
A new reallyrobinstamps acronym is in order today: T.O.T.T. = Totally Over The Top.
I just invented the acronym so spread it around. 😂 I recently came across a new card design that left me mouth open and astonished, cheering and clapping my hands at its brilliance. This may not be the original origin of this card design but I’m giving Vy Tran – Crafting Daily Dose credit for sharing it with me. You can check out her post/tutorial here.


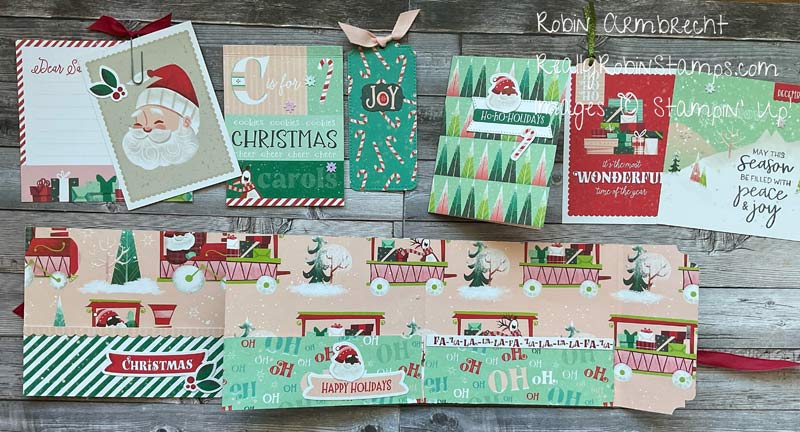
Since we have lately been diving into Easel Cards, this over the top version of an easel card is perfect for today. The Inside Out Easel Card is amazing because the inside of the card becomes the center of attention when you flip it around to display as an easel card. This card pattern can be made horizontally or vertically. For best results, watch the video tutorial and download the pdf so that you can put one of these beauties together yourself ASAP!
Basic Supplies for Horizontal Version
- 5 1/2″ x 8 1/2” card base
- 5 1/2″ x 5” card base extension
- 4” x 5 1/4” Basic White for inside back
- 4” x 5 1/4” patterned paper or cardstock fo Basic r inside front
- 3 1/4” x 5 1/4” patterned paper for outside top flap
- Punched or die cut shapes for inside stand up feature
- Punched or die cut shapes for inside front
- Punched or die cut shapes for outside sentiment
- 2 or 3 coordinating greeting sentiments


Fold on 3/4” score line in one direction and fold on the 5″ score line in both directions.
Score card base extension at 3/4”. Fold on 3/4” score line in one direction.
Attach the 4” x 5 1/4” Basic White cardstock to the inside of the card behind the stand up dies/images (this is where a personal message can be written), and attach the 4” x 5 1/4” patterned paper/cardstock to the inside of the card in front of the stand up dies/images.


Attach the 3 1/4” x 5 1/4” patterned paper on the outside/front top flap. Punch or die cut a shaped sentiment and attach with dimensionals to raise it up. This sentiment shape should be attached 1”-2” above the edge of the flap, and it will hold the inside card front in place while standing. When the card turns inside out the outside top flap will become the base of the easel card.


Basic Supplies for Vertical Version
- 4 1/4” x 11” – card base
- 4 1/4” x 6 1/4” – cardstock for card base extension
- 4” x 5 1/4” Basic White for inside back
- 4” x 5 1/4” patterned paper or cardstock for inside front
- 4” x 4 1/2” patterned paper for outside top flap
- Same punched/die cut shapes/images and greeting sentiments as horizontal version
Directions: Follows a similar assembly as the Horizontal Version except score card base along long edge at 3/4”” and 6 1/4”. Score the card base extension at 3/4”.


I had an absolute blast making this new-to-me pattern for some over-the-top cards!!! Here are some more vertical versions.


So what do you think about these fun cards? Please leave me a comment with your thoughts! Don’t forget you have until Sept. 8th to order and earn my free card class incentive. Dive in and try this pattern to send to someone who deserve a bit extra and over the top! Happy Stamping – Robin.
Product List

|
")
|
||

|

|
||
")
|
|||

|
")
 Designer Series Paper")
")
 Specialty Designer Series Paper")
 Specialty Designer Series Paper")


 Designer Series Paper")
 Designer Series Paper")
 Designer Series Paper")
 Designer Series Paper")
 Specialty Designer Series Paper")
")
")
")


Today’s cards are just totally amazing! Need to get in my craft room to play! Thanks, Robin!
Thank you, Judy!