
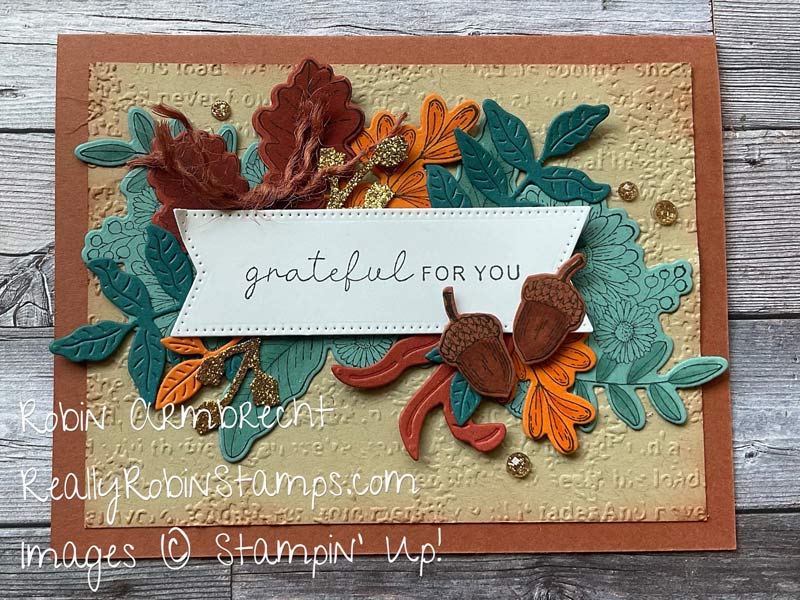
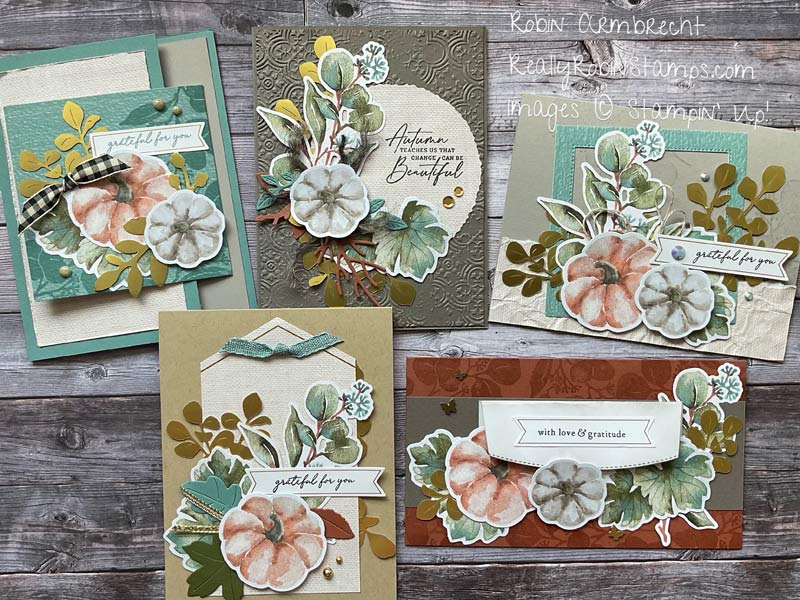
I have been anxiously awaiting the fall season to spend some time creating focal point clusters specific to fall cards. The colors, textures, and images of fall are full of so many creative possibilities for layering into clusters. As always, I spent some time doing my homework to prepare for making focal point clusters with fall elements. The first thing I ddi was put together some fall color combinations with the cardstock colors I have in my stash. Next, I found all the dies that could possibly make fall elements and cut them out in all the fall cardstock colors. Then I began layering the elements into clusters. Fun!

If you are new to the concept of Focal Point Clusters and want to start at the beginning of this discussion follow this link to Focal Point Clusters Part 1. There is important information to download and digest first! Definitely download the pdf so you can soak it all in. Then when you are ready there is more for you to discover:
Once you know that basics of putting together Focal Point Clusters you can adjust the elements to reflect whatever season your are creating for. Are you ready for some Fall themed Focal Point Clusters?
Watch the video recording and see these cards come together step by step! Download the Fall Color Combination Swatches pdf to help inspire your fall crafting projects!
Fall Focal Point Clusters – Things to Keep in Mind
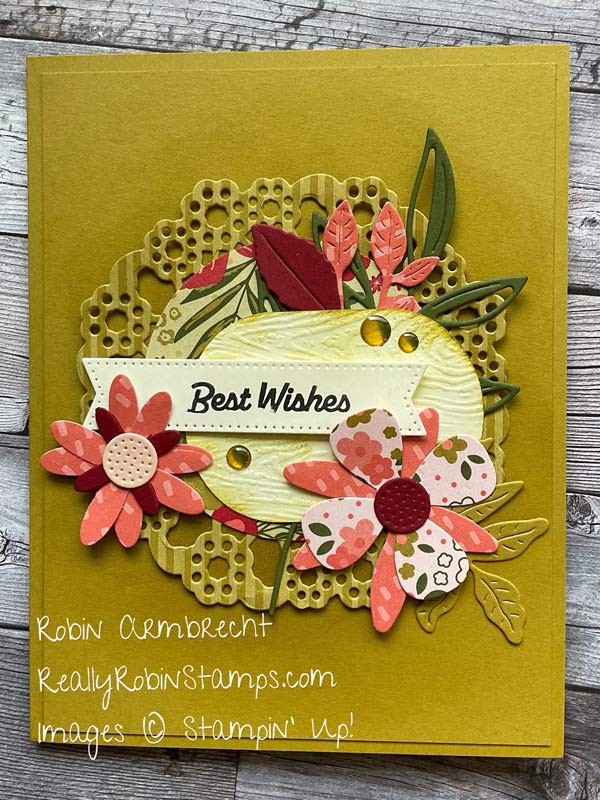
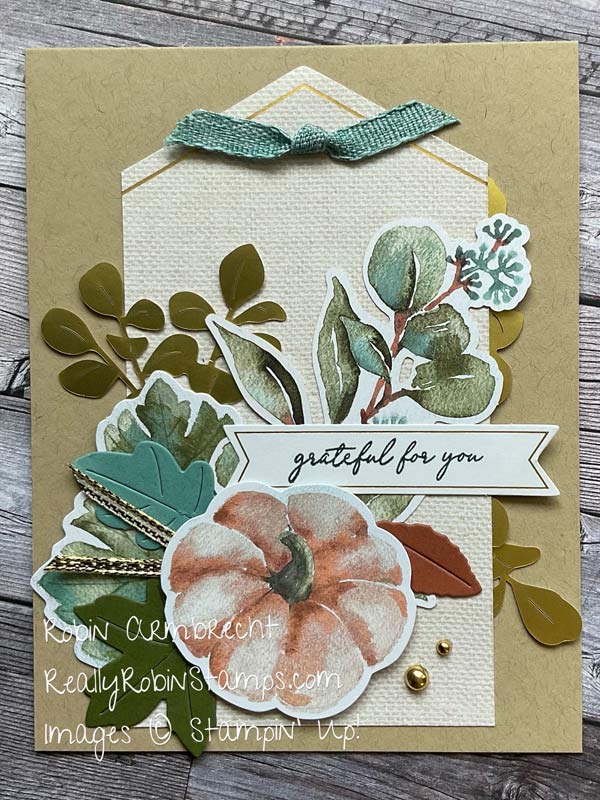
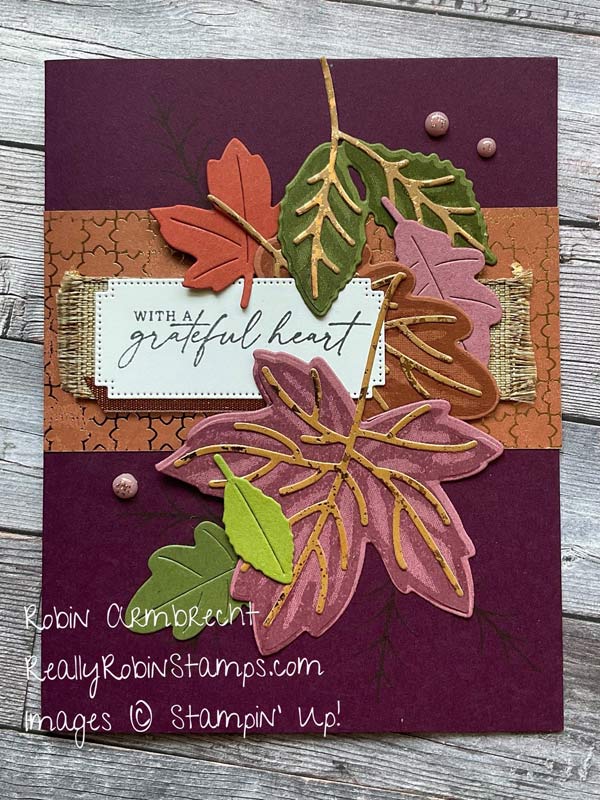
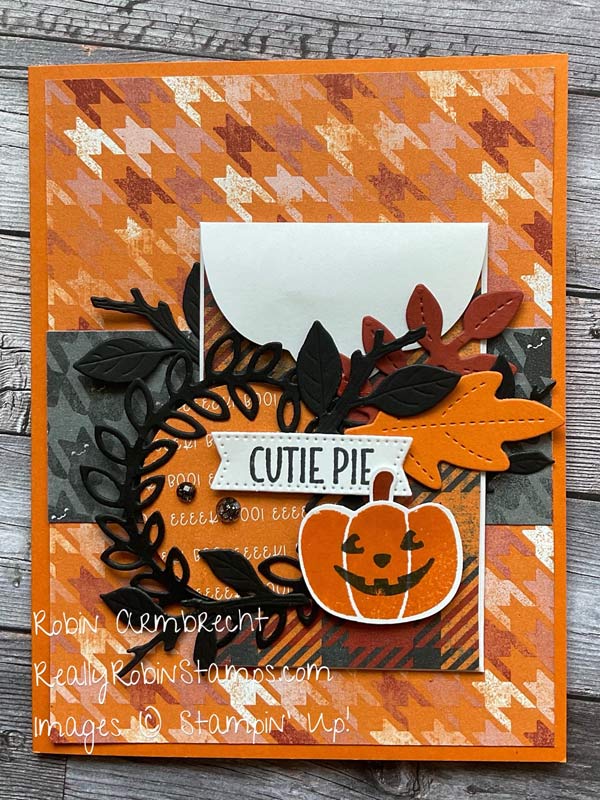
So how do we make our focal point clusters scream FALL? We simply adjust the five cluster elements to reflect fall images, colors and textures. As with all card fronts, the things that make them interesting are a nice combination of mixed shapes, odd numbers of elements, different heights on the layers, and using multiple kinds of textures. Here is how to adjust the 5 elements for fall:
- BASE – supports the cluster (need 1)
- a punched/die cut shape (square, circle, rectangle), a tag, a banner, a doily, some distressed paper or vellum, or a large detailed die cut like a leaf, flower, branch or decorative design.
- Make them fall by changing the colors, and textures.
- SECONDARY SHAPE – for the greeting or focal image (need 1)
- a smaller punched/die cut shape than the BASE, a smaller tag, banner or die cut words
- GREENERY PIECES – to layer in an around (need 2 or 3)
- Use lots of leaves in fall colors. Be sure to use leaf dies/punches that are made for your flowers too – just change the colors!
- ACCENTS – to add layered interest and to the theme of the cluster (need an odd number)
- Apples, birds, pumpkins, branches, squirrels, bark, wood, sunflowers, mugs, etc.
- Torn strip of paper, piece of ribbon layered under the SECONDARY SHAPE as a strip or in a nest, or knot/bow, pieces of foiled/glimmer paper.
- Punched/die cut detailed edge strips of coordinating cardstock (scalloped, laced, stitched)
- EMBELLISHMENTS (Use 3 of 1 type)
- Rhinestones or pearls, sequins, or enamel dots
- Change the color by coloring with Stampin’ Blends
- Think copper, bronze, and gold to accent all the fall colors
- Hues of yellow, orange, brown, & red
- Rhinestones or pearls, sequins, or enamel dots
Review – 5 Different Types of Focal Point Clusters
- Basic Shape
- Tag
- Flower Grouping
- Open Frame
Ok, my friends! I pass the baton to you and desire for you to make some FPCs and show me your creations! Come join the fun in my Facebook Group: Robin’s Really Super Stampers! Have so much fun!

Product List
")
|
")
|
")
|
|

|

|

|
")
 Designer Series Paper")
 Specialty Designer Series Paper")
 Designer Series Paper")
 Adhesive Backed Glimmer Paper")


Hi plz confirm you sent a private message to me requesting my home address. Thanx