
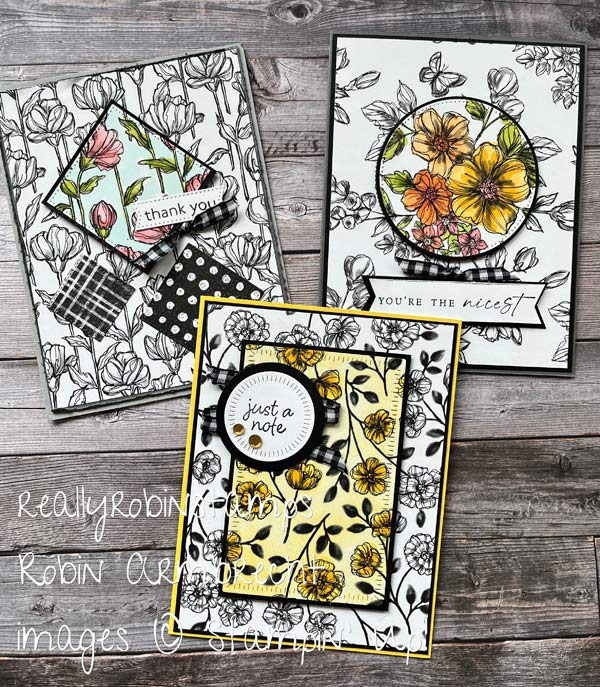
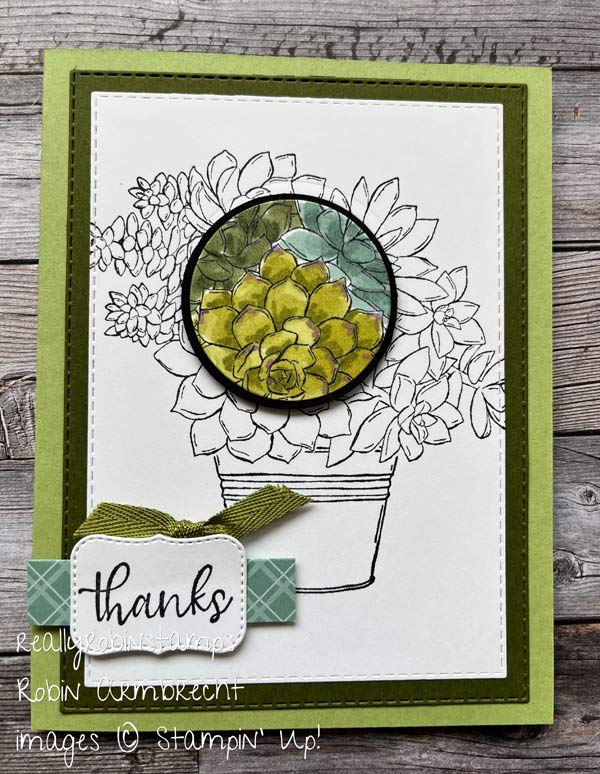
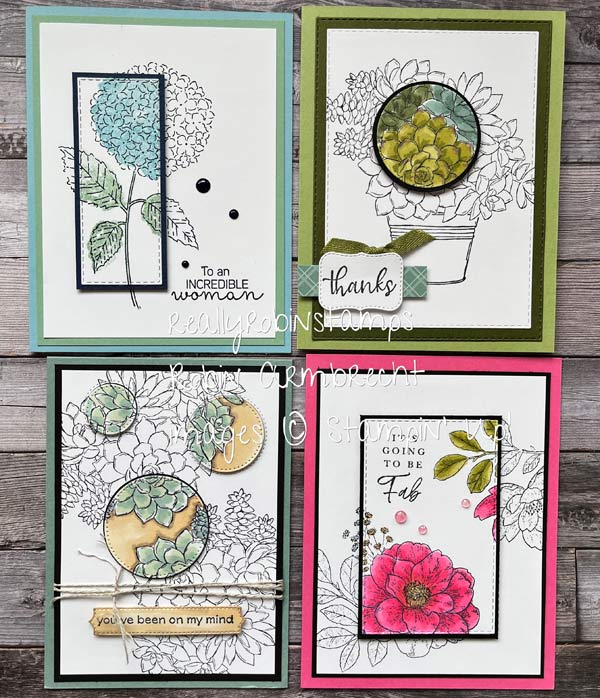
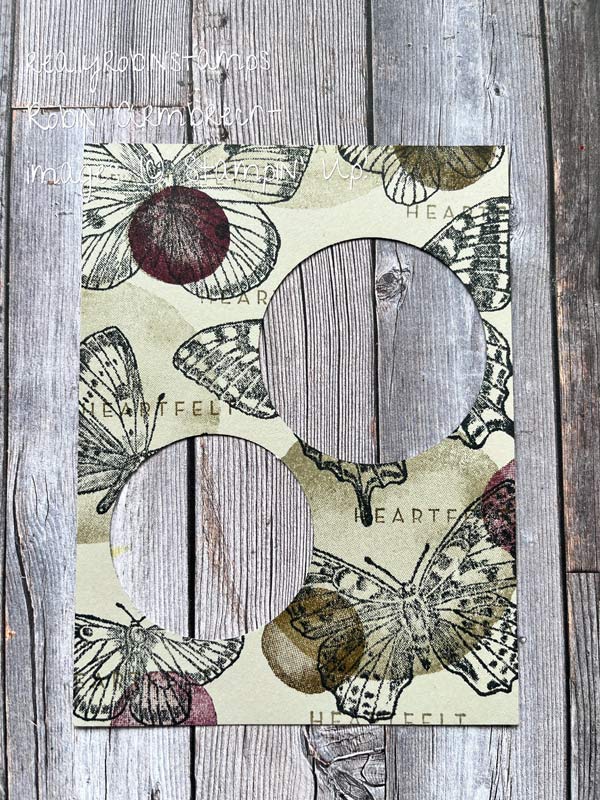
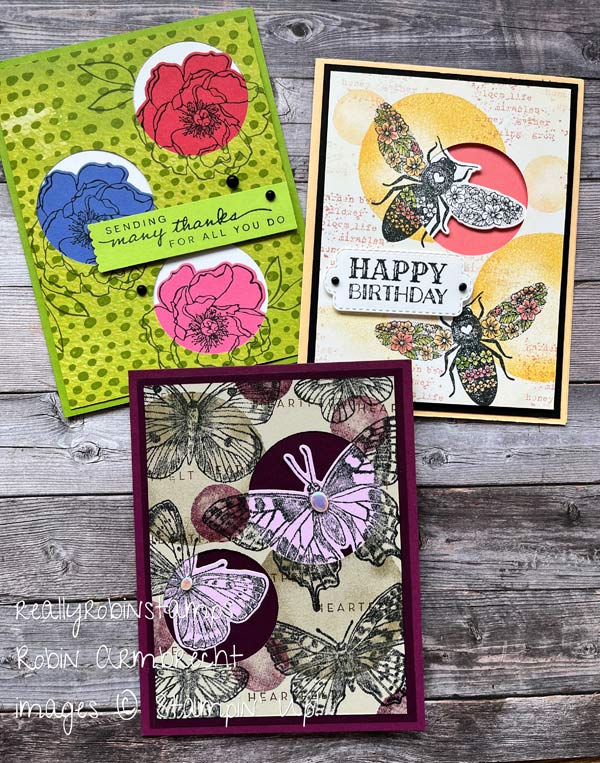
Let’s shine the light on the tried and true stamping technique called Spotlighting. This easy technique creates a stunning focal point with just a die/punch and some coloring. I’m going to show you three ways to incorporate this stamping technique into your cardmaking. Are you ready?

Watch the video tutorial, Papercrafting Playdate 87, and stamp along with me as you try the Spotlight Technique. Then, download the pdf for your files and future cardmaking sessions!

3 Ways to Use the Spotlight Technique
- Basic Spotlighting with Designer Series Paper
- Basic Spotlighting with stamped images
- Reverse Spotlighting
Basic Spotlighting with DSP
- Choose a 3-3/4″ x 5″ piece of Designer Series Paper with a black and white design that can be colored.
- Punch or die cut a shape out of the DSP.
- Color in the punched/die cut shape with Stampin’ Blends, markers, or watercolor pencils
- Layer the punched/die cut shape with Basic Black cardstock to make a skinny matte layer.
- Pop up punched/die cut shape with Stampin’ Dimensionals and insert back into the space where it was punched/cut out being careful to line up the images.

Basic Spotlighting with Stamped Images
- Choose a 3-3/4″ x 5″ piece of Basic White cardstock.
- Stamp a larger floral or scenery image in black ink.
- Punch or die cut a shape over the stamped image, creating the “spotlight” location.
- Color in the punched/die cut shape with Stampin’ Blends, markers, or watercolor pencils
- Layer the punched/die cut shape with Basic Black (or dark) cardstock to make a skinny matte layer.
- Pop up punched/die cut shape with Stampin’ Dimensionals and insert back into the space where it was punched/cut out being careful to line up the images.

Reverse Spotlighting with Stamped Images
- Choose a 3-3/4″ x 5″ piece of cardstock.
- Stamp an image (or images) in black ink. Optional – stamp other colors and images as a collage background. Choose images that can be punched or die cut with a coordinating punch or die.
- Punch or die cut a shape over the stamped image, creating the strategic “spotlight” location.
- Stamp the images again (the same image(s) that are inside the spotlight location) in black ink on a different color cardstock, then punch or die cut.
- Layer the punched/die cut images behind the spotlight locations, lining up the images.
- Layer the 3-3/4″ x 5″ spotlight piece onto another different color of cardstock and mount onto card base.


This easy stamping technique can be adapted to any stamp set or style of stamping. Go take a look at your stamps and dies and try to see them with fresh eyes. I hope you try the Spotlight Technique and then come share your cards in my Robin’s Really Super Stampers Facebook Group!

Product List
 Circle Punch")
 Circle Punch")


")
")


Wonderful ideas. Thank you for directions how-to’s and video well explained easy r
To follow
Hi Johanna! I’m thrilled you are enjoying the projects. Happy creating!
just love your work, I’ve give u watching normal shows on TV I just tune in to YouTube & look for your presentations. thanks so much for all the inspiration & enjoyment you give to so many
Aw, thank you, Judy! You are very kind. I’m glad you enjoy my content!
Where can I find the shimmer that you put on some of the flowers?
Hi Anita! It is called Wink of Stella Clear Glitter Brush. Search for it in my online store. $8