
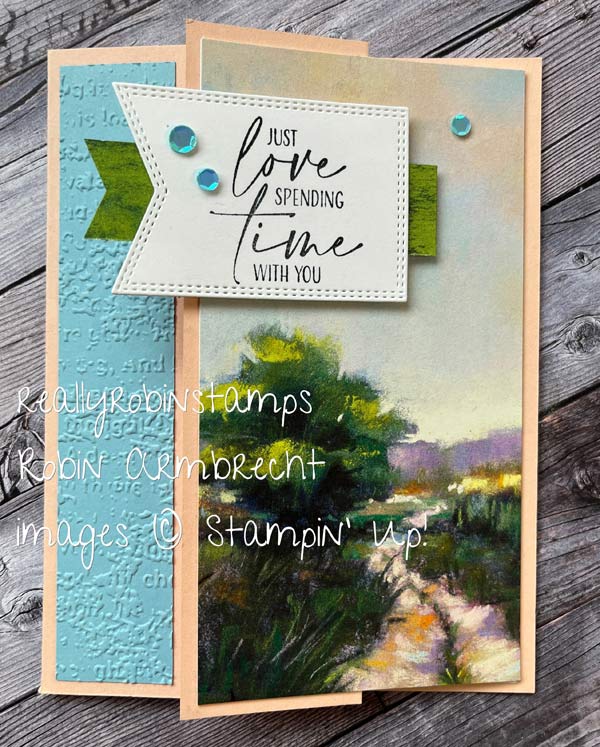
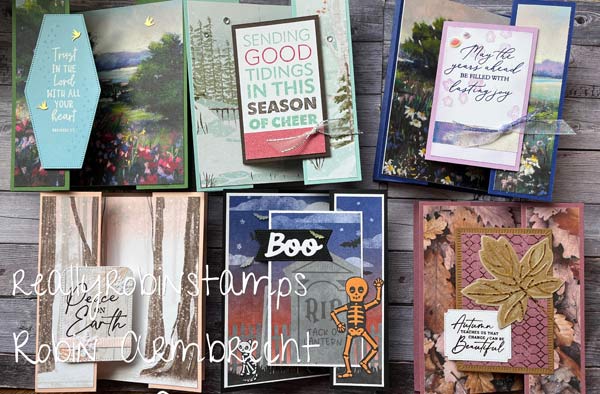
What happens when a fun fold idea pairs with some gorgeous scenic patterned paper? Pure delightfulness!! This week’s tutorial focuses on using 6×6 Designer Series Papers featuring scenes to create fun folds that showcase the scenes. The panoramic fun folds display the scenic paper to create a real wow card. You are going to love these fun folds!

Watch the video tutorial for to learn how to put together the two Panoramic Fun Folds and download the pdf to read the written directions.
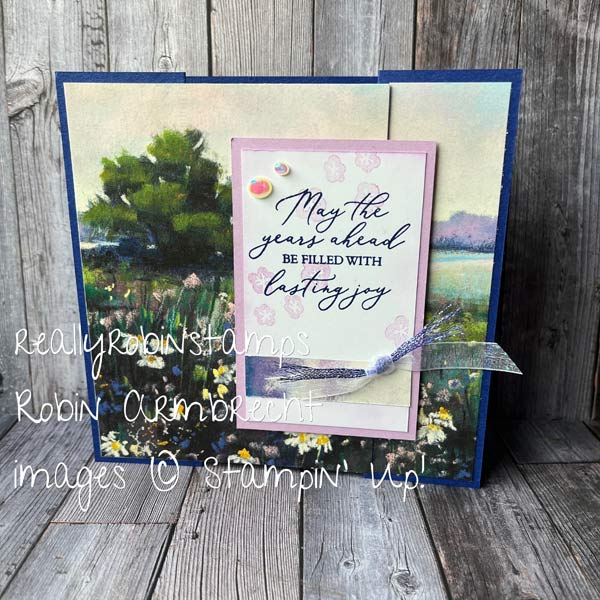
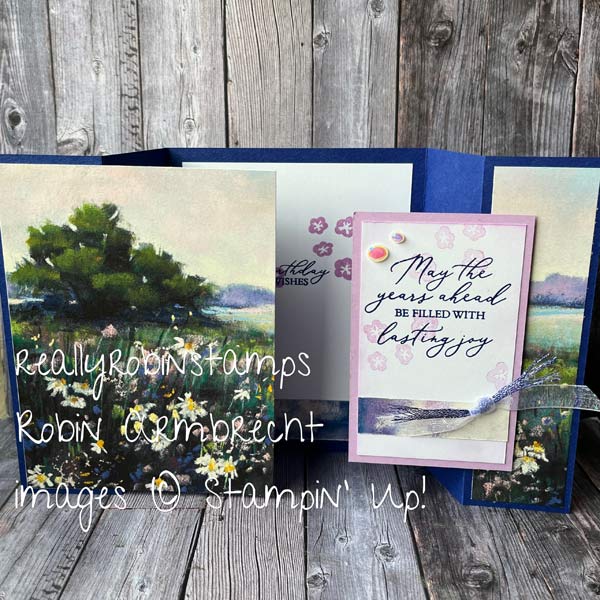
Panoramic Z Fold
Supplies
- 5-1/2” x 8-1/2” cardstock for card base
- 6 x 6 piece of Designer Series Paper with a scene
- 2” x 5-1/4” Basic White cardstock for the inside
- Optional Layers
- 2-3/4” x 5-1/4” cardstock to support the front panel
- 1” x 5-1/4” coordinating cardstock for the front
Directions
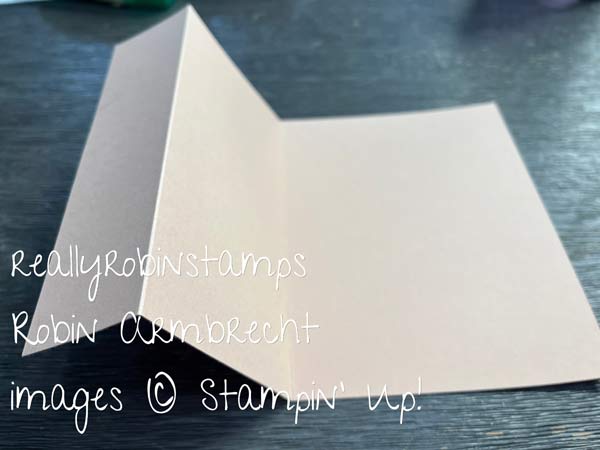
- Score along the 8-1/2” side of the 5-1/2” x 8-1/2” cardstock at 1-1/2”, and 4-1/4”from the left side. Fold in half on the 4-1/4” score line then fold back on the 1-1/2” score line to create the Z fold.
- Cut off 3/4” from either the top or bottom of the 6 x 6 DSP so that it measures 6” horizontally and 5-1/4” vertically. (You can save this piece and use it in step 9 or make it part of your focal point) Choose the top/bottom based on the scene in your DSP and what you want to show on your card.
- Measuring from left to right cut the 6” x 5-1/4” piece of DSP at 2-3/4” and 1-1/4”. The remaining piece will measure 2”. You will now have your scene cut into 3 strips: 2-3/4” x 5-1/4”, 1-1/4” x 5-1/4”, and 2” x 5-1/4”.
- Optional Step – mount the 2-3/4” x 5-3/4” piece of DSP onto cardstock to make it sturdier.
- With the card closed and the front Z-flap folded back, attach the 2-3/4” x 5-1/4” piece of DSP to the front flap leaving an 1/8” border all around the card base.
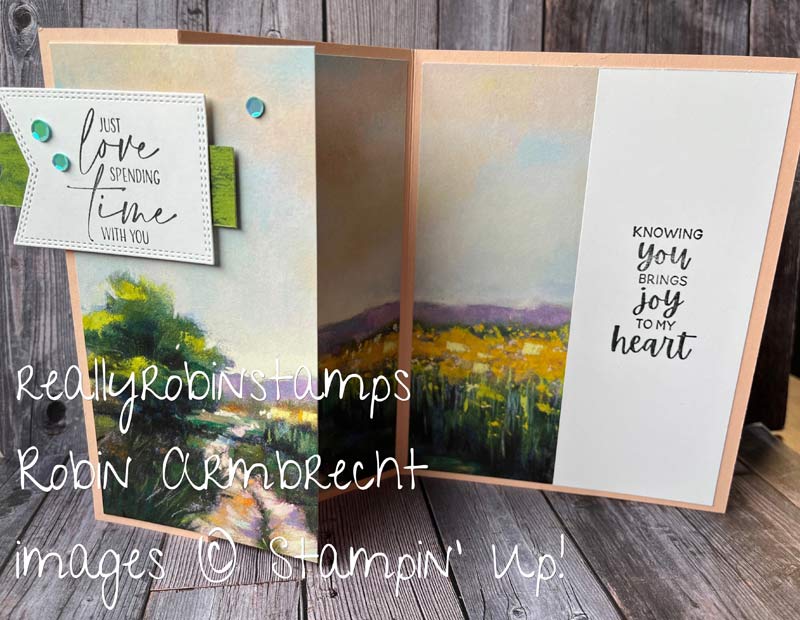
- Open the card and fold the Z flap flat. Attach the 1-1/4” x 5-1/4” piece of DSP to the inside butting it up against the first piece and leaving an 1/8” border to the card fold.
- Attach the 2” x 5-1/4” piece of DSP to the other side of the fold inside the card leaving an 1/8” border.
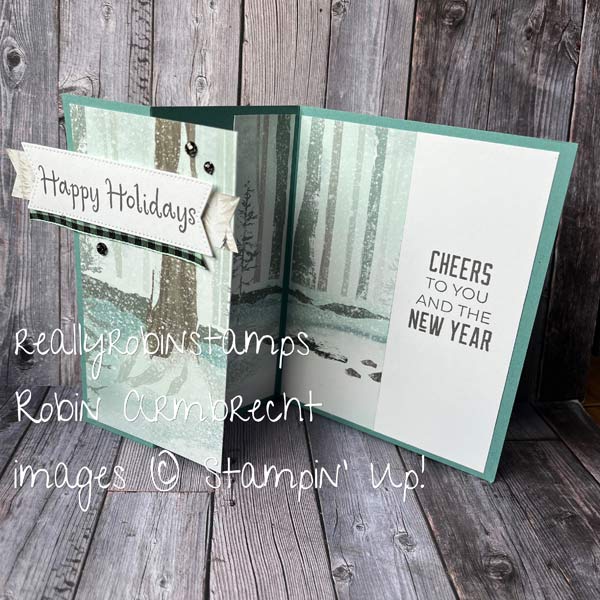
- Stamp, and/or decorate the 2” x 5-1/4” piece of Basic White and adhere to the inside of the card butting up against the DSP. Make sure this piece doesn’t show when the card is closed.
- Optional step – attach a piece of coordinating cardstock (or the 3/4” piece of DSP you cut off the 6 x 6 piece in step 2) to the card front along the fold of the card.
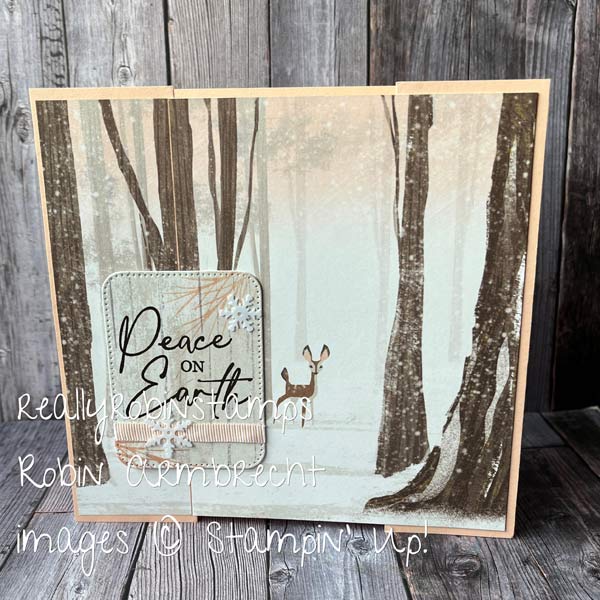
- Create a focal point greeting for the outside of the card and pop up onto the Z flap.


Panoramic Double Gate Fold
Supplies
- 5-1/2” x 10-3/4” cardstock for card base
- 6 x 6 piece of Designer Series Paper with a scene
- 4” x 5-1/4” Basic White cardstock
- 2-1/4” x 3-3/4” Basic White for focal point
- 2-1/2” x 4” cardstock matte for focal point
- 3-3/4” x 5” Basic White for inside of card
- Optional Layers – Cut your 6×6 piece to 5-1/8” instead of 5-1/4”
- 3-7/8” x 5-1/8” DSP for left panel with 4” x 5- 1/4” cardstock matte
- 1-1/4” x 5-1/8” DSP for right panel with 1-3/8 x 5-1/4” cardstock matte
Directions
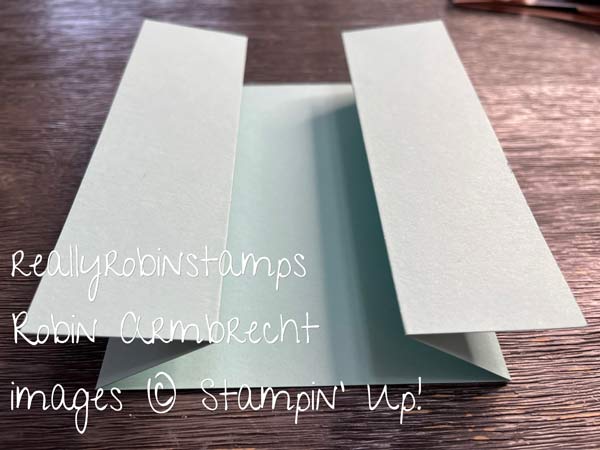
- Score along the 10-3/4” side of the 5-1/2” x 10-3/4” cardstock at 1-5/8”, 3-1/4”, 7-1/2”, and 9-1/8” from the left side. Fold on the score lines to create the double gate fold. (see Picture A)
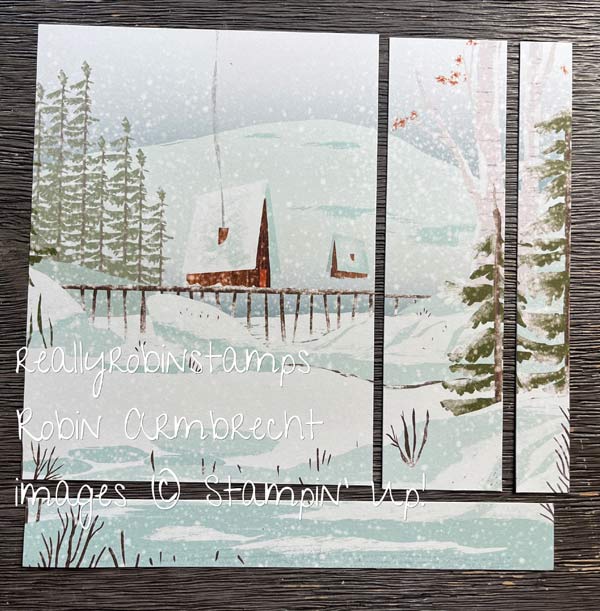
- Cut off 3/4” from either the top or bottom of the 6 x 6 DSP so that it measures 6” horizontally and 5-1/4” vertically. Choose the top/bottom based on the scene in your DSP and what you want to show on your card. (See Picture B)
- Measuring from left to right cut the 6” x 5-1/4” piece of DSP at 4” and 1-3/8”. The remaining piece will measure 5/8” and is extra. You will now have your scene cut into 2 strips: 4” x 5-1/4”, 1-3/8” x 5-1/4”.
- Adhere the 4” x 5-1/4” piece of DSP to the Basic White cardstock of the same size. Attach this to the left gate fold leaving an 1/8” of the card base showing about the left edge. (Picture C)
- Adhere the 1-3/8 x 5-1/4” piece of DSP to the right gate fold leaving 1/8” around the edge of the card base. (Picture D)
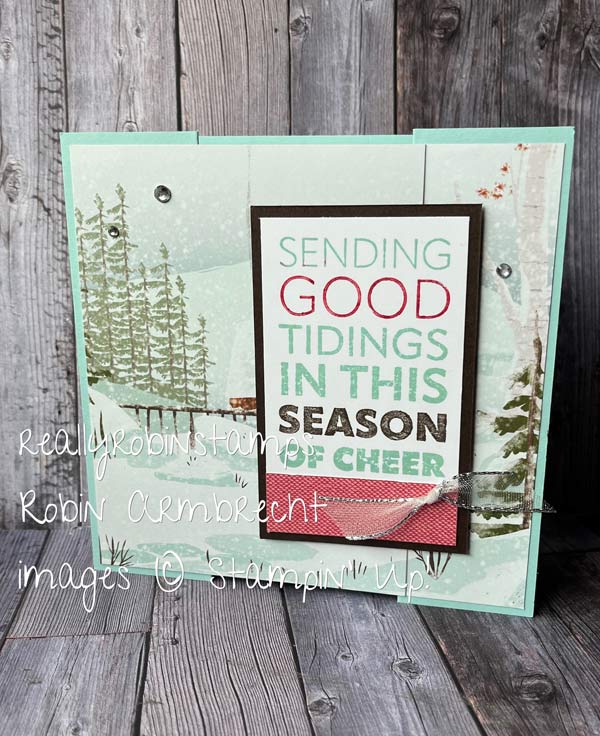
- Stamp, and/or decorate the 2-1/4” x 3-3/4” piece of Basic White focal point and layer onto the cardstock matte. Pop up and attach this focal point to the right gate fold using dimensionals along the edge of the DSP. When the two gate folds are closed on the card the layered focal point piece is right in the middle of the card front. (Picture E)
- Stamp, and/or decorate the 3-3/4” x 5” piece of Basic White and adhere to the inside of the card. Use some of the leftover strips to decorate one of the edges.


Are you ready to try these amazing panoramic fun folds? I hope you get out your cardstock and DSP to start creating! Please come join us on my Facebook Group, Robin’s Really Super Stampers, to show your Panoramic Fun Folds!

Product List

$5.50
|

$26.00
|
||

$30.00
|

$27.00
|
||
 Specialty Designer Series Paper")
 Designer Series Paper")
")
")
 Large Check Ribbon")


Thank you Robin. I sometimes hesitate to use my scenic papers because I don’t want to lose any of the scenes.
I understand this dilemma and hope you chop away with abandon now that you can use the entire scene!
Robin, I just want to say thanks for your video and fantastic ideas. I have both packs of paper, used the most ‘favorite’ of all, but was struggling with some of the sheets. You solved my problem. I can’t wait to get up in my little ‘therapy craft room’ and play. Thanks again for sharing and great videos with all the measurements.
Yay, Barb! I love to be a problem solver!
I am going to make up a sample of the first card so I have it as an idea for 2024 Christmas cards. I really liked all of your samples!
Great idea! Working ahead for next Christmas is such a good idea!