
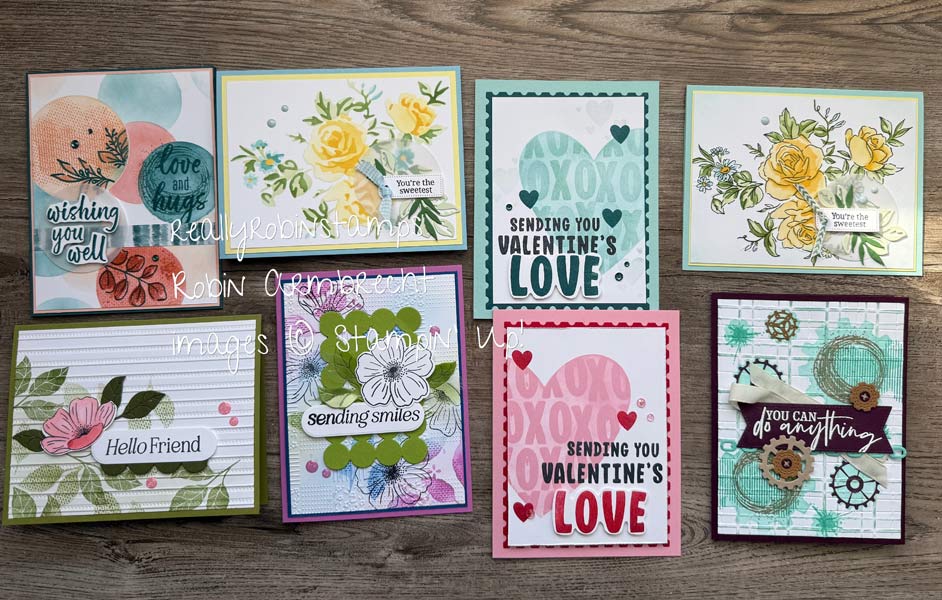
The thing about card making that is never boring is all the different techniques, fun folds, and layouts to try. Cycling through these techniques, folds, and layouts over and over again using fresh pattern papers and stamp images means endless enjoyment. It’s been an entire year (already) since I have focused on creating Focal Point Clusters (FPCs) so that is what’s on the menu for this week’s tutorial.

If you have never heard of focal point clusters before or want to start at the beginning with this concept I have five previous video tutorials & posts on this topic. There is one PDF to download and use for focal point clusters which you can find here: Focal Point Clusters PDF. Scroll all the way down to see the list of products used for these projects.
Here’s Your Homework 😉
- Watch the video tutorial on creating Focal Point Clusters Part 6.
- Make sure you have the Focal Point Clusters PDF in your files.
- Find some ephemera packs, or create your own cluster elements and start glueing them together!
Previous Focal Point Clusters Video Tutorials
Use the links below to take you to all the previous video tutorials on YouTube. To find the website posts for each one, use the search bar on the right or find the link back to the post in each video’s description (click on “more”).
- Focal Point Clusters Part 1 (Papercrafting Playdate 92)
- More Focal Point Clusters Part 2 (Papercrafting Playdate 93)
- Even More Focal Point Clusters Part 3 (Papercrafting Playdate 94)
- Fall Focal Point Clusters Part 4 (Papercrafting Playdate 101)
- Focal Point Clusters Part 5 (Papercrafting Playdate 126)
Focal Point Clusters (a review of information)
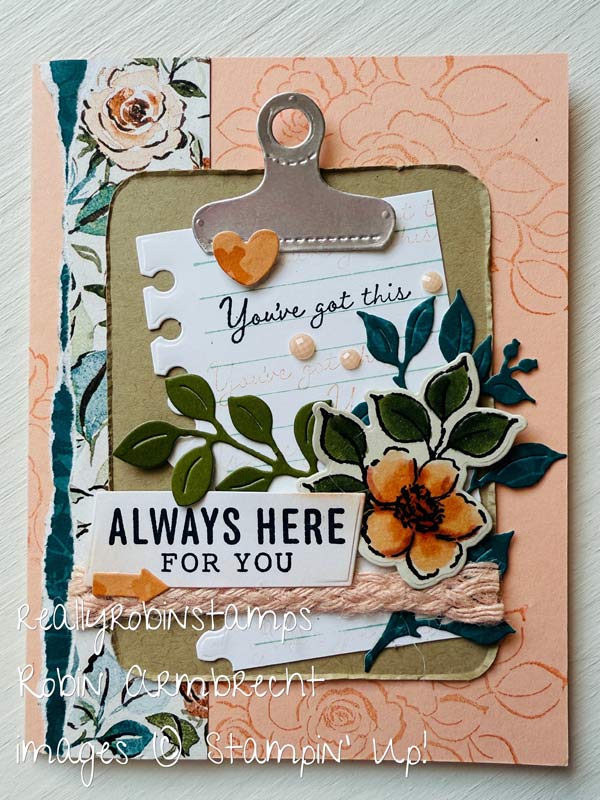
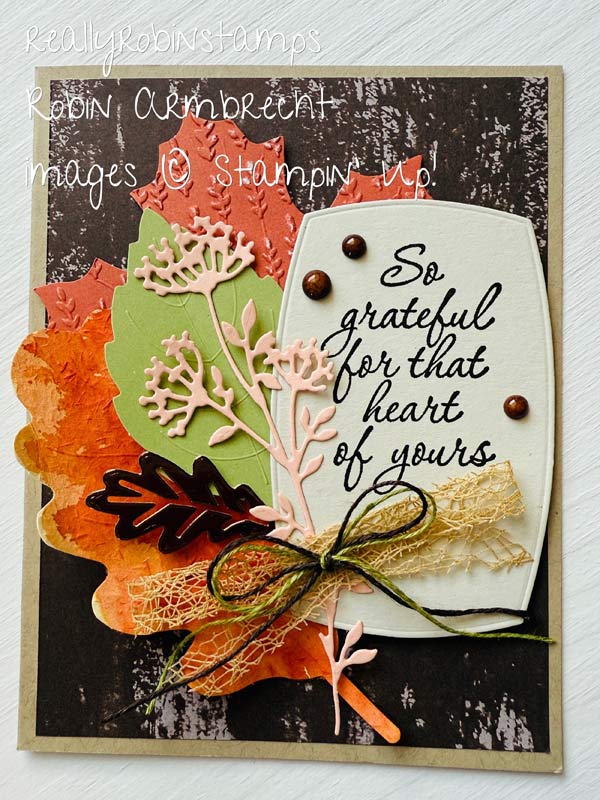
Elements that Create Clusters and How to Choose Them
- Choose a BASE to support the cluster. (Pick 1)
- Choose a SECONDARY SHAPE for the greeting image for the card. (Pick 1)
- Smaller punched/die cut shape than the BASE.
- Smaller tag or banner
- Die cut words
- Choose punched/die cut GREENERY PIECES to layer in an around. (Pick 2)
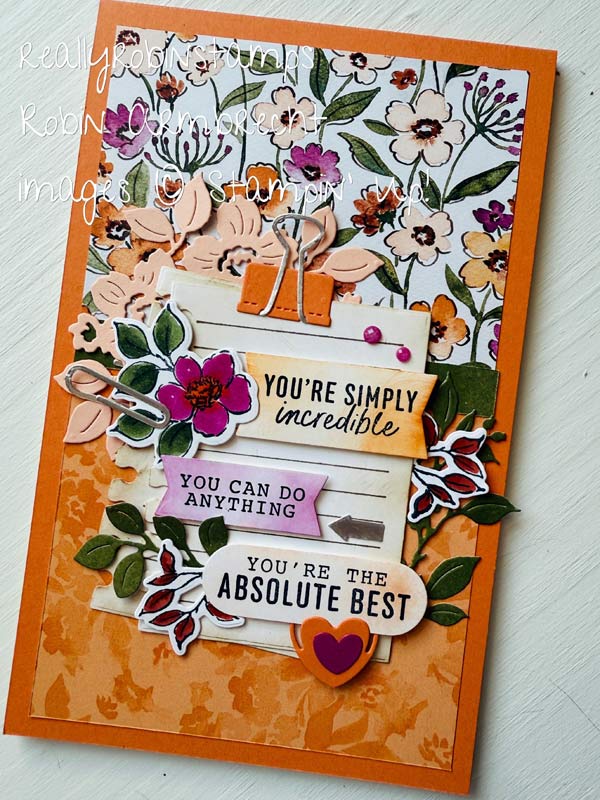
- Choose coordinating ACCENTS to add interest. (Pick an odd number)
- Torn strip of cardstock or Designer Series Paper
- Ribbon layered under the SECONDARY SHAPE as a strip or in a nest, or tied in knot/bow
- Smallest punched/die cut shapes like flowers, hearts, arrows, stars, leaves
- Foil or Glimmer paper strips
- Punched/die cut detailed edge strips of coordinating cardstock (scalloped, laced, stitched)
- Choose coordinating EMBELLISHMENTS. (Use 3 of 1 type)
- Rhinestones or pearls
- Sequins
- Enamel Dots
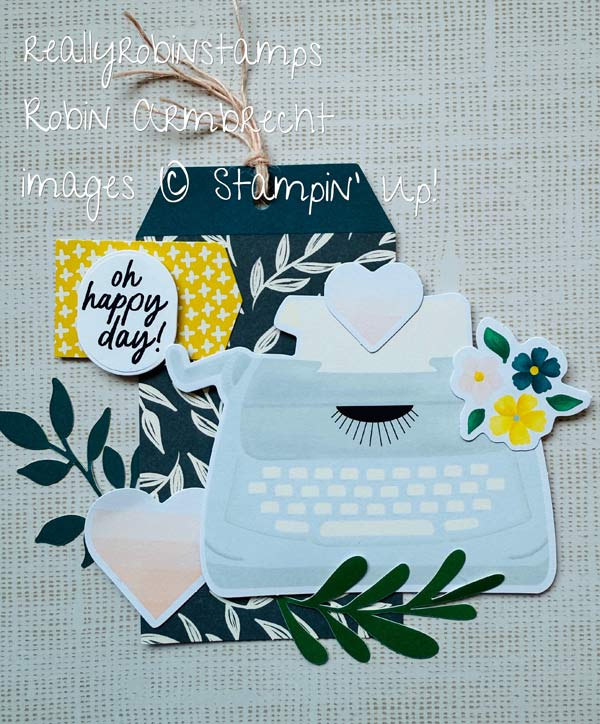
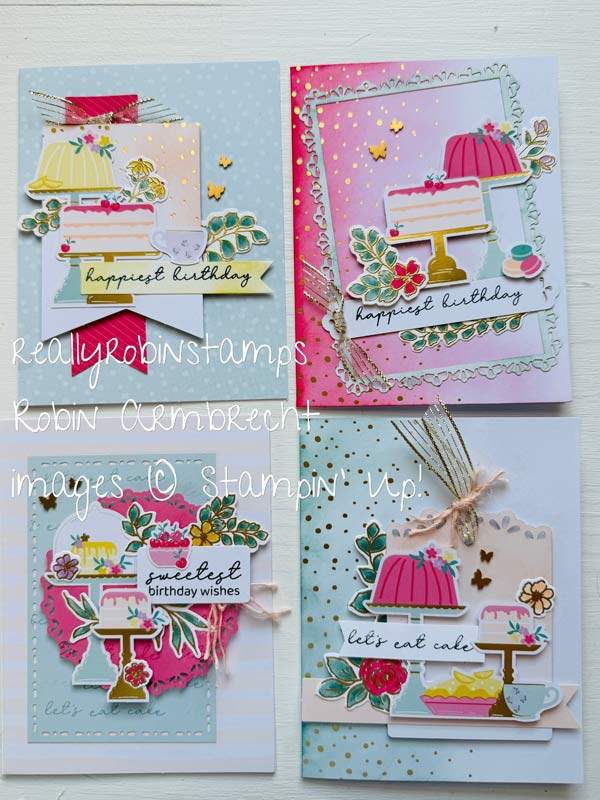
Types of Focal Point Clusters
- Basic Shape
- Tag
- Flower
- Open Frame
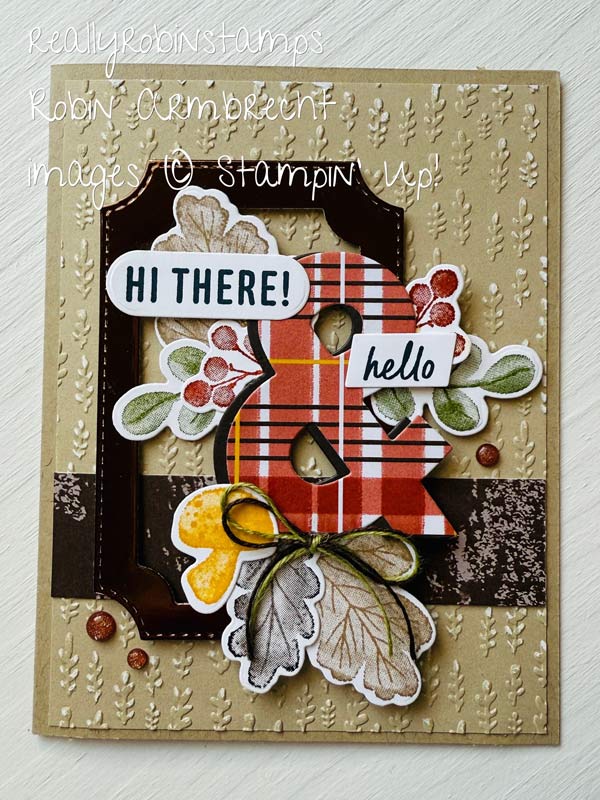
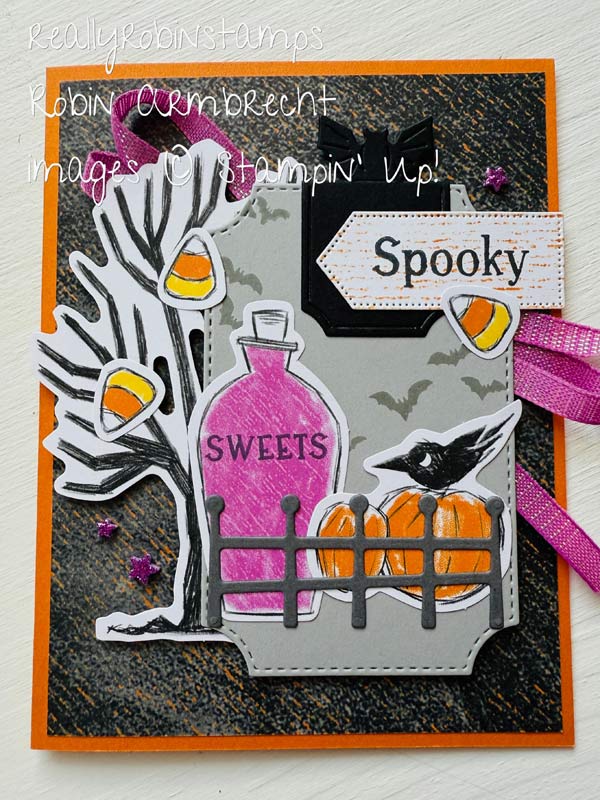
Armed with this handy information about Focal Point Clusters, I hope you dive into creating some extra special layered pieces for the people you care about! Enjoy! -Robin

![Birthday Fancy Kit (English) [ 166211 ]](https://assets1.tamsnetwork.com/images/EC042017NF/166211s.jpg "Birthday Fancy Kit (English) [ 166211 ]") | ![Make A Memory Scrapbooking Kit [ 165638 ]](https://assets1.tamsnetwork.com/images/EC042017NF/165638s.jpg "Make A Memory Scrapbooking Kit [ 165638 ]") | ![Spooky Halloween Bundle (English) [ 166199 ]](https://assets1.tamsnetwork.com/images/EC042017NF/166199s.jpg "Spooky Halloween Bundle (English) [ 166199 ]") | |
![Just A Note Bundle (English) [ 166102 ]](https://assets1.tamsnetwork.com/images/EC042017NF/166102s.jpg "Just A Note Bundle (English) [ 166102 ]") | |||
![Charming Day Bundle (English) [ 166136 ]](https://assets1.tamsnetwork.com/images/EC042017NF/166136s.jpg "Charming Day Bundle (English) [ 166136 ]") | ![More Messages Bundle (English) [ 165473 ]](https://assets1.tamsnetwork.com/images/EC042017NF/165473s.jpg "More Messages Bundle (English) [ 165473 ]") |
![Heirloom Arrangements Kit (English) [ 165007 ]](https://assets1.tamsnetwork.com/images/EC042017NF/165007s.jpg "Heirloom Arrangements Kit (English) [ 165007 ]")
![Spooky Sweet 12" X 12" (30.5 X 30.5 Cm) Specialty Designer Series Paper [ 166191 ]](https://assets1.tamsnetwork.com/images/EC042017NF/166191s.jpg "Spooky Sweet 12\" X 12\" (30.5 X 30.5 Cm) Specialty Designer Series Paper [ 166191 ]")
![Floral Charm Suite Collection (English) [ 166141 ]](https://assets1.tamsnetwork.com/images/EC042017NF/166141s.jpg "Floral Charm Suite Collection (English) [ 166141 ]")
![Floral Charm 12" X 12" (30.5 X 30.5 Cm) Designer Series Paper [ 166125 ]](https://assets1.tamsnetwork.com/images/EC042017NF/166125s.jpg "Floral Charm 12\" X 12\" (30.5 X 30.5 Cm) Designer Series Paper [ 166125 ]")
![Extraordinary Flora Bundle (English) [ 165245 ]](https://assets1.tamsnetwork.com/images/EC042017NF/165245s.jpg "Extraordinary Flora Bundle (English) [ 165245 ]")

Is there a way to look up your playdates in order?
Also, could you PLEASE do part of a video in
S L O W M O T I O N on how you tie your little ribbon bows? You make it look so easy, but it’s too fast for me to figure out how you are doing it
I have a document in the works that will have all the playdates in order. The easiest way right now is to view them on YouTube in the playlist labeled Papercrafting Playdates. I will work on the bow thing! 🤣🤣🤣🤣 You know how when you slow down something you do from muscle memory you can’t do it right…?