
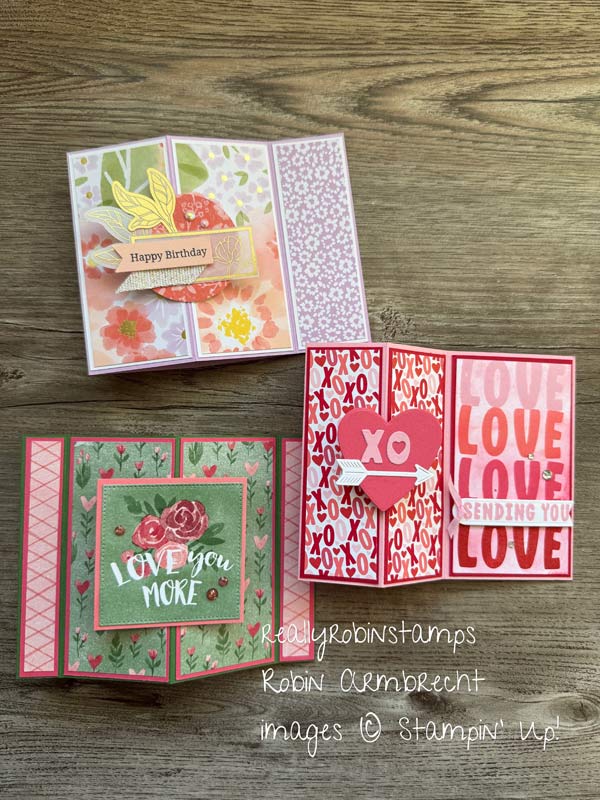
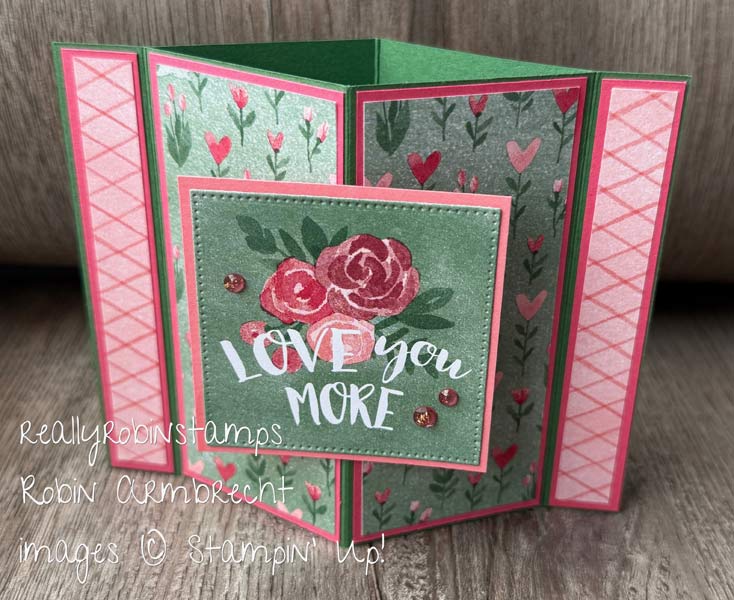
Easy fun folds are the best, would you agree? When I find a new fun fold like the Diamond Pillar Fun Fold I am so excited! Even better than finding one new fun fold is finding three ways to make different variations of it. Let’s explore three ways to make the Diamond Pillar Fun Fold!
Here’s Your Homework 😉
- Watch the video tutorial for 3 Ways to Make Diamond Pillar cards – Papercrafting Playdate 167.
- Download the pdf to use as a reference while creating.
- Grab some paper supplies and start creating some Diamond Pillar fun folds.
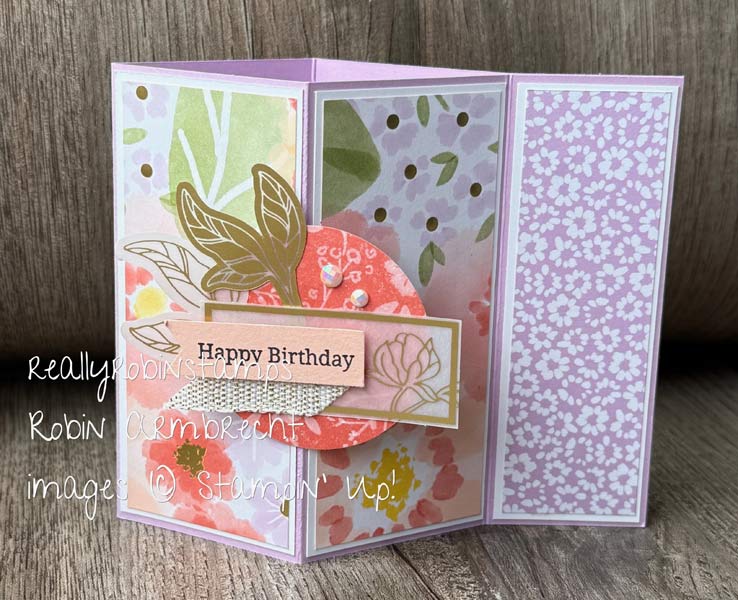
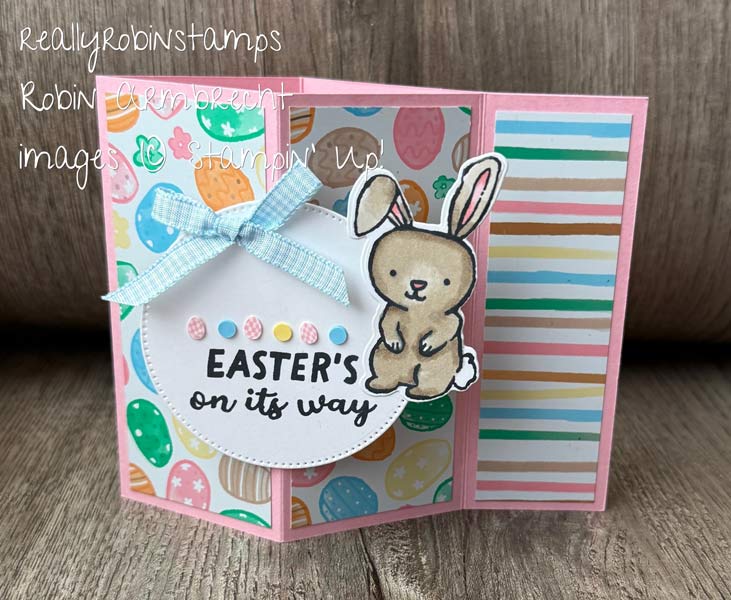
Diamond Pillar Verson 1
- 4-1/4” x 11” card base
- 1-3/4” x 4” (2) DSP #1
- 1-1/4” x 4” (1) DSP #2
- 1-3/4” x 4” Basic White (1 or 2)
- 1-7/8 x 4-1/8” (2) coordinating cardstock (optional)
- 1-3/8 x 4-1/8” (1) coordinating cardstock (optional)
- 1” x 2” Basic White (pop-out mechanism)
- Focal point shape 3-1/2” or less in diameter.
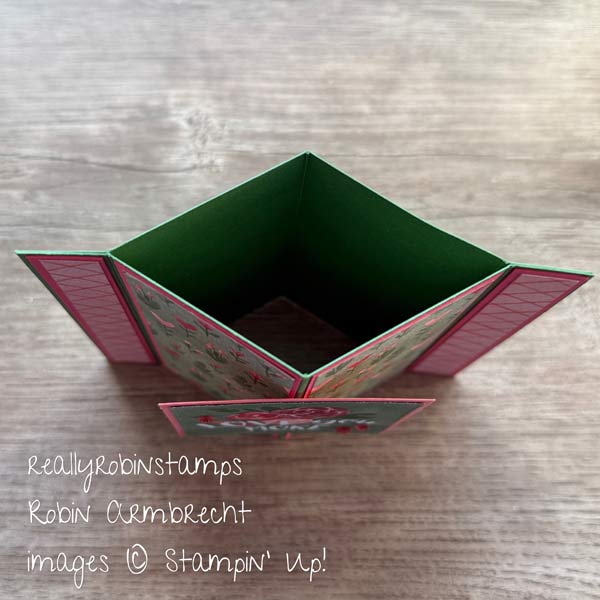
- Score the 4-1/4” x 11” piece at 1-1/2”, 3-1/2”, 5-1/2”, 7-1/2” and 9-1/2”.
- Fold in half at the 5-1/2” score line like a regular card with the opening on the right.
- Fold the 1-1/2” and 9-1/2” score lines back towards the front and back of the card base. Fold the 3-1/2” and 7-1/2” score lines towards the inside of the card base.
- Adhere the 1-1/2” sections to each other so the card no longer opens.
- Score the 1” x 2” piece of Basic White at 1/2” then cut in half so you have two 1” squares scored in half. Adhere half of the folded squares centered on either sides of the score line that separates the two 2” sections. This will be where the focal point is attached. Get as close to the score line with the fold of the squares as possible without overlapping it.
- Attach the pieces of DSP to the sections created by the score lines, having the 1-3/4” x 4” pieces overlapping the pop-out mechanism.
- Attach the 1-3/4” x 4” piece(s) of Basic White on the back of the card for personal message.
- Create a focal point of any shape not exceeding 3-1/2” in diameter and adhere to the other halves of the pop-out mechanism.

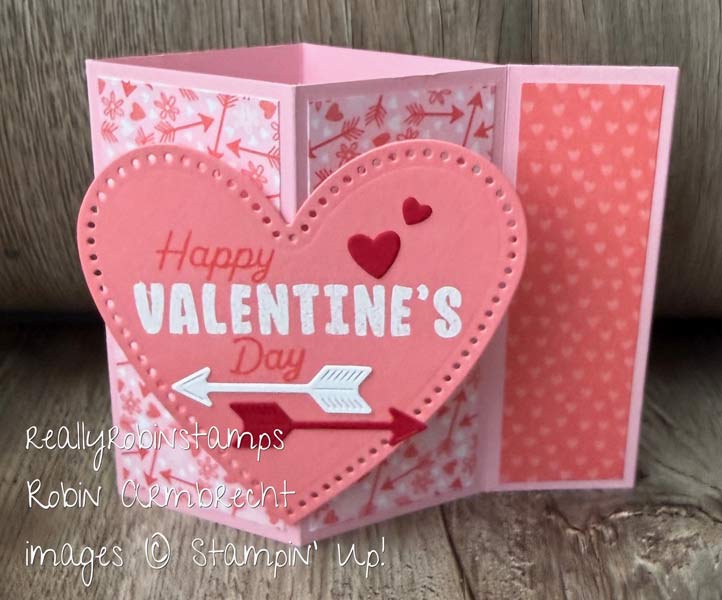

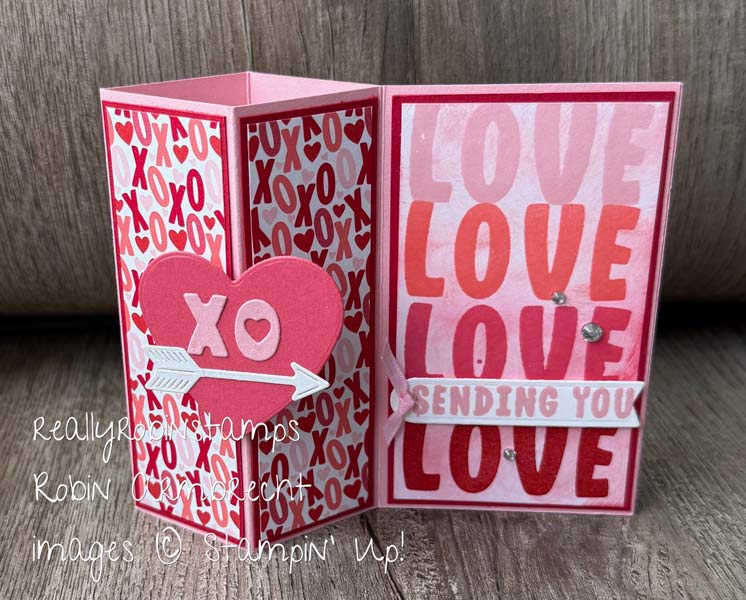
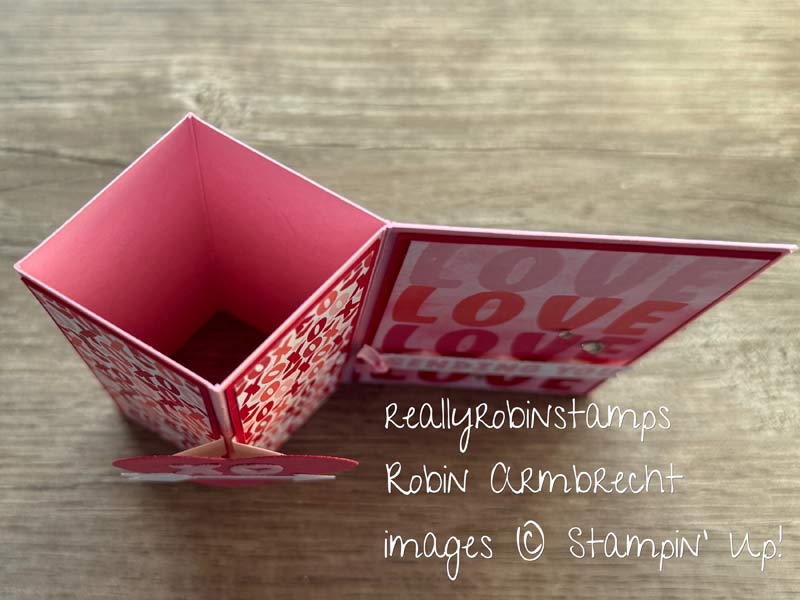
Diamond Pillar Verson 2
- 4-1/4” x 11” card base
- 1-1/4” x 4” (2) DSP #1
- 2-1/4” x 4” (2) Basic White and/or DSP #2
- 1-3/8 x 4-1/8” (2) coordinating cardstock (optional)
- 2-3/8 x 4-1/8” (1) coordinating cardstock (optional)
- 1” x 2” Basic White (pop-out mechanism)
- Focal point shape 2-1/2” x 3-1/2” or less
- Score the 4-1/4” x 11” piece at 2-1/2”, 4”, 5-1/2”, 7” and 8-1/2”.
- Fold in half at the 5-1/2” score line like a regular card with the opening on the right (or left).
- Fold on the other score lines the same way as step 3 for Version 1.
- Adhere the 2-1/2” sections to each other so the card no longer opens.
- Create the pop-out mechanism the same way as step 5 for Version 1.
- Attach the pieces of DSP to the sections created by the score lines (you may also stamp and layer a design on the larger section).
- Attach the 2-4/4” x 4” piece of Basic White on the back of the card for personal message.
- Create a focal point of any shape not exceeding 2-1/2” x 3-1/2” and adhere to the other halves of the pop-out mechanism.
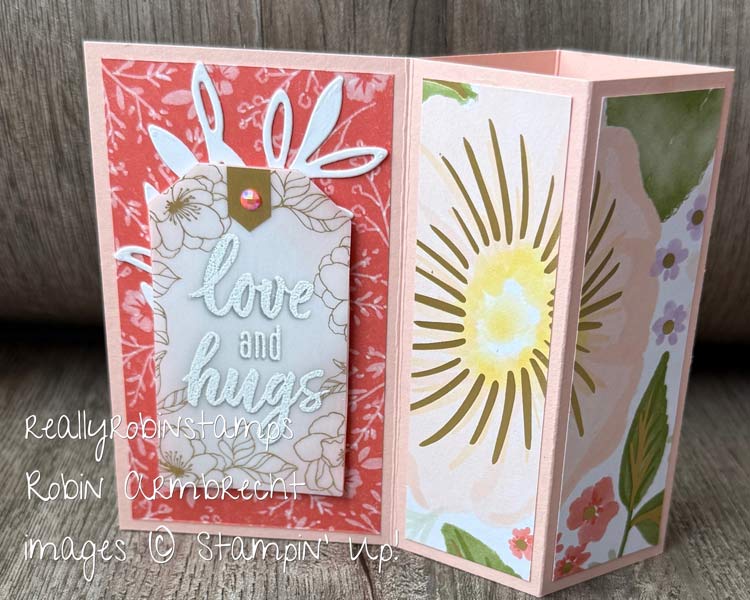
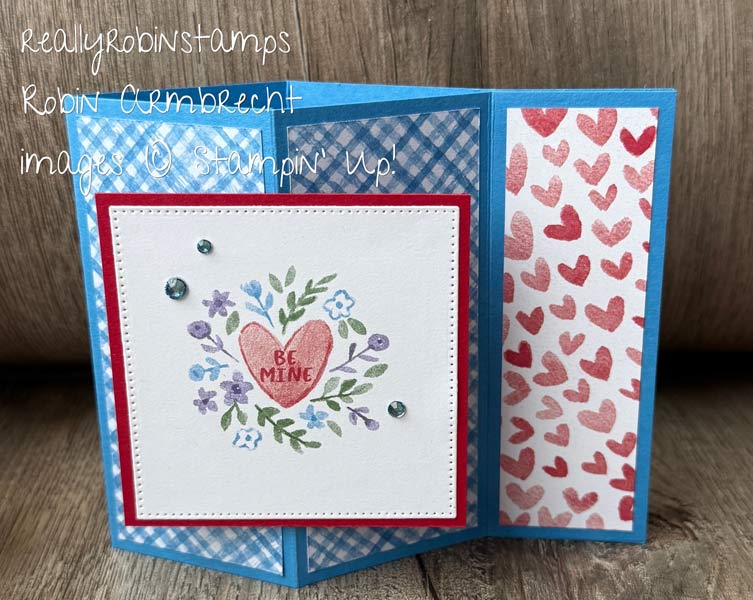
Diamond Pillar Verson 3
- 4-1/4” x 5-1/2” (2) cardbases
- 1-3/4” x 4” (2) DSP #1 and Basic White (2)
- 1/2” x 4” (2) DSP #2
- 1-7/8 x 4-1/8” (2) coordinating cardstock (optional)
- 5/8 x 4-1/8” (1) coordinating cardstock (optional)
- 1” x 2” Basic White (pop-out mechanism)
- Focal point shape 3-1/2” or less in diameter.
- Score the 4-1/4” x 5-1/2” pieces at 3/4”, 2-3/4” and 4-3/4”.
- Fold in half at the 2-3/4” score line and fold the outside score lines in the opposite direction.
- Adhere the 3/4” sections to each other.
- Create the pop-out mechanism the same way as step 5 for Version 1.
- Attach the pieces of DSP to the sections created by the score lines.
- Attach the 1-3/4” x 4” pieces of Basic White on the back of the card for personal message.
- Create a focal point of any shape not exceeding 3-1/2” in diameter and adhere to the other halves of the pop-out mechanism.
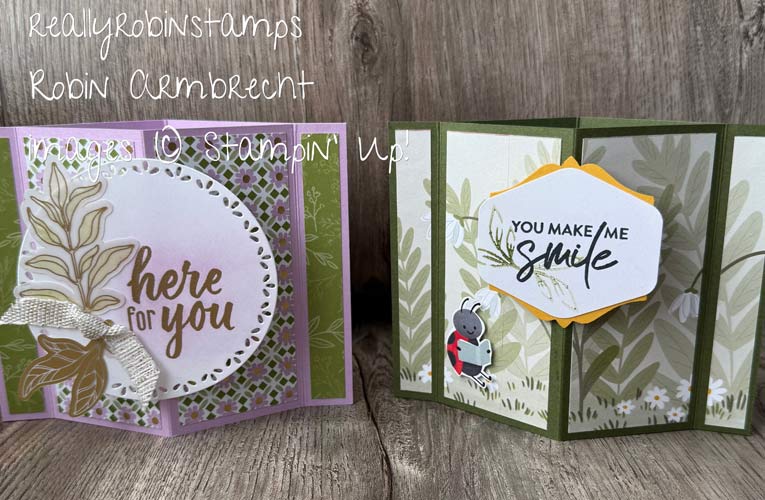
It’s your turn to take these Diamond Pillar Fun Fold versions and put them to work for you! I hope you try all three versions and figure out which one is your favorite! -Robin

Product List
![Endless Love Bundle (English) [ 167062 ]](https://assets1.tamsnetwork.com/images/EC042017NF/167062s.jpg "Endless Love Bundle (English) [ 167062 ]")
|
![Stylish Shapes Dies [ 159183 ]](https://assets1.tamsnetwork.com/images/EC042017NF/159183s.jpg "Stylish Shapes Dies [ 159183 ]")
|
![2" (5.1 Cm) Circle Punch [ 133782 ]](https://assets1.tamsnetwork.com/images/EC042017NF/133782s.jpg "2\" (5.1 Cm) Circle Punch [ 133782 ]")
|
![Banner Sayings Bundle (English) [ 167051 ]](https://assets1.tamsnetwork.com/images/EC042017NF/167051s.jpg "Banner Sayings Bundle (English) [ 167051 ]")
|
![Love Notes 6" X 6" (15.2 X 15.2 Cm) Mix & Match Designer Series Paper [ 166985 ]](https://assets1.tamsnetwork.com/images/EC042017NF/166985s.jpg "Love Notes 6\" X 6\" (15.2 X 15.2 Cm) Mix & Match Designer Series Paper [ 166985 ]")
![Cute As A Bug 12" X 12" (30.5 X 30.5 Cm) Designer Series Paper [ 166994 ]](https://assets1.tamsnetwork.com/images/EC042017NF/166994s.jpg "Cute As A Bug 12\" X 12\" (30.5 X 30.5 Cm) Designer Series Paper [ 166994 ]")
![Made With Love 12" X 12" (30.5 X 30.5 Cm) Designer Series Paper [ 167054 ]](https://assets1.tamsnetwork.com/images/EC042017NF/167054s.jpg "Made With Love 12\" X 12\" (30.5 X 30.5 Cm) Designer Series Paper [ 167054 ]")
![Lovely & Beautiful 12" X 12" (30.5 X 30.5 Cm) Specialty Designer Series Paper [ 166957 ]](https://assets1.tamsnetwork.com/images/EC042017NF/166957s.jpg "Lovely & Beautiful 12\" X 12\" (30.5 X 30.5 Cm) Specialty Designer Series Paper [ 166957 ]")
![Easter Joy 12" X 12" (30.5 X 30.5 Cm) Specialty Designer Series Paper [ 166939 ]](https://assets1.tamsnetwork.com/images/EC042017NF/166939s.jpg "Easter Joy 12\" X 12\" (30.5 X 30.5 Cm) Specialty Designer Series Paper [ 166939 ]")
![Bubble Bath 1/8" (3.2 Mm) Faux Linen Ribbon [ 167075 ]](https://assets1.tamsnetwork.com/images/EC042017NF/167075s.jpg "Bubble Bath 1/8\" (3.2 Mm) Faux Linen Ribbon [ 167075 ]")
![White With Gold 3/8" (1 Cm) Ribbon [ 166979 ]](https://assets1.tamsnetwork.com/images/EC042017NF/166979s.jpg "White With Gold 3/8\" (1 Cm) Ribbon [ 166979 ]")
![Beautifully Adorned Ephemera Pack [ 166980 ]](https://assets1.tamsnetwork.com/images/EC042017NF/166980s.jpg "Beautifully Adorned Ephemera Pack [ 166980 ]")


Robin, this was really an informative play date. I’m anxious to get going on at least one pillar version TODAY. It’s gray outside (no snow, though, odd for Montana) so perfect day to stay in and play.
Marsha in Montana
just found you!!! watched your 1, 2, 3 z fold video (from 2024). loved it and already made a demo so I wouldn’t forget it. am now going to watch your other videos.