It’s time to play with September’s Paper Pumpkin Kit, “Aspens of Gratitude”. Join me as we put together the cards and use this forest inspired kit! You will find a video tutorial for creating with this kit as well as ideas for some alternative designs below.
Here is Our Monthly Paper Pumpkin Challenge
- Open the kit when it arrives (or anytime you get to it!).
- Use the contents to create beautiful things.
- Store the leftovers in an organized way.
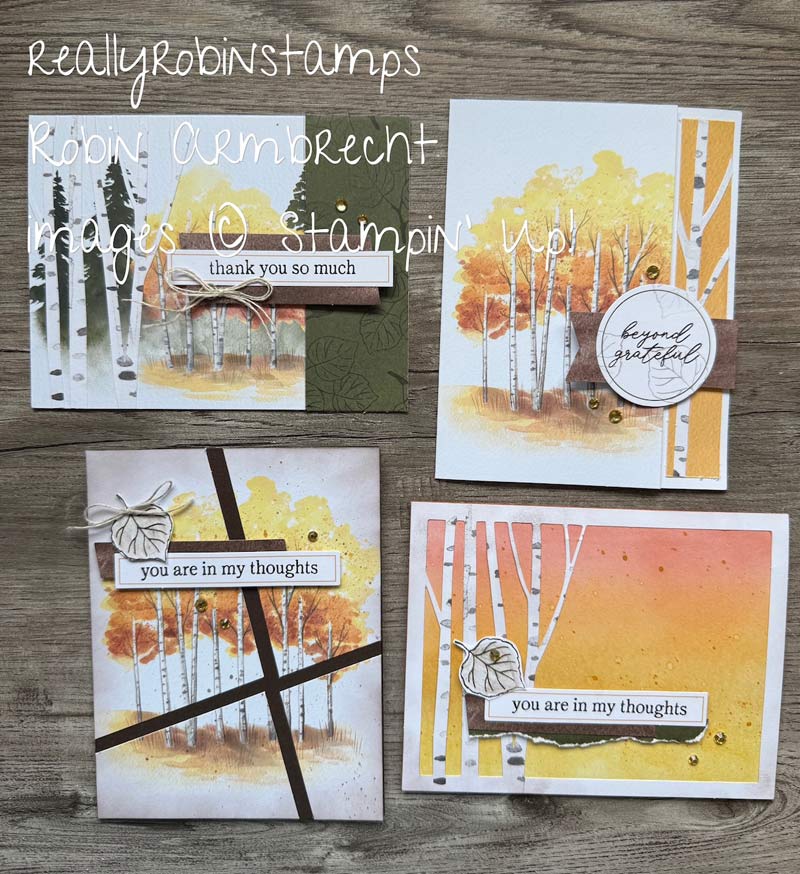
Grab your kit and join me for some creative playtime. September’s Paper Pumpkin Kit, “Aspens of Gratitude” makes ten cards. I will make two cards as designed by Stampin’ Up! and then make four alternative versions using the supplies in the kit. The photos of the alternative cards are below. Watch the video for the specific measurements used to create the alternative designs on cards #1-#4.
Interested in Paper Pumpkin Kits? Become a monthly subscriber or choose the months you want to receive the kits. You can also give Paper Pumpkin subscriptions as a gift!
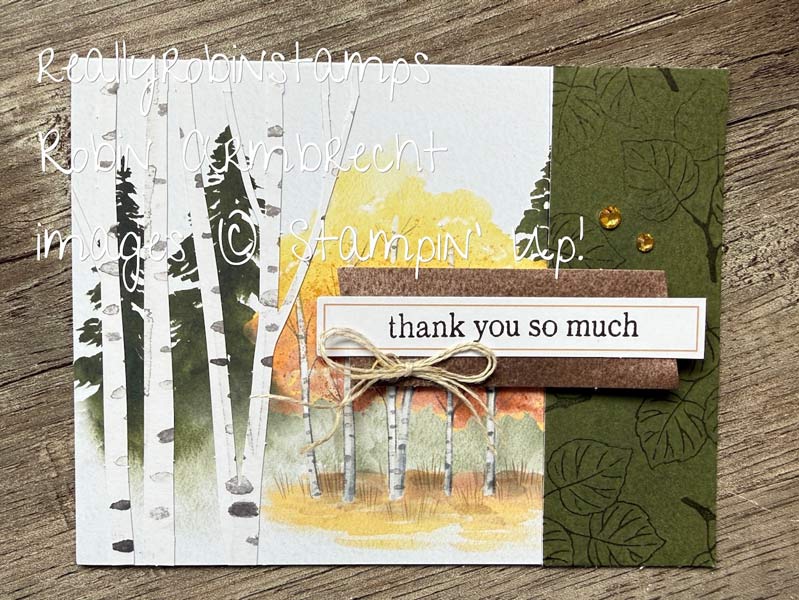
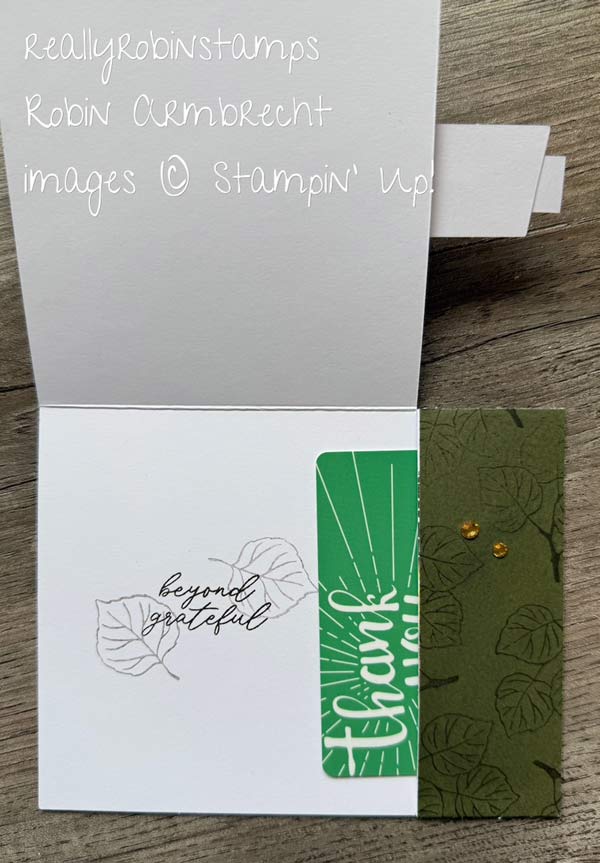
Alternative Card 1 – Gift Card Holder
- Cut the card front from score line to opening at 1-1/2″. This turns the card front into two flaps.
- Attach the small flap to the inside of the card around the outside edges to create a pocket.
- Use Mellow Moss envelope flap cut at 4-1/4″x 1-1/2″ to cover the smaller flap. Stamp a background first with leaf image.
- Attach focal point to large flap only but overlapping the pocket.
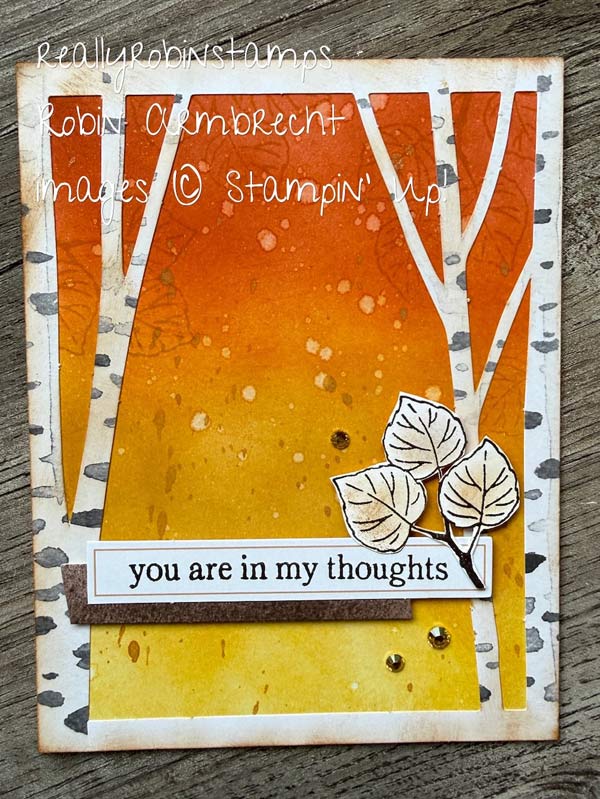
Alternative Card 2 – Fold-Back Card
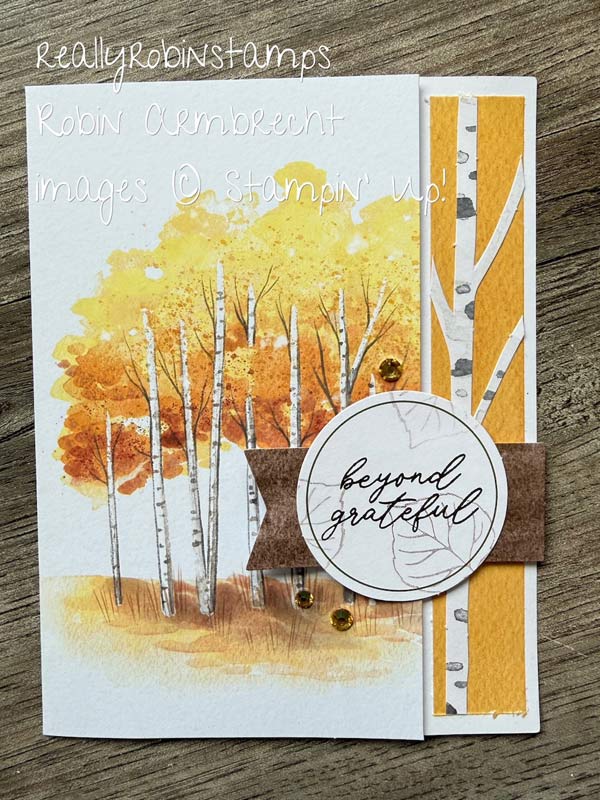
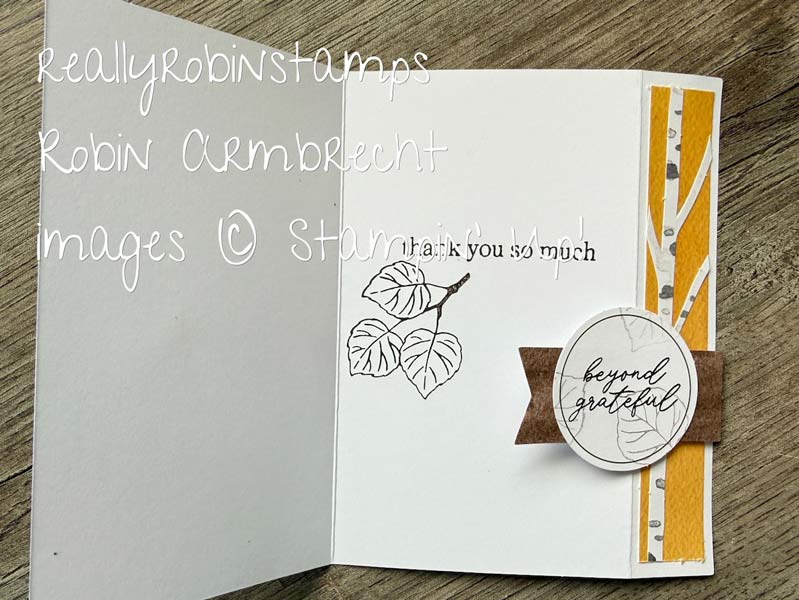
- Using a premade card base, cut off 1″ from the card front.
- Score the inside of the card base at 1″ (right at the same spot where the newly cut card front edge is). Fold the score line to the back of the card. Decorate this 1″ section with Golden Glow envelope flap piece cut 5-1/4″ x 3/4″ and a piece of the tree trunk.
- Create focal point and attach only to the fold-back section.
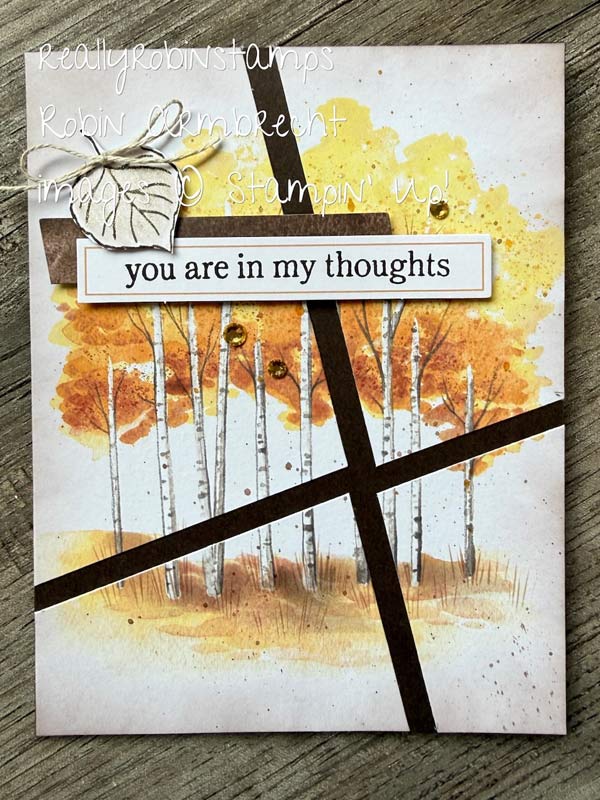
Alternative Card 3 – Wonky Windowpane
- Cut a premade card base in half and trim the printed side to 4″ x 5-1/4″.
- Using a ruler and pencil, measure and mark at 1-3/4″ to the right from top left corner, 2-3/4″ down from top right corner, 1″ to the left of the bottom right corner, and 1″ up from the bottom left corner.
- Cut between the marks from top to bottom, then from side to side to create 4 “wonky” panes.
- Attach to a card base (a dark card base looks great!) aligning the outside corners and edges.
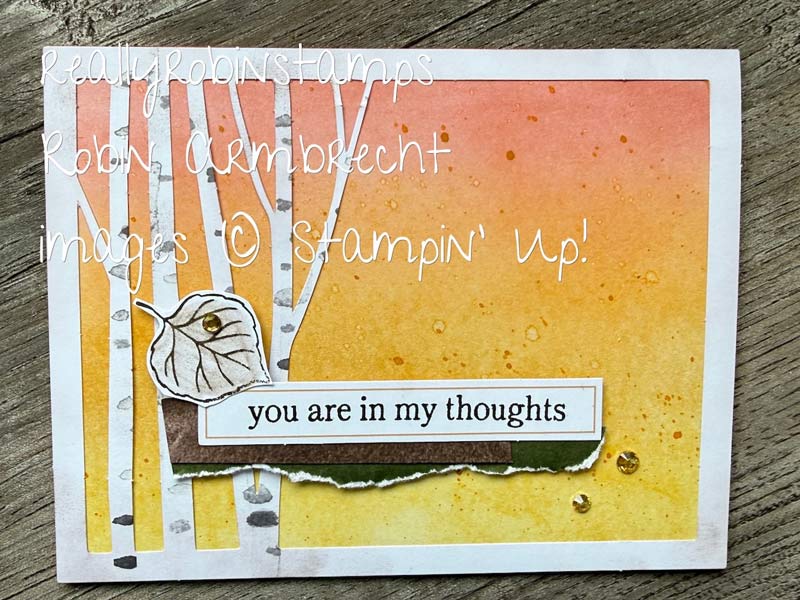
Alternative Card 4 – Blended Sky Background
- Use blending brushes and ink to create a sky background.
- Splatter with Golden Glow Shimmer Brush and/or water to create specks and water marks.
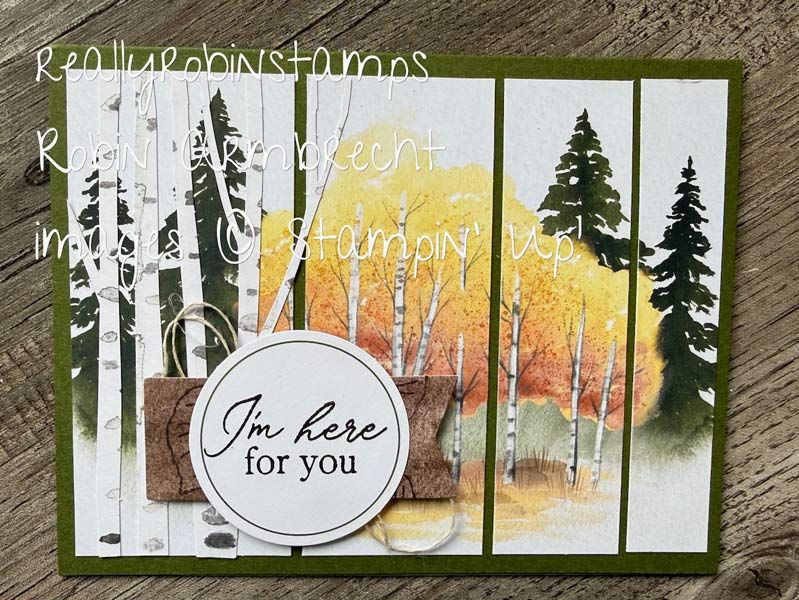
One More Idea – Graduated Strips
Trim a premade card front to 4″ x 5″. Starting from the left side cut strips at 2″, 1-1/2″, and 1″. Attach the strips to a dark card base leaving 1/8″ in between.
I hope you are feeling inspired to be creative, whether it is with September’s Paper Pumpkin Kit, “Aspens of Gratitude”, or any other kit! Happy Paper Pumpkin-ing!

Product List
![Paper Pumpkin 12 Month Subscription [ 166818 ]](https://assets1.tamsnetwork.com/images/EC042017NF/166818s.jpg "Paper Pumpkin 12 Month Subscription [ 166818 ]")
|
![Paper Pumpkin 6 Month Subscription [ 166817 ]](https://assets1.tamsnetwork.com/images/EC042017NF/166817s.jpg "Paper Pumpkin 6 Month Subscription [ 166817 ]")
|
![Paper Pumpkin 3 Month Subscription [ 166816 ]](https://assets1.tamsnetwork.com/images/EC042017NF/166816s.jpg "Paper Pumpkin 3 Month Subscription [ 166816 ]")
|
![Paper Pumpkin Subscription [ 166815 ]](https://assets1.tamsnetwork.com/images/EC042017NF/166815s.jpg "Paper Pumpkin Subscription [ 166815 ]")
|