I’m starting something new this year! I hope you will join me in creating with our Paper Pumpkin kits as they arrive each month. True confession time…I may have one or two past Paper Pumpkin kits in my craft room waiting to be used. Can you relate? I’ve come to the conclusion that my procrastination with using the kits is due to my desire to use them perfectly, and thinking I don’t have the time. This is silliness. I don’t just want to collect them anymore, I want to experience their joy each month. So let’s dive into the January 2026 Kit, “Special Delivery”!

Will YOU Accept the Challenge? (to use your kit with me)
Here is what I am going to do:
- Open my kits when they arrive.
- Use the contents to create beautiful things.
- Share my ideas with you.
- Store the leftovers in an organized way.
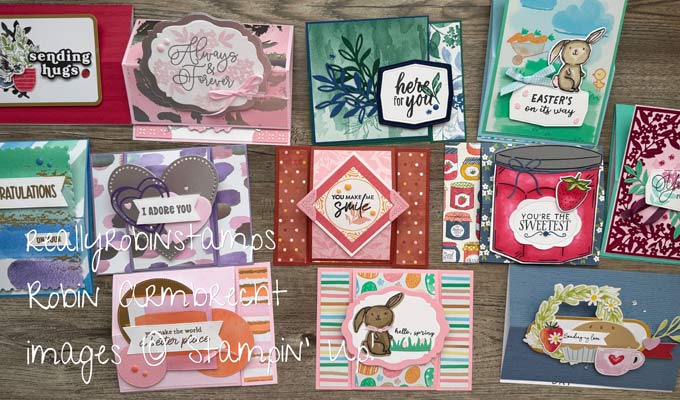
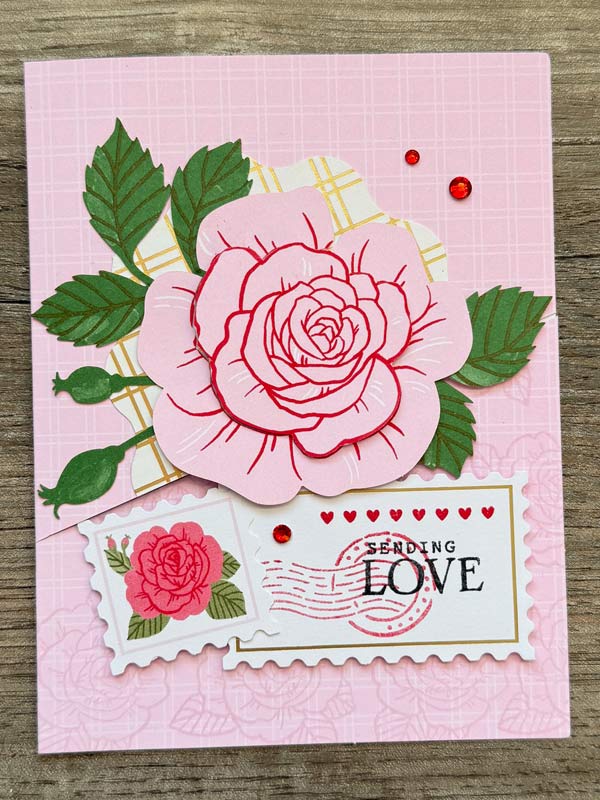
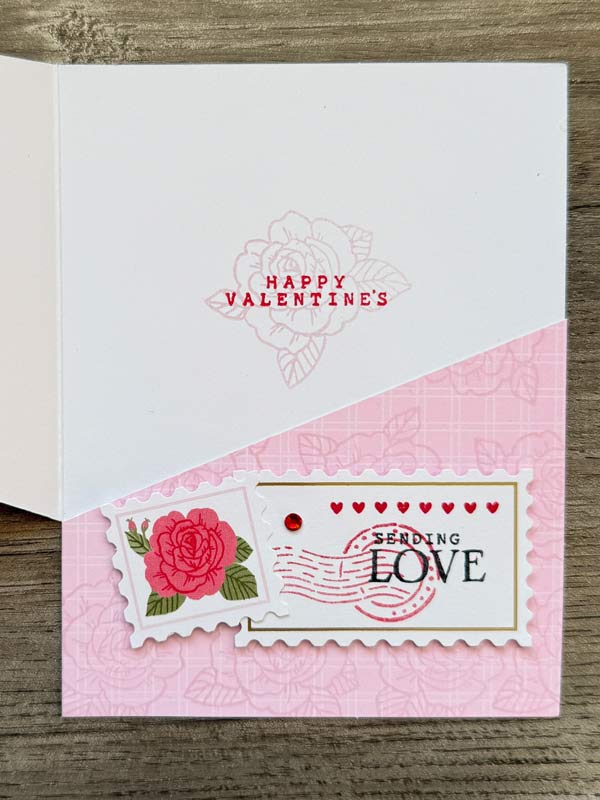
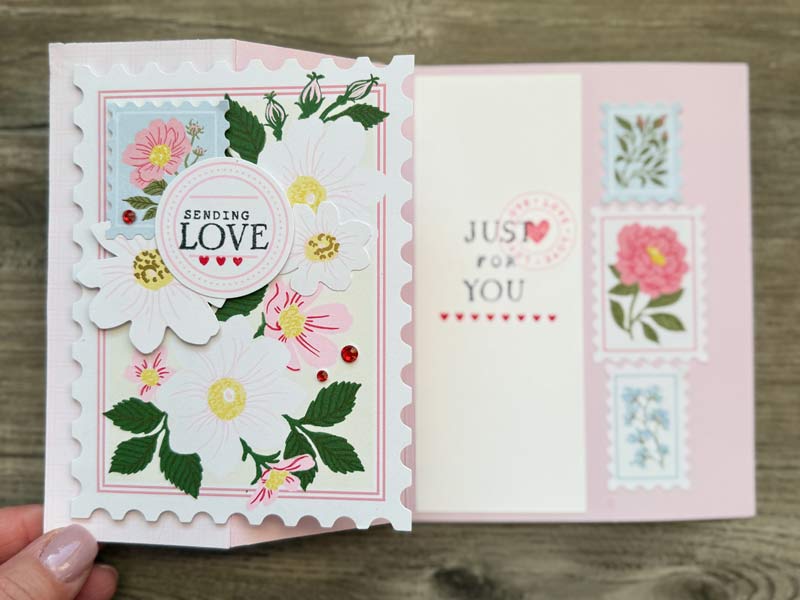
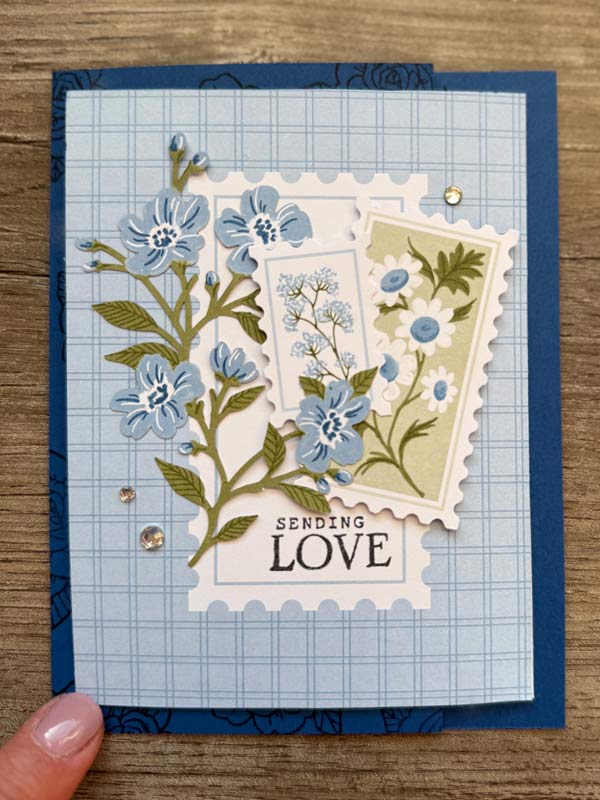
Grab your kit and join me for some creative playtime. January’s “Special Delivery” Kit makes nine cards. I will make three cards as designed by Stampin’ Up! and then make three alternative versions using the supplies.
Interested in Paper Pumpkin Kits? Become a monthly subscriber or choose the months you want to receive the kits. You can also give Paper Pumpkin subscriptions as a gift!
“I don’t just want to collect them anymore, I want to experience their joy each month. ” -reallyrobinstamps😆
Alternative Card 1 – Pocket Card (gift card holder)
Cut diagonally through card front between 2″ from top right and 2″ from bottom left corners. Attach the edges of the bottom half to the inside of the card to make a pocket for a gift card, photo or insert. Raise up focal point pieces on both sides of the diagonal split so that you can tuck one piece under another to help card stay closed.
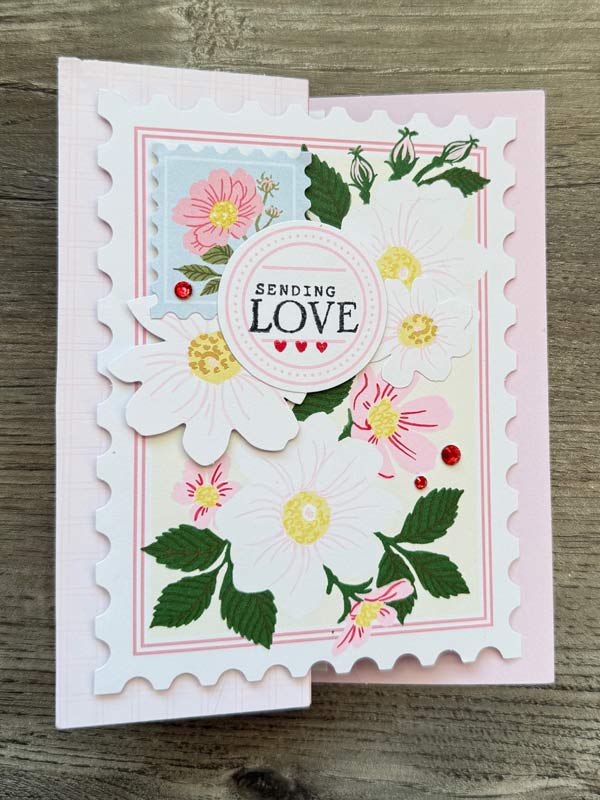
Alternative Card 2 – Z-Fold
With the printed side of the cardstock facing up, score at 2-1/8″ vertically through the card front. Fold back on this line to create a Z-Fold. Cut the pink envelope apart and cut a 2-1/8″ x 5-1/2″ piece to cover the folded front Attach the large card front only on the half that folds back. Use a 2″ x 5-1/4″ piece of Basic White for inside greeting.
Alternative Card 3 -Joy Fold
Cut off 1″ of the card front of the card base (I used Blueberry Bushel cardstock) so that the card base measures 5-1/2″ x 7-1/2″, scored at 4-1/4″. Attach the backside of the small notecard ( 5″ x 7-1/2″) inside the larger card base making sure the opening of the notecard is to the left. Cut the blue envelope apart and cut a piece that covers the front of the notecard, centering the address window.

I hope you are feeling inspired to be creative, whether it is with this month’s Paper Pumpkin Kit, “Special Delivery”, or any other kit!
Product List
![Paper Pumpkin 12 Month Subscription [ 166818 ]](https://assets1.tamsnetwork.com/images/EC042017NF/166818s.jpg "Paper Pumpkin 12 Month Subscription [ 166818 ]")
|
![Paper Pumpkin 6 Month Subscription [ 166817 ]](https://assets1.tamsnetwork.com/images/EC042017NF/166817s.jpg "Paper Pumpkin 6 Month Subscription [ 166817 ]")
|
![Paper Pumpkin 3 Month Subscription [ 166816 ]](https://assets1.tamsnetwork.com/images/EC042017NF/166816s.jpg "Paper Pumpkin 3 Month Subscription [ 166816 ]")
|
![Paper Pumpkin Subscription [ 166815 ]](https://assets1.tamsnetwork.com/images/EC042017NF/166815s.jpg "Paper Pumpkin Subscription [ 166815 ]")
|
![Special Delivery Paper Pumpkin Refill [ 168631 ]](https://assets1.tamsnetwork.com/images/EC042017NF/168631s.jpg "Special Delivery Paper Pumpkin Refill [ 168631 ]")