
Fall is coming and it’s time to turn our attention to some fall craft projects and what better way to begin than with PUMPKINS!!! So let’s play with pumpkins and do some stamping, coloring, kissing, and creating of and with PUMPKINS. Are you ready? I’m going to show you three projects that each have pumpkins as the focal image, and incorporate a technique, a fun fold, and a 3D project. Your assignment is to watch the video and download the two pdfs and get busy

View my video tutorial to see how these projects come together and the details behind the technique, the fun fold and the 3D project, then download the pdf for your files to help you recreate on your own.
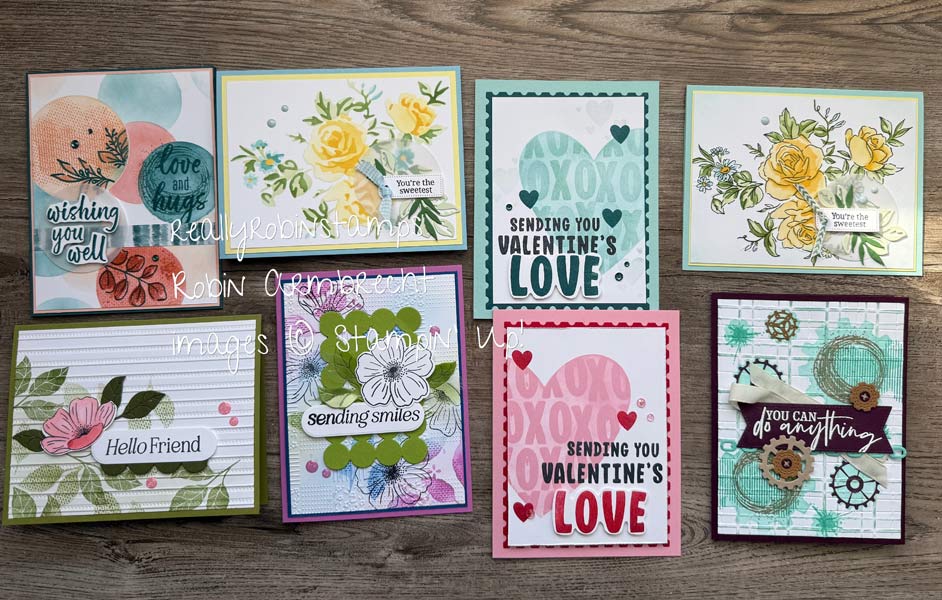
Simple Stamping & Coloring

The Technique – Kissing
The kissing technique is a way to transfer a detailed background image to a solid image for a delightful effect!
- Ink detailed background image.
- Press unlinked (clean) solid image onto detailed image using it like an ink pad.
- Stamp onto cardstock = MAGIC!!

The Fun Fold – Double Box Fun Fold
Supplies
- 4-1/4” x 9-3/8” cardstock for card base
- 3-1/2” x 5-1/8” cardstock for top piece
- 4” x 5-1/4” Basic White cardstock
- 1-1/4” x 4” DSP
- 3-3/4” x 4” DSP
- 3-1/4” x 3-1/2” DSP
- Optional Layers: 3-1/4” x 3-1/2” CS and 3” x 3-1/4” DSP
- Pieces for a layered focal point
Directions
- 1. Score along the 9-3/8” side of the 4-1/4” x 9-3/8” cardstock at 3/8”, 1-3/8”. 2-7/8”, and 3-7/8” from the left side. Fold all the score lines in the same direction.
- 2. Score along the 5-1/8” side of the 3-1/2” x 5-1/8” cardstock at 3/8” and 1-3/8” from the right side.
- 3. Fold on all the score lines in the same direction.
- 4. Add adhesive on the 3/8” tab on both pieces (see Picture A).
- 5. Create the box on the card base by folding on the third score line from the left (see dotted line on Picture A) and tucking the 3/8” tab with adhesive under to attach to the inside of the card base. When this step is completed your card base will have a box on the left side like Pictures B.
- 6. Adhere the 1-1/4” x 4” and 3-3/4” x 4” pieces of DSP to the card base.
- 7. Attach the front piece to the card base by first flattening the card base and then centering it over the card base a shown in Picture C. It will attach on the right side where the 3/8” tab is located.
- 8. Finish attaching the front piece on the left side while keeping the card base flattened. See Picture D.
- 9. Attach the 3-1/4” x 3-1/2” piece of DSP (or other optional layering pieces) to front piece. Make a focal point!


The 3D Pumpkin Treat Box


Creating a 3D pumpkin is so easy with the Countryside Corners Dies. I am so thankful to Kathi Brown who swapped with me last month and shared this idea. You can create 4 sizes of pumpkin treat boxes using these dies and adding a simple open box in between the die layers. Download the pdf for all the details on creating these adorable treat boxes.


Oh my, pumpkins all around today and I hope you are inspired to get your fall crafting started and include some pumpkin projects!


Hi Robin, great video! I watched it today. I didn’t get the “package ” until Friday. Thanks for putting it together. I tried to join the meeting but Zoom said I didn’t have the correct invitation so I couldn’t even watch. Anyway, I was disappointed that I couldn’t see everyone again.
Thanks again and I hope to see you soon.
GGgrammajane
Hi Jane! We missed you at the gathering!
I love your shows I have learned so much from them. Thank you
Thank you so much Margaret! I’m happy you are learning new things!
Michele
These are great! Especially love “you’re the pick of the patch.’
Thank you, Kylie!