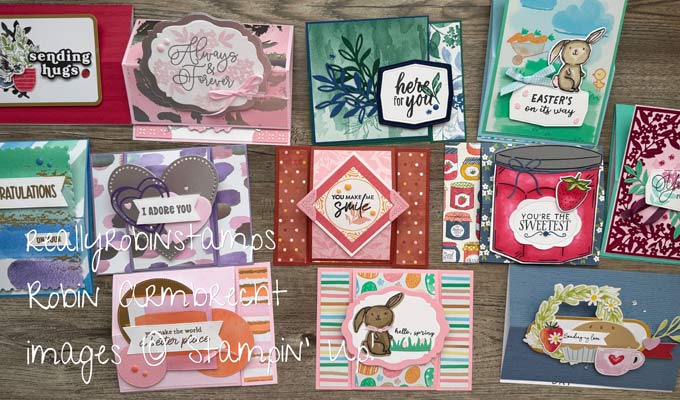
Easy is the name of the game this week! I wanted to play with the Split Front Panel card design because it is so easy and versatile. A split front panel card is a concept where the front of the card base is cut apart and put back together. Easy-peasy!
Here’s Your Homework 😉
- Watch the video tutorial to learn how to create split fron panel cards two ways.
- Download the pdf to use as a reference while creating.
- Shop your stash for your favorite Designer Series Papers and images to use on split front cards.
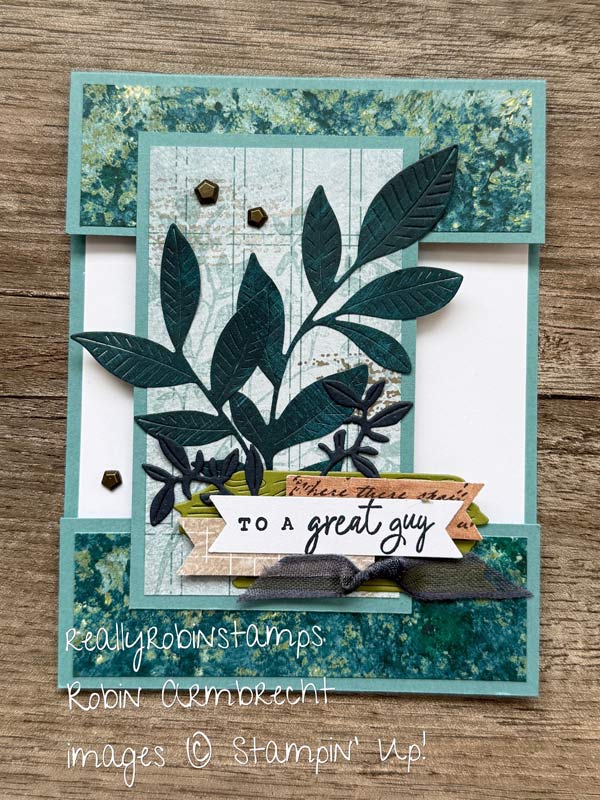
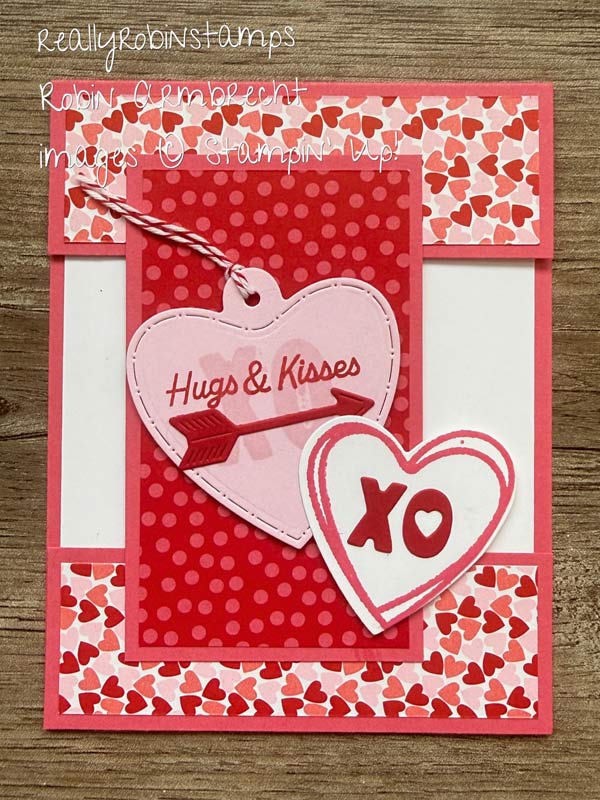
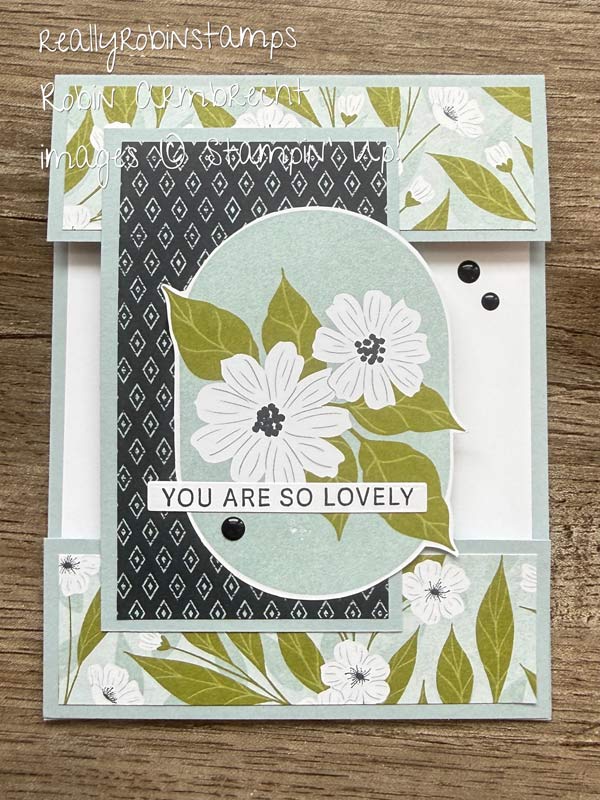
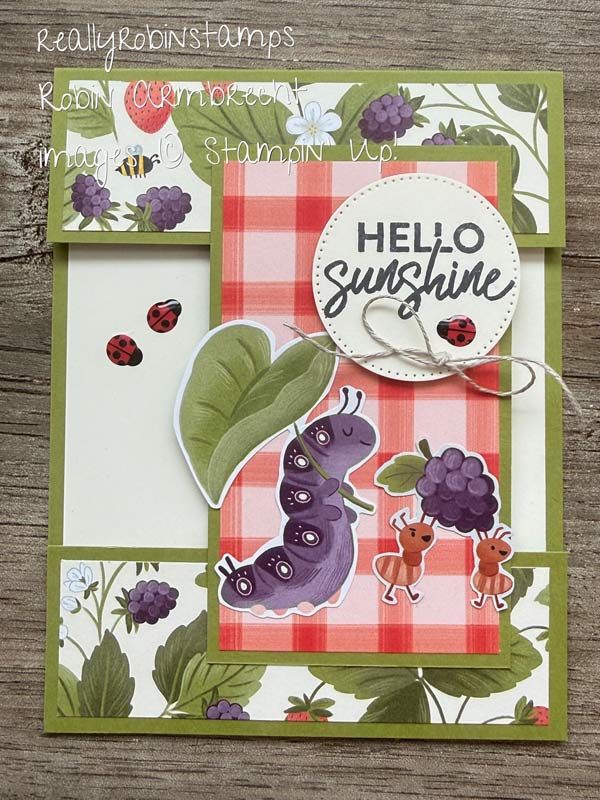
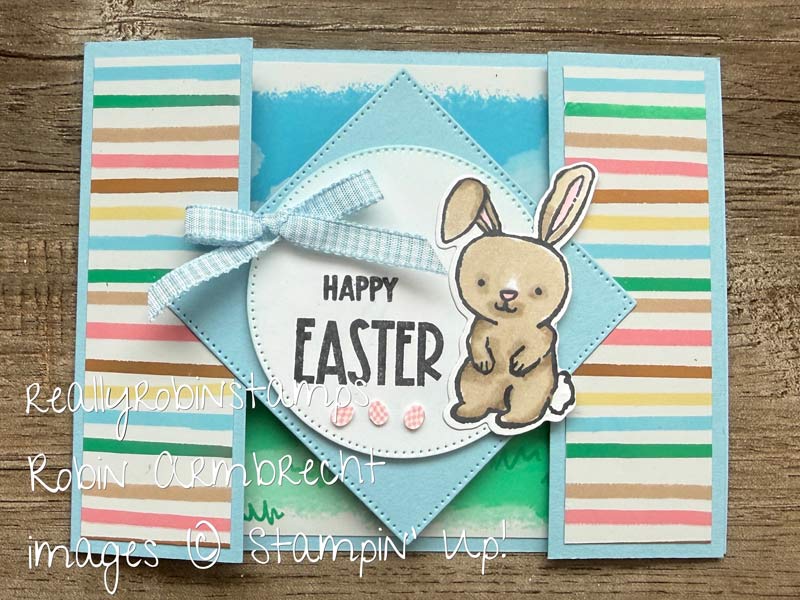
Split Front Panel Card
- 4-1/4” x 11” card base
- 4” x 5-1/4” Basic White
- 1-1/4 x 4 DSP #1 (2)
- 2-1/4 x 4” DSP #2 (1) or Basic White
- Score the 4-1/4” x 11” card base in half at 5-1/2”. On the front of the card base measure along the 11” side at 1-1/2” and cut off. Measure again at 2-1/2” and cut off.
- Attach the 4” x 5-1/4” piece of Basic White inside the card base.
- Attach the 1-1/4 x 4” pieces of DSP #1 on the 1-1/2” section of what’s left of the card front and on the 1-1/2” x 4-1/4” piece that got cut off first.
- Attach the 2-1/4 x 4” piece of DSP #2 on the 2-1/2” x 4-1/4” piece of card front that got cut off second. Reattach this piece to the card front by turning it perpendicularly and adhering it first to the top section of the card front (It can be centered or offset).
- Line up the remaining 1-1/2” x 4-1/4” piece along the bottom edge of the card and attach the bottom of the 2-1/2” x 4-1/4” piece. This now connects the card front.
- Stamp the inside greeting making sure it is behind the 2-1/2” x 4-1/4” piece.


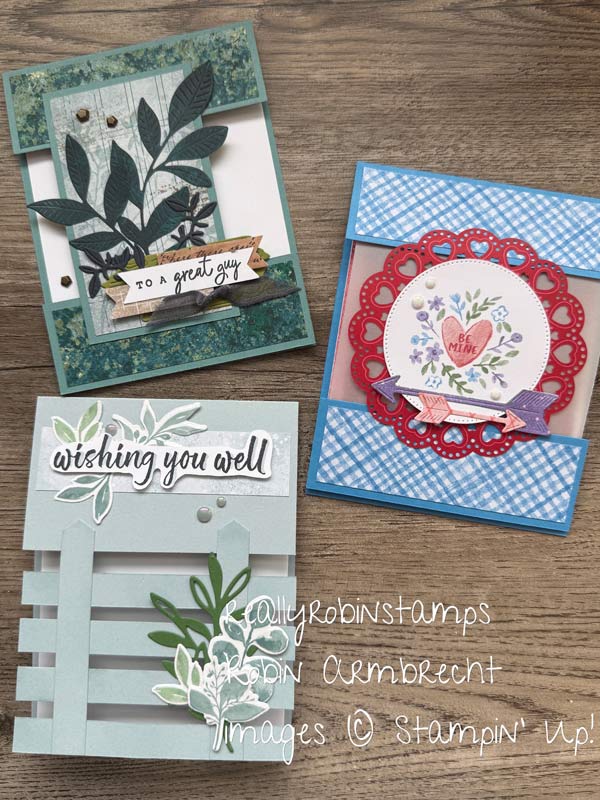
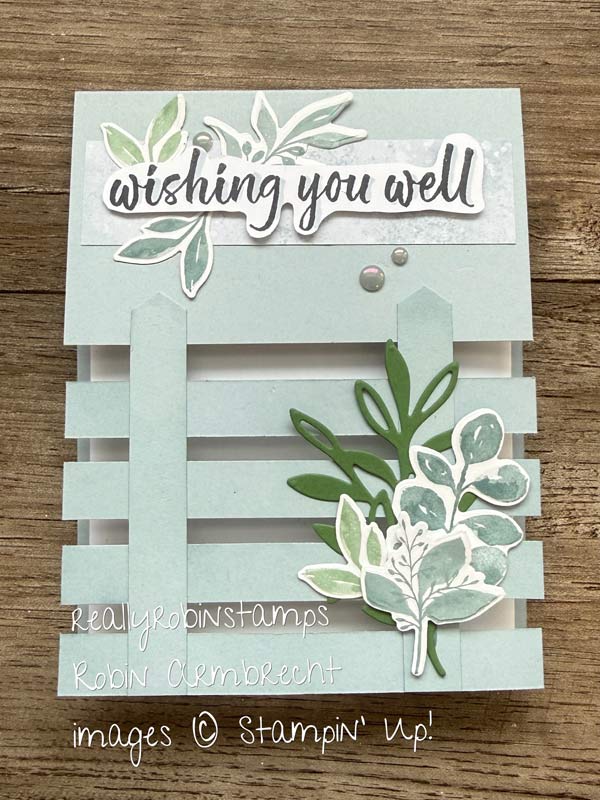
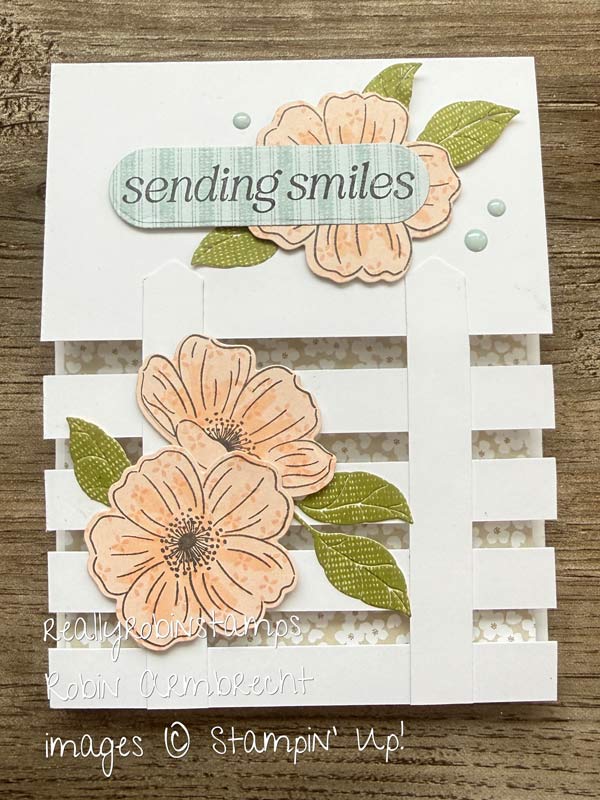
Split Front Fence
- 4-1/4” x 11” card base
- 4” x 5-1/4” Basic White for inside if card base isn’t white
- Optional for inside: 5-1/4” x 8” DSP, scored at 4” to make an inside card
- Score the 4-1/4” x 11” card base in half at 5-1/2”. On the bottom front of the card base measure along the 11” side and cut off six 1/2” strips. This leaves you with 2-1/2” left of the card front.
- Add masking paper, masking tape, or sticky notes upside down under the card front. The sticky side should be facing up.
- Create horizontal fence posts by spacing four 1/2” strips in the empty space of the card front. Start with a strip along the bottom edge and work your way up leaving 1/4” in between strips.
- Once those strips are straight (sticking to the masking tape) add two strips to make the vertical fence posts.* Add adhesive on each horizontal fence post 3/4” from the edges where the vertical fence posts will attach. The vertical fence posts are longer than needed so about 1/2” will hang past the bottom edge of the card front.
- Let the adhesive dry/set. Remove the masking tape and trim off the vertical post overhang.
- Decorate your fence!
- Attach the 4” x 5-1/4” piece of Basic White inside the card base.
- * Trim the top ends of the vertical fence posts to make a point.

I hope you have as much fun as I had this week when you dive into making split panel cards. Enjoy!

Product List
![Endless Love Bundle (English) [ 167062 ]](https://assets1.tamsnetwork.com/images/EC042017NF/167062s.jpg "Endless Love Bundle (English) [ 167062 ]")
|
![Greenery Lane Bundle (English) [ 166877 ]](https://assets1.tamsnetwork.com/images/EC042017NF/166877s.jpg "Greenery Lane Bundle (English) [ 166877 ]")
|
![Nature's Symphony Bundle (English) [ 166926 ]](https://assets1.tamsnetwork.com/images/EC042017NF/166926s.jpg "Nature's Symphony Bundle (English) [ 166926 ]")
|
|
![Easter Basket Bundle (English) [ 166947 ]](https://assets1.tamsnetwork.com/images/EC042017NF/166947s.jpg "Easter Basket Bundle (English) [ 166947 ]")
|
|||
![Greenery Lane Washi Tape [ 166880 ]](https://assets1.tamsnetwork.com/images/EC042017NF/166880s.jpg "Greenery Lane Washi Tape [ 166880 ]")
|
![Three Banner Punch [ 167050 ]](https://assets1.tamsnetwork.com/images/EC042017NF/167050s.jpg "Three Banner Punch [ 167050 ]")
|
![Lovely Arrangements Bundle (English) [ 167176 ]](https://assets1.tamsnetwork.com/images/EC042017NF/167176s.jpg "Lovely Arrangements Bundle (English) [ 167176 ]")
![Vellum 12" X 12" (30.5 X 30.5 Cm) Specialty Paper [ 167099 ]](https://assets1.tamsnetwork.com/images/EC042017NF/167099s.jpg "Vellum 12\" X 12\" (30.5 X 30.5 Cm) Specialty Paper [ 167099 ]")
![Easter Joy 12" X 12" (30.5 X 30.5 Cm) Specialty Designer Series Paper [ 166939 ]](https://assets1.tamsnetwork.com/images/EC042017NF/166939s.jpg "Easter Joy 12\" X 12\" (30.5 X 30.5 Cm) Specialty Designer Series Paper [ 166939 ]")
![Cute As A Bug 12" X 12" (30.5 X 30.5 Cm) Designer Series Paper [ 166994 ]](https://assets1.tamsnetwork.com/images/EC042017NF/166994s.jpg "Cute As A Bug 12\" X 12\" (30.5 X 30.5 Cm) Designer Series Paper [ 166994 ]")
![Love Notes 6" X 6" (15.2 X 15.2 Cm) Mix & Match Designer Series Paper [ 166985 ]](https://assets1.tamsnetwork.com/images/EC042017NF/166985s.jpg "Love Notes 6\" X 6\" (15.2 X 15.2 Cm) Mix & Match Designer Series Paper [ 166985 ]")
![Lovely Blossoms 12" X 12" (30.5 X 30.5 Cm) Designer Series Paper [ 167168 ]](https://assets1.tamsnetwork.com/images/EC042017NF/167168s.jpg "Lovely Blossoms 12\" X 12\" (30.5 X 30.5 Cm) Designer Series Paper [ 167168 ]")
![Lovely & Beautiful 12" X 12" (30.5 X 30.5 Cm) Specialty Designer Series Paper [ 166957 ]](https://assets1.tamsnetwork.com/images/EC042017NF/166957s.jpg "Lovely & Beautiful 12\" X 12\" (30.5 X 30.5 Cm) Specialty Designer Series Paper [ 166957 ]")
![Days Like This Memories & More Card Pack [ 166911 ]](https://assets1.tamsnetwork.com/images/EC042017NF/166911s.jpg "Days Like This Memories & More Card Pack [ 166911 ]")
![Nature Walk 12" X 12" (30.5 X 30.5 Cm) Designer Series Paper [ 166912 ]](https://assets1.tamsnetwork.com/images/EC042017NF/166912s.jpg "Nature Walk 12\" X 12\" (30.5 X 30.5 Cm) Designer Series Paper [ 166912 ]")