
It’s the middle of summer and there are so many activities to be involved in and sometimes it is difficult to spend hours and hours making cards. Having an easy card template (or two) in your back pocket when you need a bunch of cards is so helpful. I’m here to save the day with not one but two easy card templates that lend themselves to making multiple cards in one sitting. AND they both use easy to cut pieces of patterned paper in sizes that might already be in your scraps! Let’s dive in and give these two templates a try!

Take some time to watch the video tutorial for these templates and see how easily they can be used and adapted to any patterned paper. Plus we discuss how to step up a simple card template for when you want more than quick & easy. Then download the card template pdfs for your files.
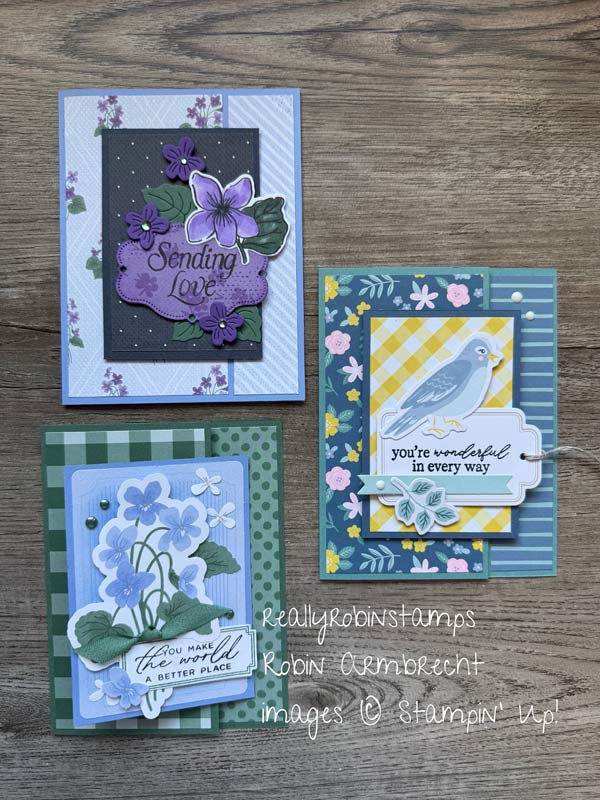
Card Template 17 – Layered Vertical Strips

Supplies and Directions
- 5 1/2” x 8 1/2” card base
- 4” x 5-1/4” cardstock
- 1-1/2” x 3-1/2” DSP #1
- 1-1/2” x 4” DSP # 2
- 1” x 4-3/4” CS or DSP #3
- Focal Point Basic White or any Neutral, and any size or shape
- 3 embellishments
- Adhere the 4” x 5-1/4” piece of cardstock on the card base. Options: stamp a background on this piece or use an embossing folder.
- Attach the 1” x 4-3/4” CS or DSP #3 piece along the left edge of the card front about 1-1/4” from the left edge, and 1/4” from top and bottom edges.
- Adhere the 1-1/2” x 4” DSP #2 piece centered top & bottom over DSP #2, and 1/8” from the left edge.
- Attach the 1-1/2” x 3-1/2” DSP # 1 piece overlapping piece #2 by 3/4” and centered top and bottom.
- Pop up and attach the focal point shape over the the section where DSP #1 & #2 overlap.
- Add 3 embellishments of different sizes in two different locations creating a triangle with their placement.

Card Template 18 – Horizontal Strips

Supplies and Directions
- 5 1/2” x 8 1/2” card base
- 4” x 5-1/4 ” cardstock neutral
- 4” x 1” DSP (4 different designs)
- Punched or Die Cut Image for focal point
- Large horizontal greeting
- Ribbon or embellishments
- On the 4” x 5-1/4” piece of cardstock start adhering the strips starting with the top and bottom edge. Then adhere the next strips leaving 1/16” in between the strips. Leave one “blank space” for the greeting to be stamped on the 4” x 5-1/4” supporting cardstock.
- Stamp greeting sentiment in the blank space.
- Adhere the card front to the card base.
- Punch or Die Cut some accents to place around the greeting.
- Embellish as desired.

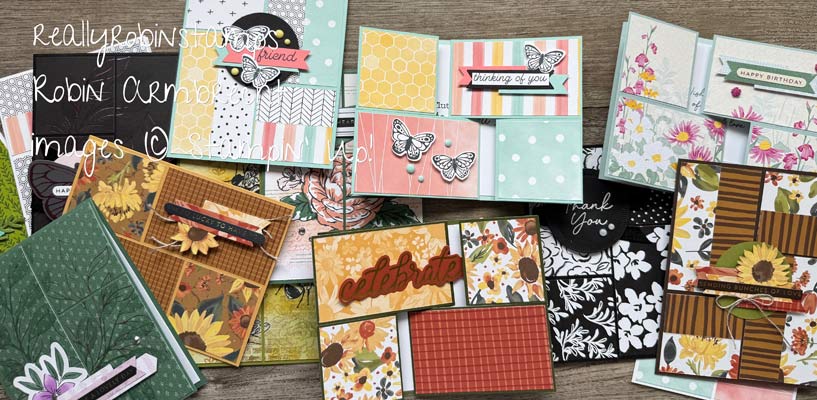
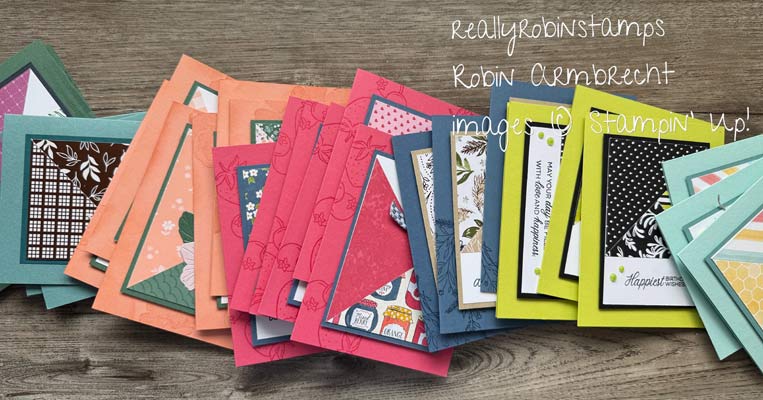
Happy Paper Pairs Using Templates 17 & 18
(Such Cute Couples!)


Consider how easy it is to make a gorgeous set of cards as a gift using one or both of these templates!

Ok, you know what to do…it’s time to take what you’ve learned and get busy making a bunch of cards for yourself or others! Come share what you are creating in our Facebook Group: Robin’s Really Super Stampers.

Product List
")
|
")
|
||

|
|||
")
")
")
 Designer Series Paper")
 Designer Series Paper")
 Designer Series Paper")
 Designer Series Paper")
 Designer Series Paper")
 Designer Series Paper")
 Designer Series Paper")
Thanks, Robin. You always have the most detailed blog posts to accompany your videos. The templates are always great to collect but your numerous examples are so appreciated. I always go right to your videos when they pop up in my notifications. I really like all the various ways to use scraps and/or outdated papers I haven’t gotten around to using — both of which I’m trying to whittle away bit by bit.
Thank you, Lucy! I really appreciate your feedback and positive comments. Definitely get that paper cut up and onto those card fronts!
Hi Robin,
I just watched your video for card templates 17 & 18, and I absolutely loved what you did with those paper strips! You are a very good teacher, and you explained things super well. I especially loved all the samples you had made to show the various templates! Thank you so much!
Chris in Calgary, Canada
Hi Chris! Thank you for leaving me a comment with your appreciation. I’m so glad you enjoyed these templates.
Robin, I recently found your blog The card templates are wonderful !!!! Loved the videos .
The cards are beautiful…. Thank you for all the inspiration I will have so much fun using up my scrap peices of the beautiful SU DSP.
Hi Debbie! Happy to help you use up all those scraps!!
Hi Robin,
It’s Tina Burgess. I would like to schedule a party with you sometime. Let me know some open dates that you have
Hello Tina! I would love to have a party with you! I will email you.
thank you very much for sharing these templates. Super thoughtful of you.