
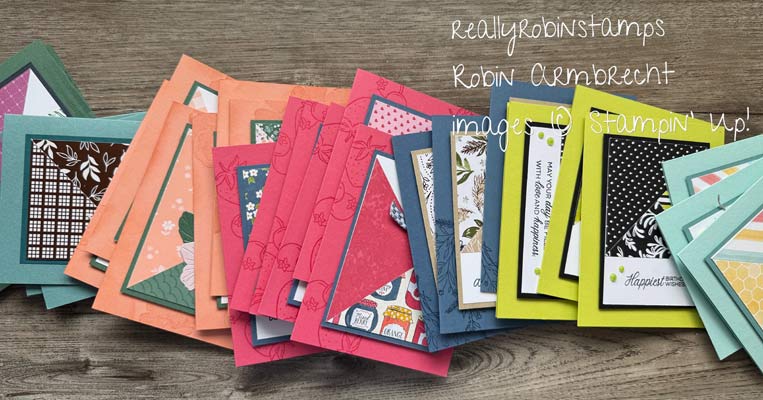
Today’s easy card template is named “Mini-Blinds” because of the evenly spaced strips of patterned paper that remind me of the mini-blinds on my window. I like card template #22 because it is a great way to create a stunning card front while using up scraps of Designer Series Paper. However, it is also a great way to get to know a brand new package of DSP because of how many pieces it uses. OR, it is a perfect template for making multiples of cards too. Versatile, easy, and stunning are all words to love when considering a card template.

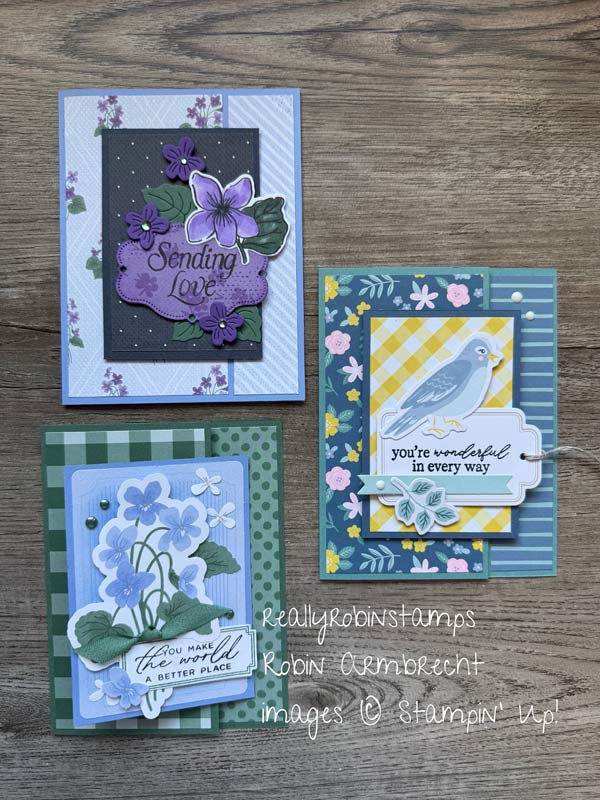
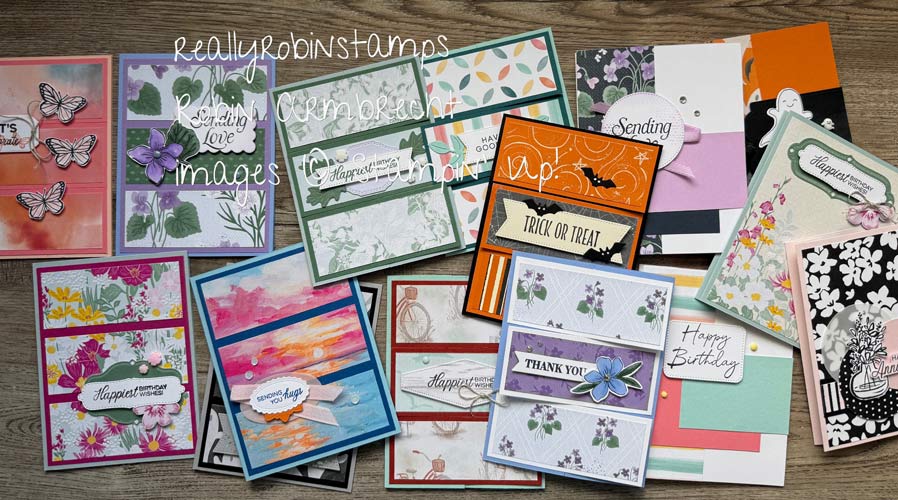
Ready to see all the ways you can use, change, and rearrange the Mini-Blinds Card Template 22? Watch the video tutorial to learn how to vary the template and see all the samples! Download the pdf to help you while creating your own Mini-Blinds Cards! don’t forget to scroll all the way down to see all the samples made using Card Template 22 AND the Stampin’ Up! supplies I used to create my cards.

Supplies for Mini-Blinds Card Template 22
- 4 1/4” x 11” cardstock card base
- 3 1/4” x 5-1/2” coordinating cardstock
- 1” x 3” DSP #1
- 1” x 3” DSP #2
- 1” x 3” DSP #3
- 1” x 3” DSP #4
- 1” x 3” DSP #5
- Focal point piece/accent
- Die-cut/punched shape for greeting
- 3 embellishments
Directions for Assembly
- Arrange the 1” x 3” pieces of DSP centered horizontally on the 3 1/4” x 5-1/2” piece of coordinating cardstock so that there is 1/8” in between the strips, and 1/8” margin on the left and right edges Attach the top and bottom pieces first meeting the edges, then the next closest pieces leaving the 1/8” in between leaving the center strip for last.. Attach this piece to the center of the card front. There will be 1/2” on each side and the top and bottom will meet the edges exactly.
- Attach the focal point/accent that will overlap at least 2 of the DSP strips anywhere on the card front. Add the die-cut/punched greeting piece near or overlapping the focal point.
- Add embellishments.
Mini-Blinds – Choices and Options
- Choose five different and coordinating patterns from the same package of DSP.
- Choose one scenic pattern piece and cut into five pieces (start with a piece measuring 5” x 3”)
- Use the same pattern for all five pieces.
- Use a neutral cardstock color measuring 5” x 3”, and stamp a background, collage, or use an embossing folder. Then cut apart into the 1” pieces.
To use the template in its most basic (and lovely) form choose five different pieces of Designer Series Paper.


Vary the template by using a scenic piece of Designer Series Paper or using regular cardstock embossed with an embossing folder (see pdf directions for starting size).


Or create your own background paper from scratch using a collage style of stamping, then cut apart to use with the Mini-Blinds Card Template.

Where are you going to start with the Mini-Blinds Card Template 22? Jump in, grab some paper, and start creating! You know you want to!

Product List
")
|
")
|
|||
")
|
")
|
")
|

|

|
")

 Designer Series Paper")
 Designer Series Paper")
 Designer Series Paper")
 Designer Series Paper")
 Designer Series Paper")
 Specialty Designer Series Paper")
Again had lots of fun watching your video
My first favorite one is Narure’s beauty
And the Easter one,
Want to tell you last video your inspired me and I did a health journal
Thank you for all your knowledge
Hi Diane! Thank you for your delightful comments – I appreciate you! I’m happy you created a journal for yourself too.
I just love this template and all your cards! The embossed card is wonderful. Another way to use the embossing folder. Thanks for sharing!
Thank you, Joan! I’m so happy you enjoyed this card template.
Very fun ideas on everyone! Enjoyed you making them for us. Great idea on mini blind template. Thank you!
Thank you, Linda! Glad you enjoyed the projects.
Robin………..Another awesome creation. I love watching you from Port Dover, Ontario on Lake Erie in Canada and have picked up many of your ideas.
Thank you very much! Welcome to our community!
Really enjoying all your you tube videos
Thank you, Lynn!