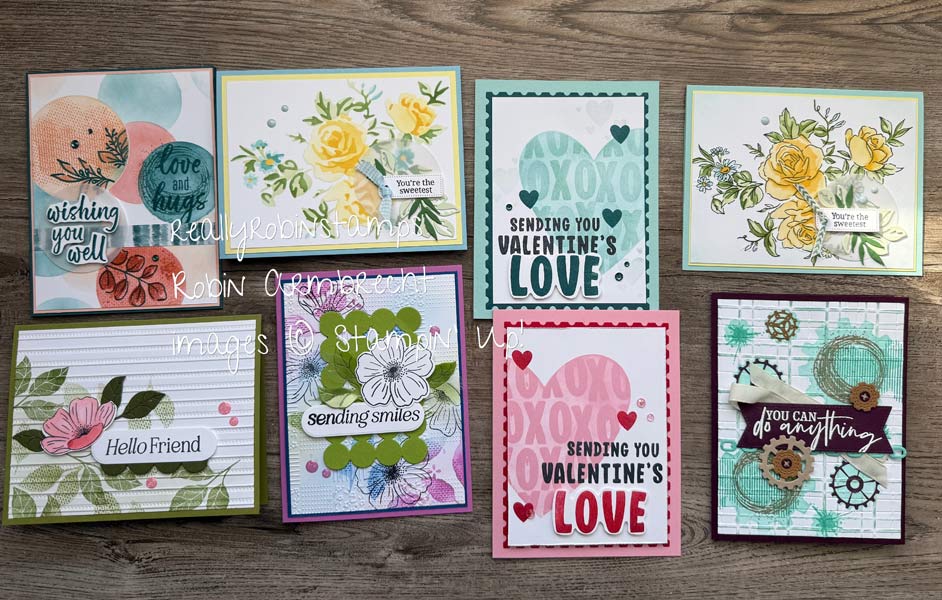
At our recent yearly Stampin’ Up! Demonstrator event I was reminded to not forget about some basic coloring techniques using classic tools. I found this to be so inspirational that I wanted to play with them all this week! Are you ready? Get out some of your maybe unused supplies and let’s put them back to work.
Here’s Your Homework 😉
- Watch the video tutorial for Coloring Techniques – Papercraftign Playdate 174
- Download the free pdf to use a resource while you practice the techniques at home.
- Dig into your supply stash for some tools you may have forgotten about.
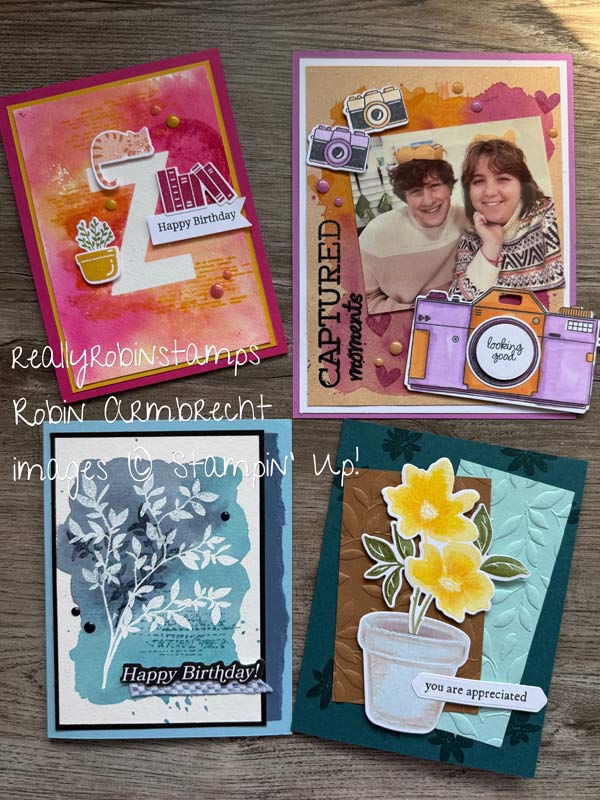
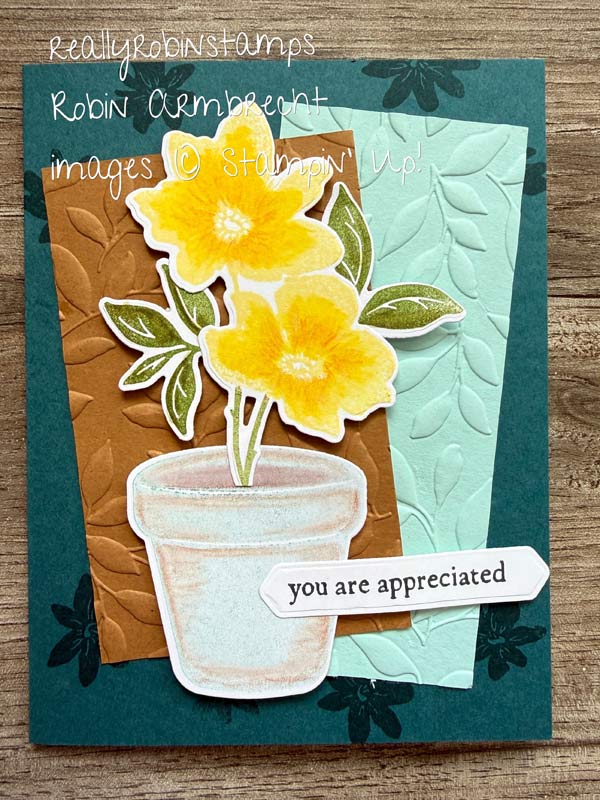
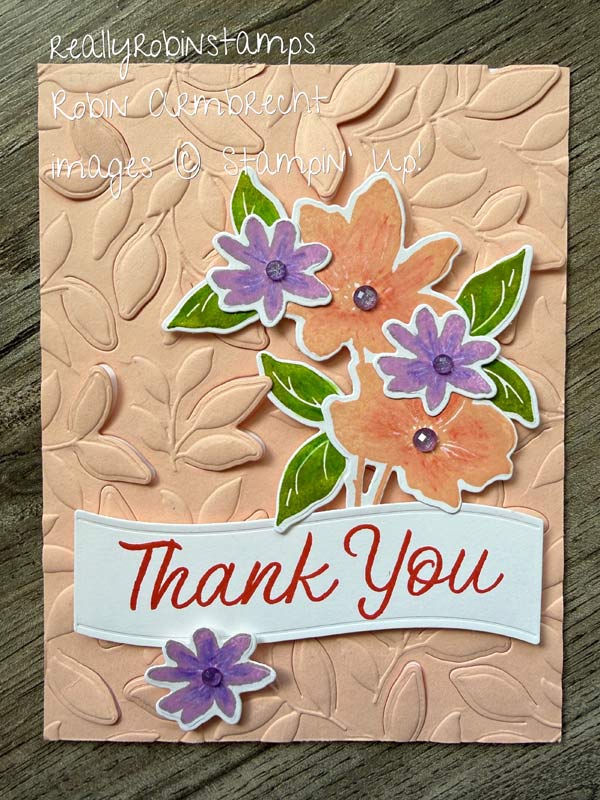
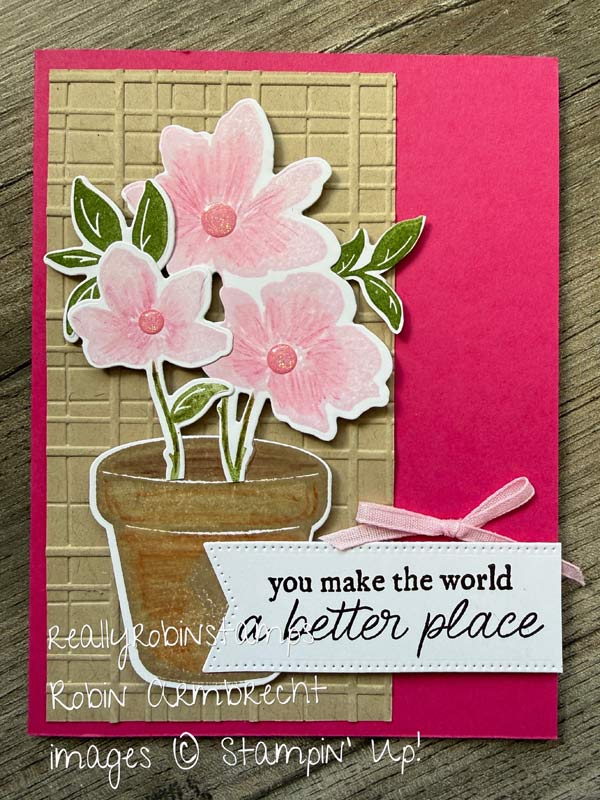
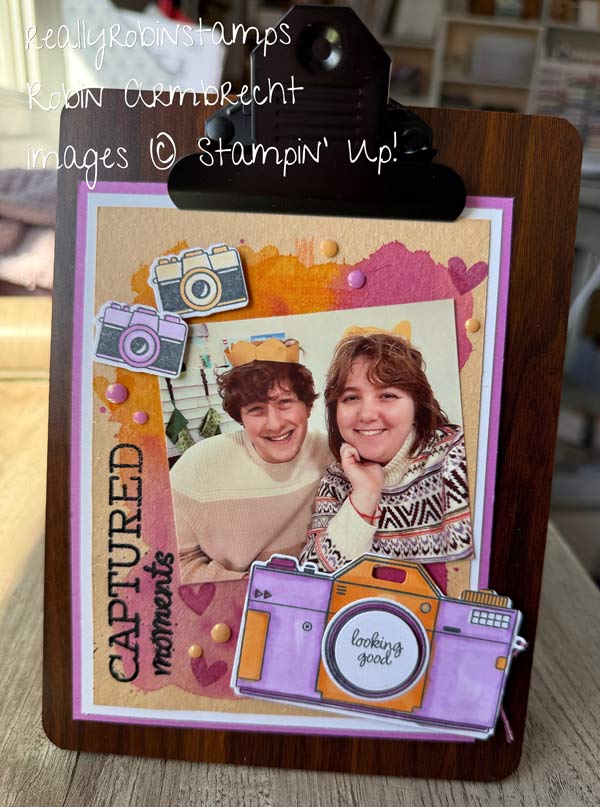
Technique #1 – Combined Detail Coloring
- Stamp image in Classic inks on Basic White cardstock.
- Apply details and shading using Watercolor Pencils.
- Use Blender Pens to make the pencil marks smooth (or not!).
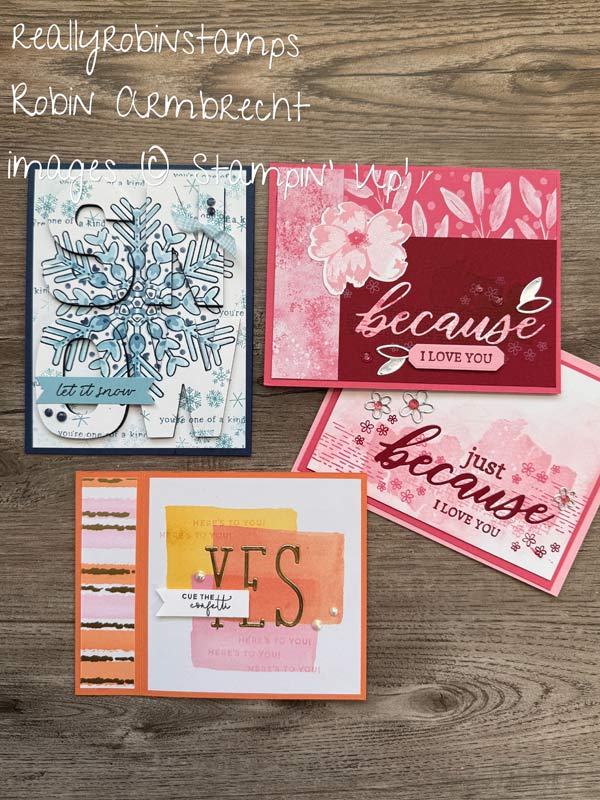
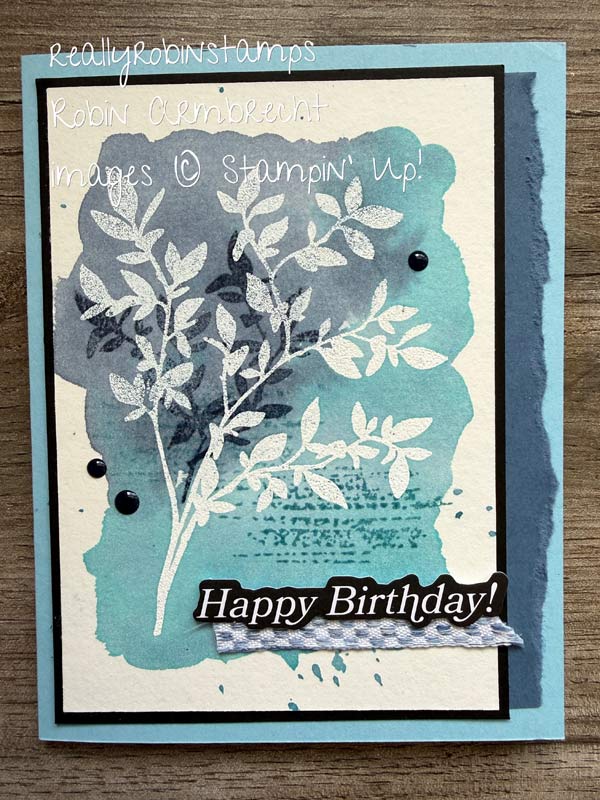
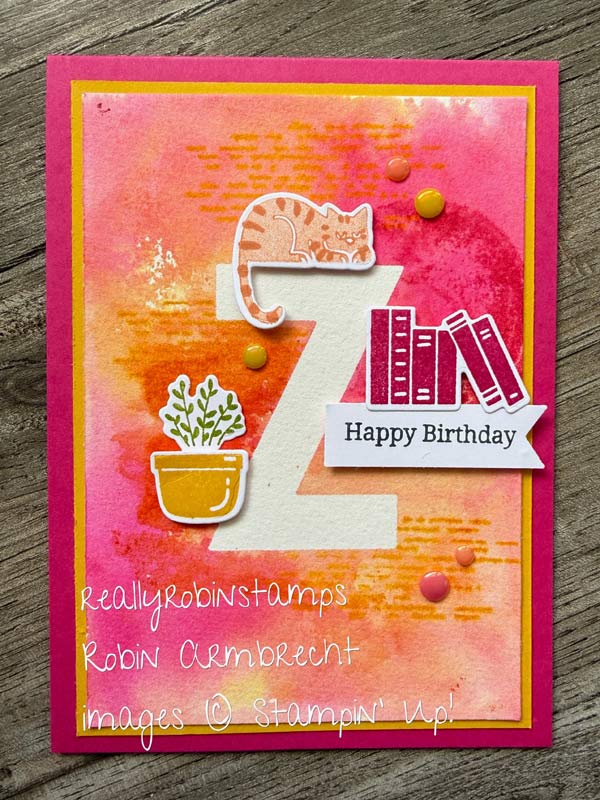
Technique #2 – Watercolor Emboss Resist
- Stamp image in Versamark ink on Watercolor Paper.
- Cover with White (or Clear) embossing powder and heat set.
- Create a pool of ink inside ink pad lid or on a separate dish.
- Use Water Painters to watercolor over embossed image.
- Dab excess pooled ink with tissue and let air dry or carefully heat set.
- Add stamped images over embosses area
- Use tissue to wipe ink off of embossed area.
- REVERSE Method: Make the watercolor background first. Let dry. Emboss over the top.
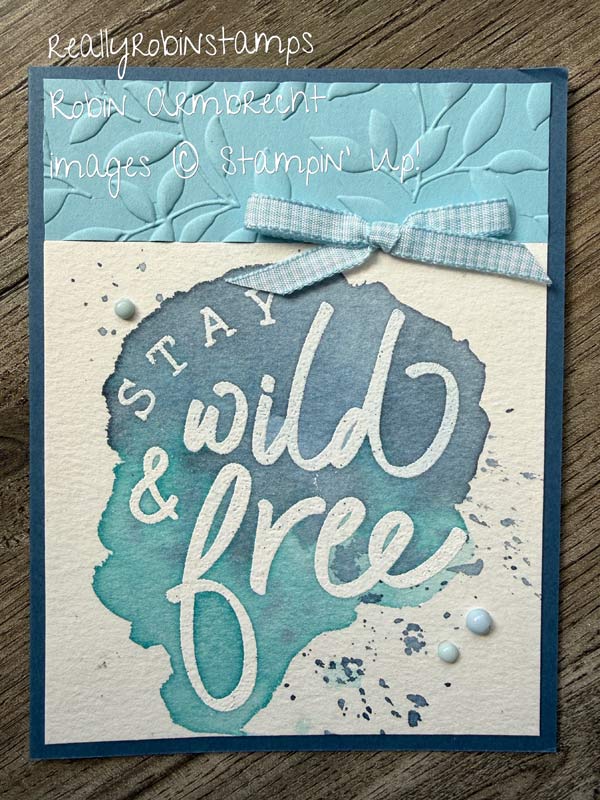

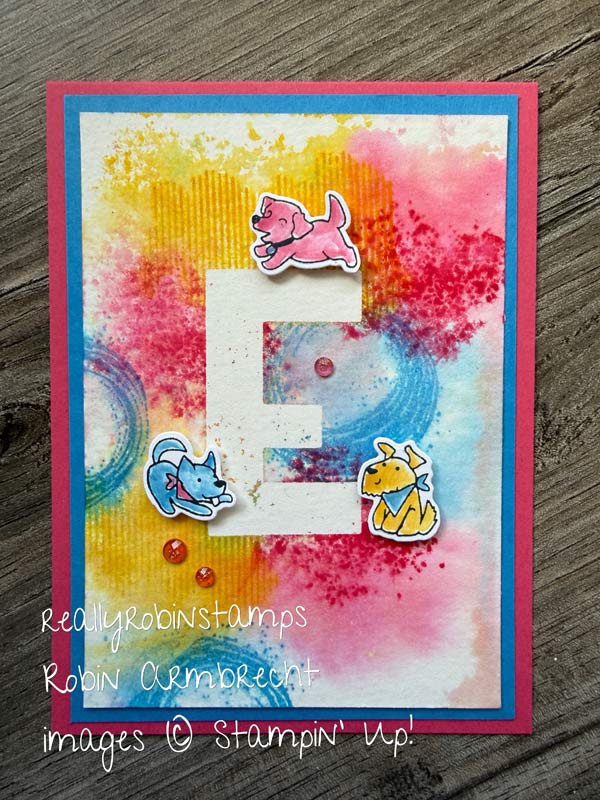
Technique #3 – Ink Smooshing
- Apply 2-3 colors of ink to a plastic or glass surface (wax paper, acetate, ziplock bag, etc) creating a random pattern or use stamps to create the patterns.
- Spritz with a fine mist of water until the ink is very wet and starts to run together.
- Lay the watercolor paper face down on top of the ink and let it sit for a minute soaking up the ink & water.
- Gently lift up and blot large drips with a paper towel. Let dry or use heat tool to speed up the process.
- Use the watercolored paper as a background or backdrop for some collage or a focal point. Add additional stamped images to watercolored background.
- Optional (shown in photos below): Cut out an alphabet letter or shape out of masking paper and add to watercolor paper first, then do smooshing technique, then remove mask.
Product List
![Paradise Garden Bundle (English) [ 167121 ]](https://assets1.tamsnetwork.com/images/EC042017NF/167121s.jpg "Paradise Garden Bundle (English) [ 167121 ]")
|
![Help Me Grow Bundle (English) [ 167167 ]](https://assets1.tamsnetwork.com/images/EC042017NF/167167s.jpg "Help Me Grow Bundle (English) [ 167167 ]")
|
![Cutest Crew Bundle (English) [ 167149 ]](https://assets1.tamsnetwork.com/images/EC042017NF/167149s.jpg "Cutest Crew Bundle (English) [ 167149 ]")
|
![On Display Bundle (English) [ 167306 ]](https://assets1.tamsnetwork.com/images/EC042017NF/167306s.jpg "On Display Bundle (English) [ 167306 ]")
|
|
![Party Alphabet Dies [ 165263 ]](https://assets1.tamsnetwork.com/images/EC042017NF/165263s.jpg "Party Alphabet Dies [ 165263 ]")
|
![Capturing Smiles Bundle (English) [ 167133 ]](https://assets1.tamsnetwork.com/images/EC042017NF/167133s.jpg "Capturing Smiles Bundle (English) [ 167133 ]")
|
![Nature's Symphony Bundle (English) [ 166926 ]](https://assets1.tamsnetwork.com/images/EC042017NF/166926s.jpg "Nature's Symphony Bundle (English) [ 166926 ]")
|
||
![Stampin' Spritzer [ 126185 ]](https://assets1.tamsnetwork.com/images/EC042017NF/126185s.jpg "Stampin' Spritzer [ 126185 ]")
|
![Water Painters [ 168253 ]](https://assets1.tamsnetwork.com/images/EC042017NF/168253s.jpg "Water Painters [ 168253 ]")
|
![Fluid 100 Watercolor Paper [ 149612 ]](https://assets1.tamsnetwork.com/images/EC042017NF/149612s.jpg "Fluid 100 Watercolor Paper [ 149612 ]")
|
||
![Watercolor Pencils Assortment 2 [ 149014 ]](https://assets1.tamsnetwork.com/images/EC042017NF/149014s.jpg "Watercolor Pencils Assortment 2 [ 149014 ]")
|
![Watercolor Pencils Assortment 1 [ 161700 ]](https://assets1.tamsnetwork.com/images/EC042017NF/161700s.jpg "Watercolor Pencils Assortment 1 [ 161700 ]")
|
![Stampin' Brayer [ 162936 ]](https://assets1.tamsnetwork.com/images/EC042017NF/162936s.jpg "Stampin' Brayer [ 162936 ]")
|
![Blender Pens [ 102845 ]](https://assets1.tamsnetwork.com/images/EC042017NF/102845s.jpg "Blender Pens [ 102845 ]")
|
![Paradise Garden Hybrid Embossing Folder [ 167120 ]](https://assets1.tamsnetwork.com/images/EC042017NF/167120s.jpg "Paradise Garden Hybrid Embossing Folder [ 167120 ]")
![Exploring Nature Photopolymer Stamp Set (English) [ 166913 ]](https://assets1.tamsnetwork.com/images/EC042017NF/166913s.jpg "Exploring Nature Photopolymer Stamp Set (English) [ 166913 ]")
![Swirled Designs Photopolymer Stamp Set [ 167030 ]](https://assets1.tamsnetwork.com/images/EC042017NF/167030s.jpg "Swirled Designs Photopolymer Stamp Set [ 167030 ]")
![Stampin' Glass Mat Studio (Imperial) [ 163987 ]](https://assets1.tamsnetwork.com/images/EC042017NF/163987s.jpg "Stampin' Glass Mat Studio (Imperial) [ 163987 ]")
![White Willow 12" X 12" (30.5 X 30.5 Cm) Cardstock [ 166703 ]](https://assets1.tamsnetwork.com/images/EC042017NF/166703s.jpg "White Willow 12\" X 12\" (30.5 X 30.5 Cm) Cardstock [ 166703 ]")
![Natural Hues 12" X 12" (30.5 X 30.5 Cm) Textured Specialty Paper [ 166929 ]](https://assets1.tamsnetwork.com/images/EC042017NF/166929s.jpg "Natural Hues 12\" X 12\" (30.5 X 30.5 Cm) Textured Specialty Paper [ 166929 ]")
I hope that you have remembered a few older color techniques that you forgot about, or maybe something new that you want to try. I challenge you to search your stash for your watercolor pencils, blender pens, and any other tools you haven’t used in awhile and start playing!