
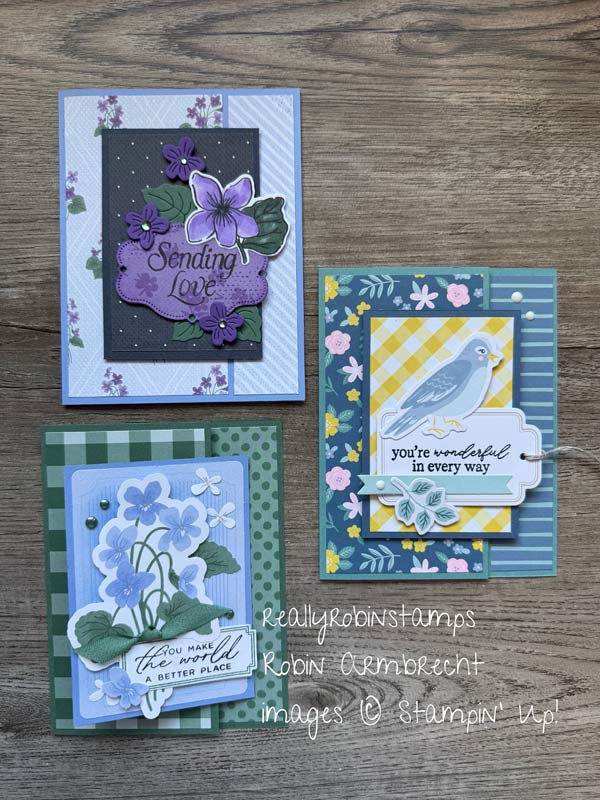
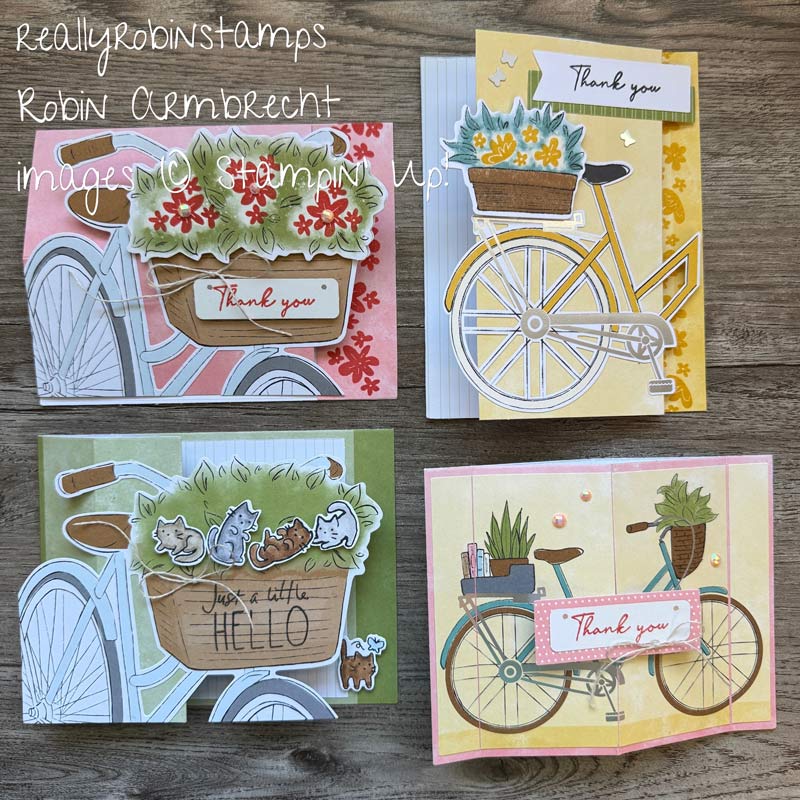
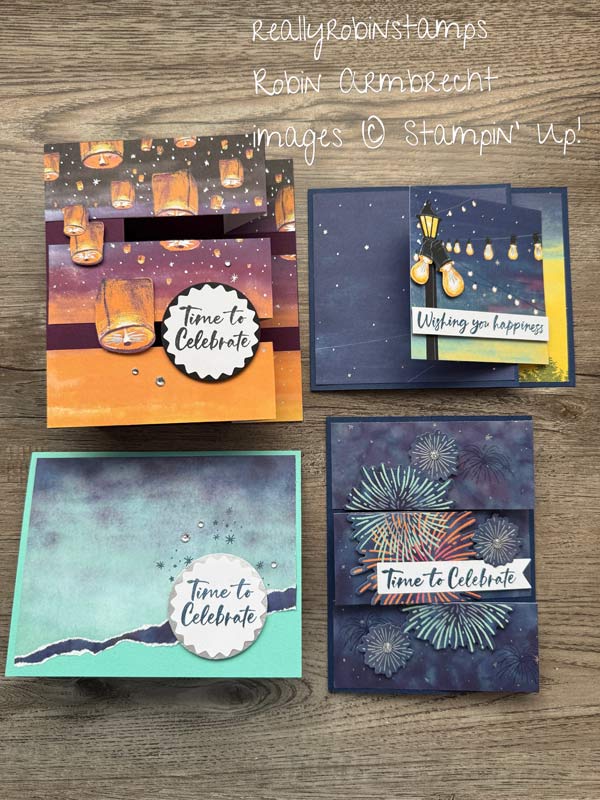
Happy new Mini Catalog week! I’m excited to share a new fun fold card with you. With all the brand new packages of Designer Series Papers being released this week I wanted to find a card design that would showcase coordinating pattern papers, and get to know all the new paper packs. I found some inspiration from fellow Stampin’ Up! Demonstator, Julie Beltramo. (Check out her blog post to see her card!)
This fun fold combines the features of two easy fun folds into one amazingly easy card. It has the features of both a book-binding card and a Z-fold card. I decided to call it the One, Two, Three, Z-Fold Card because it uses 3 pieces of Designer Series Paper measuring 1″ x 4″, 2″ x 4″ and 3″ x 4″. What you will love about this design is how easy and fun it is to make! Let’s get started.


Download the pdf directions to use with your own stash of supplies, and watch my video tutorial to see how this fun fold gets put together plus see a lot of new products from the Jan-Apr Mini Catalog!
Supplies to Make the One, Two, Three, Z-Fold Card
- 4-1/4” x 11” cardstock for card base
- 4-1/4” x 3-1/4” cardstock for card front
- 1” x 4” Designer Series Paper pattern #1
- 2” x 4” Designer Series Paper pattern #2
- 3” x 4” Designer Series Paper pattern #3
- 2” x 4” Basic White cardstock for inside
- 2” x 4” Designer Series Paper pattern #4 (optional)


Directions
- Score along the 11” side of the 4-1/4” x 11” cardstock at 2-1/8”, 4-1/4” and 5-1/2” from the left side. Fold in half on the 5-1/2” score line then fold back on the 4-1/4” and 2-1/8” score lines to create the book binding feature and the Z-fold.
- Create the book-binding feature first. Add adhesive to the space between the 5-1/2” and 4-1/4” score lines and adhere to the inside of the card.
- Attach the 1” x 4” piece of DSP on the outside left edge along the book-binding feature.
- Attach the 2” x 4” piece of DSP on the right edge of the inside of the card.
- Attach the 3” x 4” piece of DSP onto the 4-1/4” x 3-1/4” piece of cardstock.
- Fold bad the Z-fold feature and add adhesive to top panel. Center the 3-1/4” x 4-1/4” layered cardstock piece over the adhesive and mount to Z-fold feature. Note: This cardstock piece is centered over the z-fold, NOT the card front. It will be offset on the card front so that you see less of the left DSP and more of the right DSP.
- Attach the 2” x 4” piece of Basic White in the inside butting up next to the 2” x 4” piece of DSP.


Try the 1, 2, 3, Z-Fold with ANY Designer Series Paper


These fun folds are so much fun to make! I challenge you to create one with YOUR own paper and creative flair, then come and share your card in our Facebook Group: Robin’s Really Super Stampers. Happy creating!

Product List
 Designer Series Paper")
 Designer Series Paper")
 Specialty Designer Series Paper")
 Designer Series Paper")
 Designer Series Paper")
 Crinkle Ribbon")

")

")


")
")

I absolutely Love all of the cards that you made today.
Thank you very much, Barbara! This was a fun week of card making for me (but then MOST weeks are…)!! I hope you make one or two of these fun folds as well!
Loved this – perfect for an upcoming January birthday card.
Hi Mary! I was really happy to use this fun fold for my January birthday cards too! I may make my Valentine’s Day cards with the 1,2,3 Z-fold too! Thank you for your sweet comment!
Great fun fold ! Waiting on my order to be delivered. Thanks for sharing 💗
Hi Lynn! How exciting to have new products heading your way. I hope they arrived soon and you can do some “homework”!
You are so creative. You inspire me every time I watch one of your video’s. You also do a great job of teaching the procedure. Thank you for all you do to help others with their papercrafting.
Hi Diana and thank you very much for your words of encouragement. I’m thrilled you are excited about making cards and hope you make lots and lots in 2024. Thanks for leaving me your sweet comment!
Robin, the 1,2,3 Z fold cards were amazing! You share the best techniques for stepping up my card making. The idea of the pattern using copy paper to save and make again is brilliant. Thanks!
What color blue cardstock did you use for the lightening bolts on the “You’re a Rockstar” card? I really pops against the black and white DSP.
Hi Mickey! I used Tahitian Tide cardstock!
I made this 123 Z fold for my daughter’s January birthday.
All of your cards are so pretty. You have a good eye for design.
Hi Teresa! I bet she loved it! Thank you for your comment!
Love this card, and really enjoy watching and participating in your Play Dates.
Kathy, Brisbane, Australia.
Hi Kathy and thank you!
Oh my GOODNESS!!! I just found your site . I was going to clean my kitchen today but forget it. I’ve already been on your site for 3 hours and I’m not sure how to detach myself. You are so creative and have my creative mind going.
Your comment has made my entire day. Thank you for choosing me over cleaning the kitchen!!!!!!!
Your 1, 2, 3 Z-fold came out at the right time for me. With a couple of modifications, it was perfect for the two cards I used for workshops. Thank you for sharing! I was going to share a picture, but I can’t figure out how.
Hi Susan! I’m glad to know you enjoyed this fun fold and shared it with your customers!
Love them all!
Thank you, Carol!
Great cards, I love the fun fold.
Thank you, Cheri!
These are all such wonderful cards, Robin, and they do show off all the papers beautifully. I feel like I’ve made one of these while fixing up a mistake, so looking forward to trying your very clear instructions. Thanks so much for all the info.
Regards, Diane
Thank you, Diane! I’m happy you like this fun fold.
I really like these cards! Great tutorial! Is there a way to save this post to Pinterest?
Hi Barb! yes, when you hover over one of the pictures then a Pinterest pin should show up.