
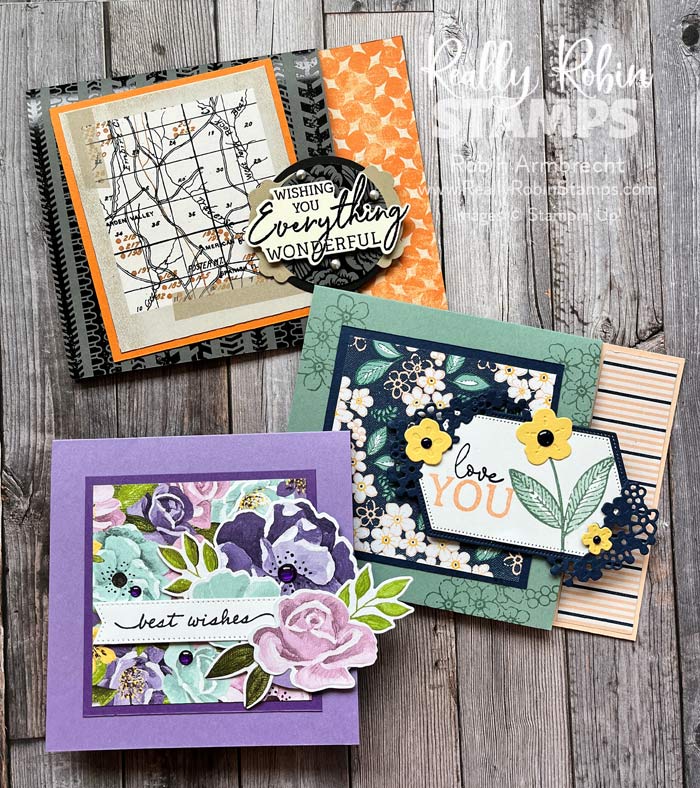
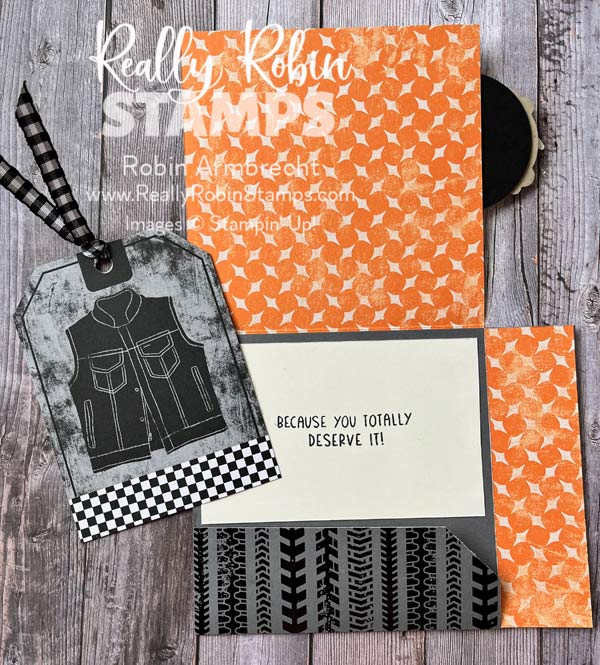
Today’s fun fold is one I created a few years ago and recently stumbled upon in my card stash. This pocket card design is perfect for giving gift cards for any occasion. It is a unique fun fold in that it is a square pocket card merged with an invitation sized layer which is why I named it the Vertizontal Pocket Card. Plus, made-up words are fun!
vertical square pocket card + horizontal layer = vertizontal pocket card 🤔
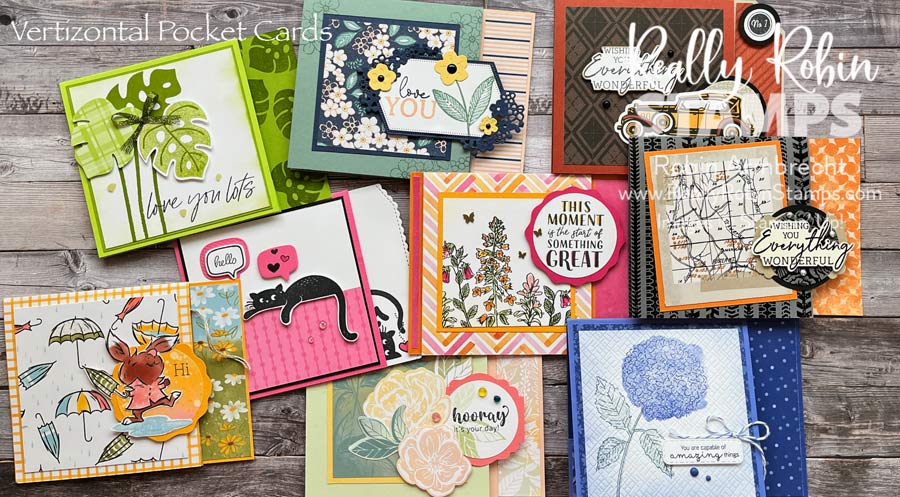
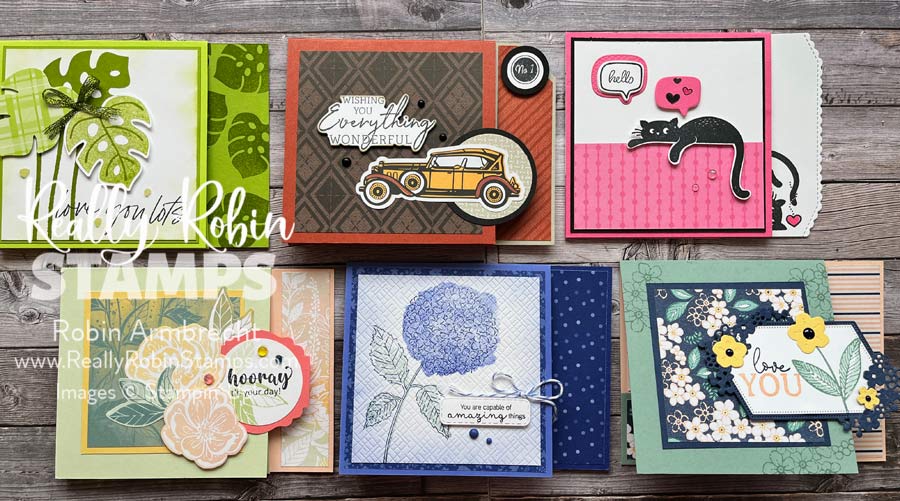
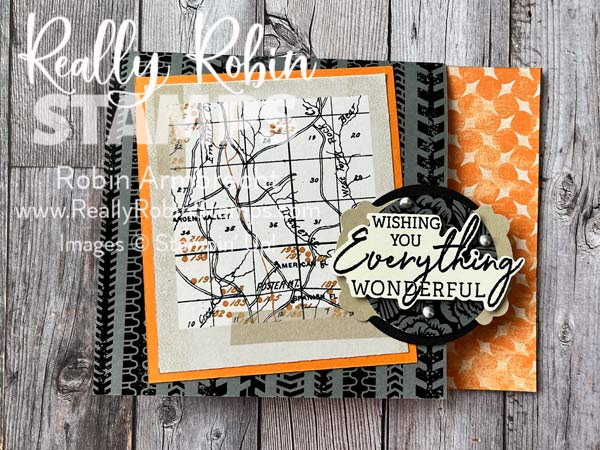
Watch my video tutorial to see these projects in action and follow along step by step. Download the free pdf for your files to recreate this project over and over! These are the 3 projects we created together in the video tutorial.
Papercrafting Playdate 86 – https://www.youtube.com/live/JNvaq3lBE8I?feature=share
Let’s begin with the (Vertical) Square Pocket Card. This is a refreshing change from the typical invitation-sized card because it is so nicely square! Even though it is a square card, it still fits inside our medium envelopes and requires no extra postage.
Supplies for Square Pocket Card
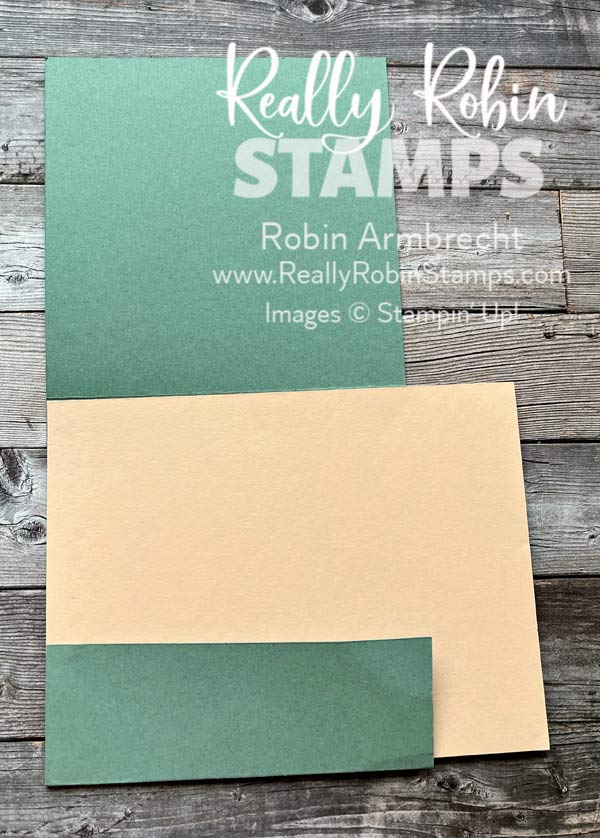
- 4-1/4” x 10” cardstock, scored at 4-1/4″ and 8-1/2″
- 1-1/4” x 4” DSP for pocket flap
- 3” x 3” DSP or Basic White cardstock
- 3-1/4” x 3-1/4” coordinating cardstock
- 2-1/4” x 4” Basic White for inside

Now let’s turn to the fun fold of the day, the Vertizontal Pocket Card, and learn how it is built onto the Square Pocket Card.
Supplies for the Vertizontal Pocket Card
- 4-1/4” x 10” cardstock, scored at 4-1/4″ and 8-1/2″
- 4-3/16” x 5-1/2” coordinating cardstock
- 1-1/4”* x 4” DSP for right edge
- 1-1/4” x 4” DSP for pocket flap
- 3” x 3” DSP or Basic White cardstock
- 3-1/4” x 3-1/4” coordinating cardstock
- 2-1/4” x 4” Basic White
- Pieces for a layered embellishment
- *Other Option: 1-1/8” x 4 for a precise fit.
Directions for Assembly
- Score along the 10” side of the cardstock at 1-1/2” and 5-3/4” (or 4-1/4” and 8-1/2”).
- Fold on the score lines creating a square card with a pocket on the inside. The 1-1/2” score line will create the pocket.
- Adhere the 1-1/4” x 4”* piece of DSP along the right edge of the 4-3/16” x 5-1/2” piece of CS leaving a border.
- Attach the 4-3/16” x 5-1/2” piece of CS inside the 4-1/4” x 10” piece of CS in the middle section. Align the left edge of the 4-3/16” x 5-1/2” piece with the inside of the square card. It will stick out on the right side 1-1/2”.
- Create the inside pocket by adhering the left edge of the pocket to the 4-3/16” x 5-1/2” piece.
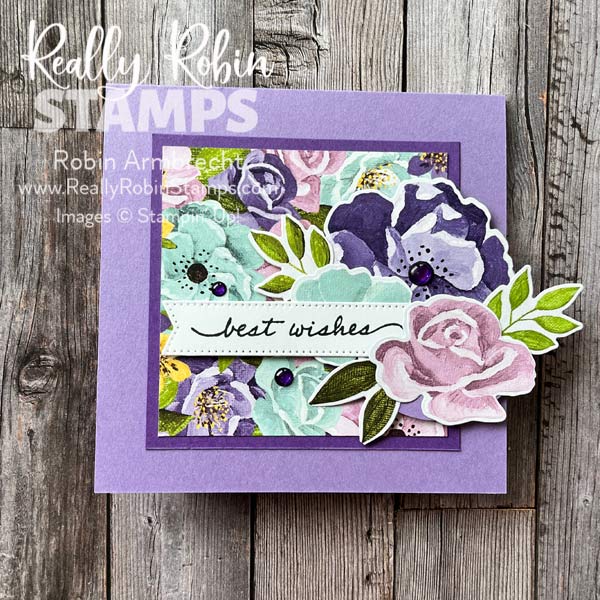
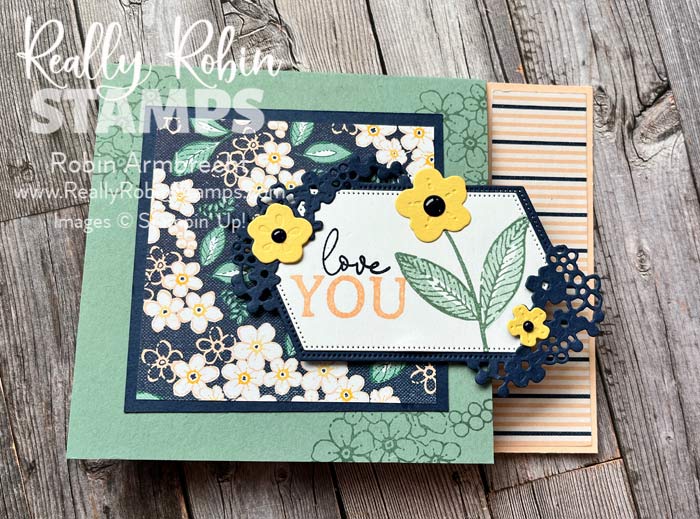
- Layer the 3” x 3” DSP onto the 3-1/4” x 3-1/4” cardstock and attach to the card front.
- Create a focal point cluster with a greeting and accents. Attach the cluster to the card front, overlapping the right edge of the square card front over the 1-1/4” x 4” DSP.

There are lots of ways to change up the Vertizontal Pocket Card and make it just right for your specific needs.
It is also fun to create the Vertizontal Pocket Card with Designer Series Paper. The process works the same way and adds some 2-sided patterned fun!
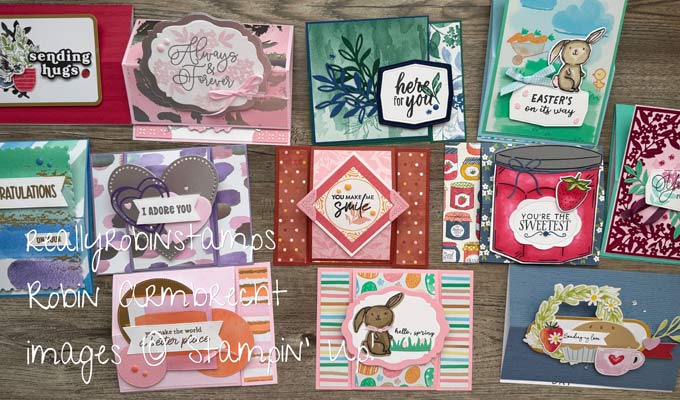
Ready to try a Vertizontal Pocket Card? I sure hope you can think of some friends and family who might need a card + gift card from you in the future! I hope you enjoy this fun fold design and make lots of them!

Product List

|
|||

|
 Circle Punch")
|
 Circle Punch")
|

|
 Designer Series Paper")
 Designer Series Paper")
 Specialty Designer Series Paper")
")
")
")
")


Hi Robin, do you send your stuff in Canada?
Hi Lina! Can you clarify your question please? Do you mean can I sell you stuff if you are in Canada? If you live in Canada you have to purchase from a Canadian demonstrator – there are many amazing ones!
I have just recently begun watching your videos & really enjoying them. I would appreciate being on your email list.
Janice Gandt
Central Texas
Hi Janice! Thank you so much for your message! There is a link/box on the right sidebar where you can sign up for my email list. I look forward to communicating with you!
I love all of your cards. So creative you are. It’s mind blowing!
hi Robin
I clicked on the link for this video but I still done see download for your combinations that you came up with for the circles and different labels. can you provide the direct link? I’m sorry I have hard time finding stuff.
Hi Gwen! I sent you an email.