
Let’s add another “one sheet wonder” (or 2!!!) to our idea bank! I have two different OSWs templates for you to try. Each template uses a piece of 6″ x 6″ Designer Series Paper, and creates four card fronts for notecard-sized cards. One of the templates is created by me, and the other was inspired by fellow demonstrator, Linda Dalke, who created this One Sheet Wonder (I really love all the quadrangle shapes she created and how they create interesting card fronts! Thank you Linda!). Both template versions of the 6″x6″ One Sheet Wonder for Notecards are in the pdf. All supplies used for the projects are listed below. Also find a list of all my favorite One Sheet Wonder Templates below!

Here’s Your Homework 😉
- Watch the video tutorial to learn how to create with each of these templates – Papercrafting Playdate 143.
- Download the pdf to use as a reference while you are creating.
- Grab some 6″ x 6″ Designer Series Paper and start creating some adorable notecards!
6″ x 6″ One Sheet Wonder for Notecards
Before you begin creating with this OSW, choose your Designer Series Paper. You will want to choose a piece where the patterns on the front and back sides coordinate with each other.
Supplies
- 4 notecard bases (5-1/2” x 8-1/2”, scored at 4-1/4”)
- 4 – envelopes (A2 size)
- 6” x 6” piece of double-sided patterned paper with coordinating sides
- 4 punched or die cut sentiments for card fronts
- Embellishments of choice
Directions
- Measure and cut in half at 3” from top bottom of the 6 “x 6” DSP first. Take the left half, rotate 90°, and cut at 3”. Take the right half, rotate 90°, and cut at 4-1/2”. You now have four pieces.
- Next, make the measurements and cuts that are inside each of the four pieces.
- For the first 3” square: measure 1” down from top right corner and 1” across from bottom left corner and cut diagonally between the two marks.
- For the second 3” square: Cut 3 strips that are ½” x 3”each leaving a 1-1/2”x 3” piece.
- For the large rectangle: measure and cut at 2-1/2” (along the 3” side) making a 2-1/2” x 4-1/2” piece and a 1” x 4-1/2”.
- The last piece has no cutting.
- As you cut you will sort the pieces into piles according to the number of the card they belong to. When you begin to assemble the card fronts you will flip one or more of the pieces created to the opposite pattern.
- Arrange and attach the pieces fronts of the notecards. Add a punched or die cut focal point with sentiment. Embellish as desired.


Once you get used to cutting and arranging these pieces into card fronts, you will be able to make adjustments to fit the needs of your paper and your greetings. Get creative!


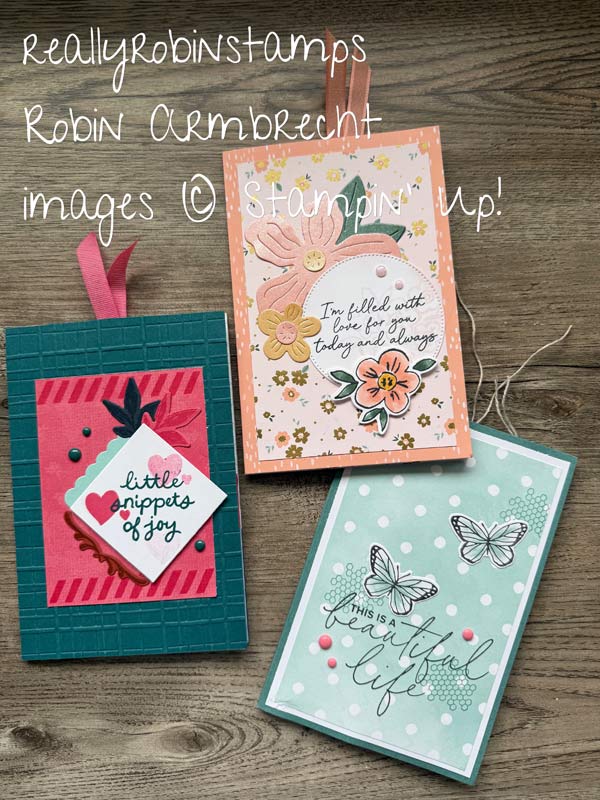
Cards Made with Linda Dalke’s 6×6 OSW


Now it’s your turn to start creating using the new 6″ x 6″ One Sheet Wonder for Notecards templates! I can’t wait to see what you come up with. -Robin
Love One Sheet Wonders? Here are links to the other OSW templates that I have created over the years:
- OSW for Notecards PP 64
- 6×6 Double One Sheet Wonder PP21
- Amazing OSW PP2
- Pick 6 Wonder Template PP107
- 12×12 One Sheet Wonder PP100

Product List

|

|
||

|
|||

|

|

|
 Designer Series Paper")
")
")
")
 Designer Series Paper")
 Designer Series Paper")
 Designer Series Paper")
 Designer Series Paper")
 Designer Series Paper")


Certainly lots of choices
Thank you oh so much
Diane Duguay
Thank you, Diane! I’m happy you enjoyed this tutorial!