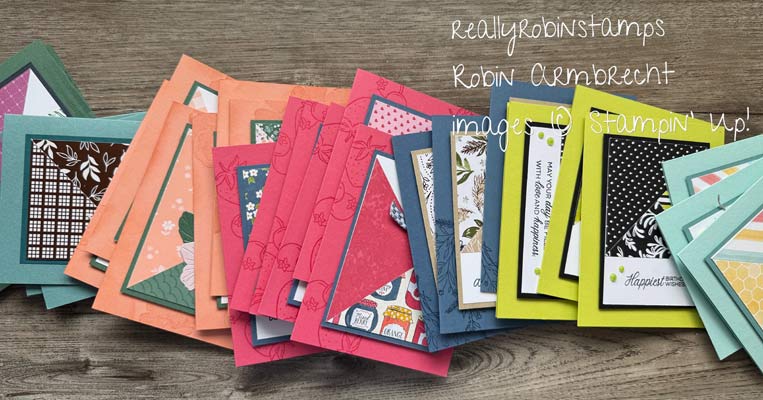
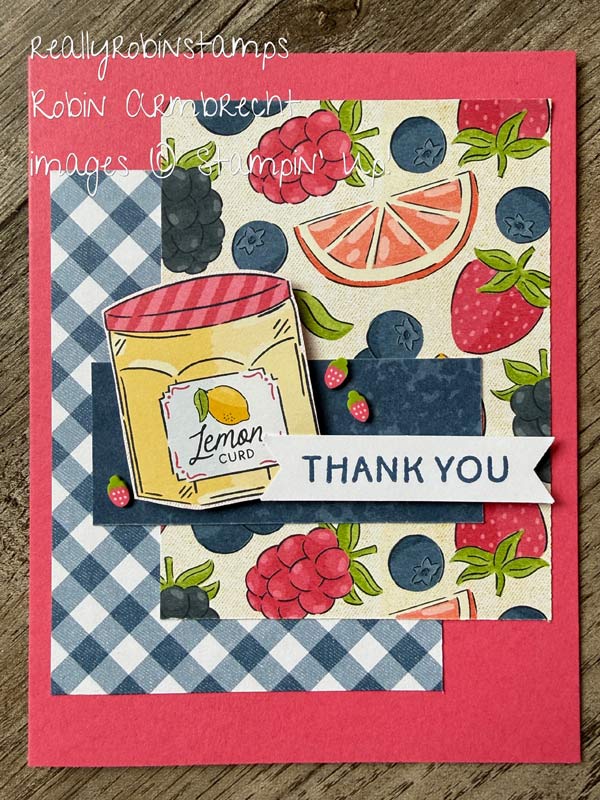
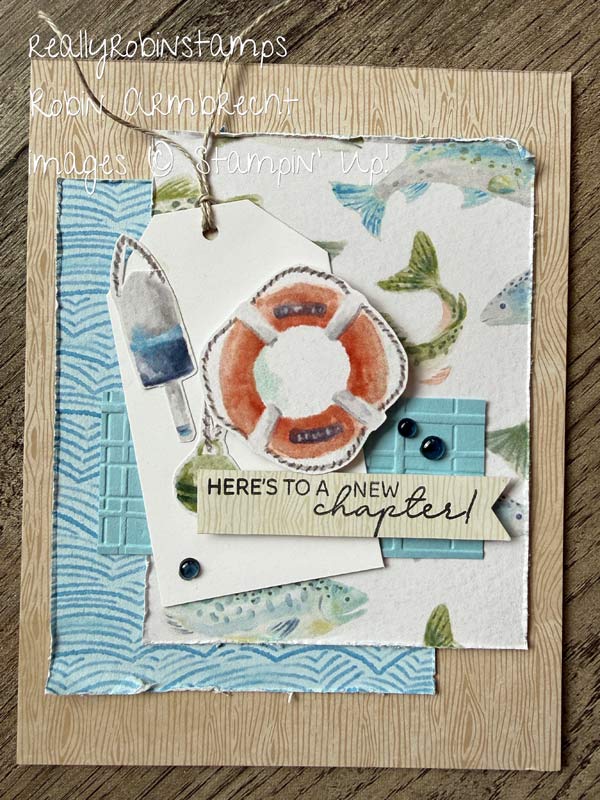
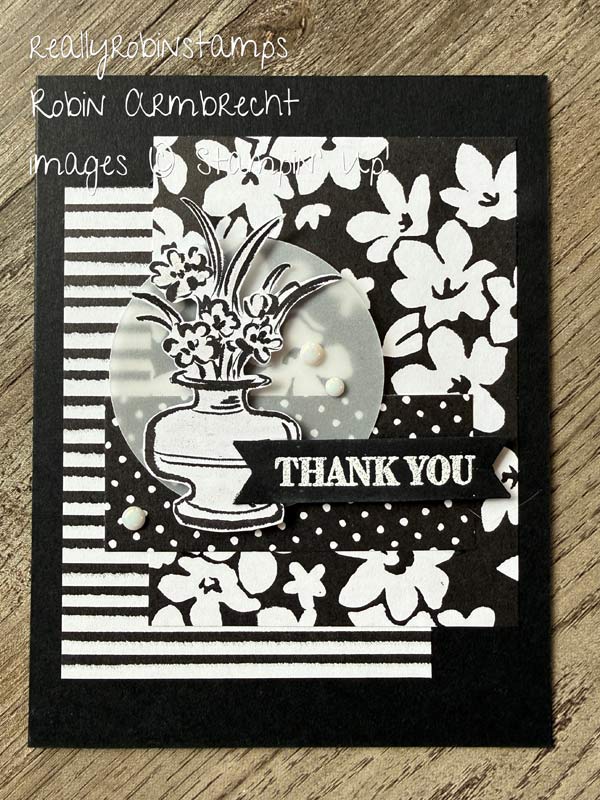
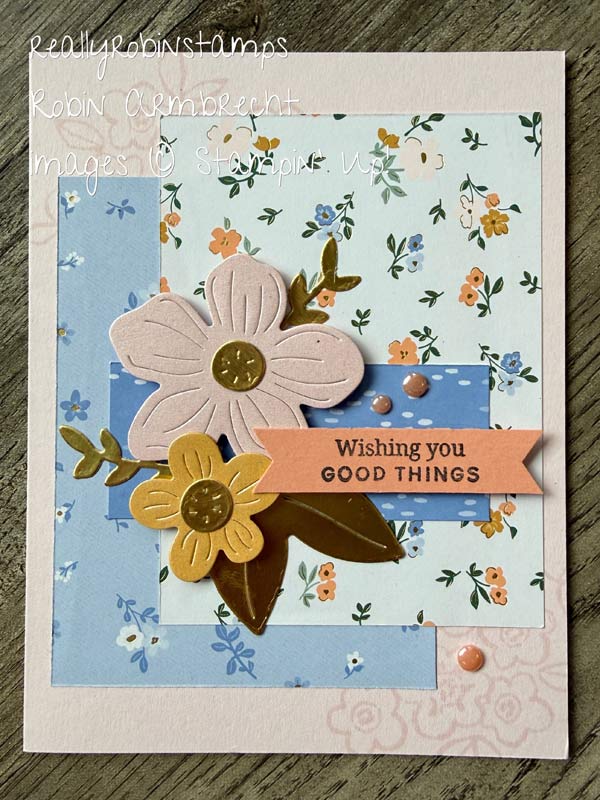
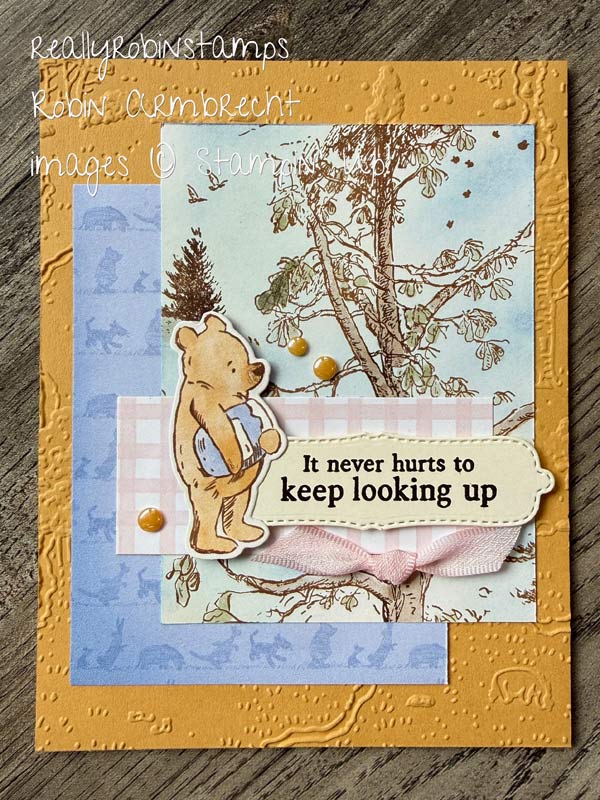
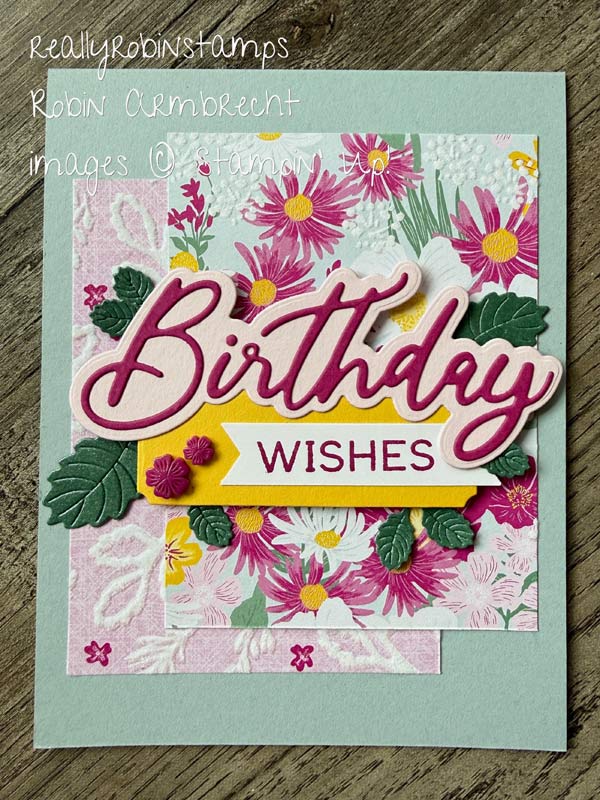
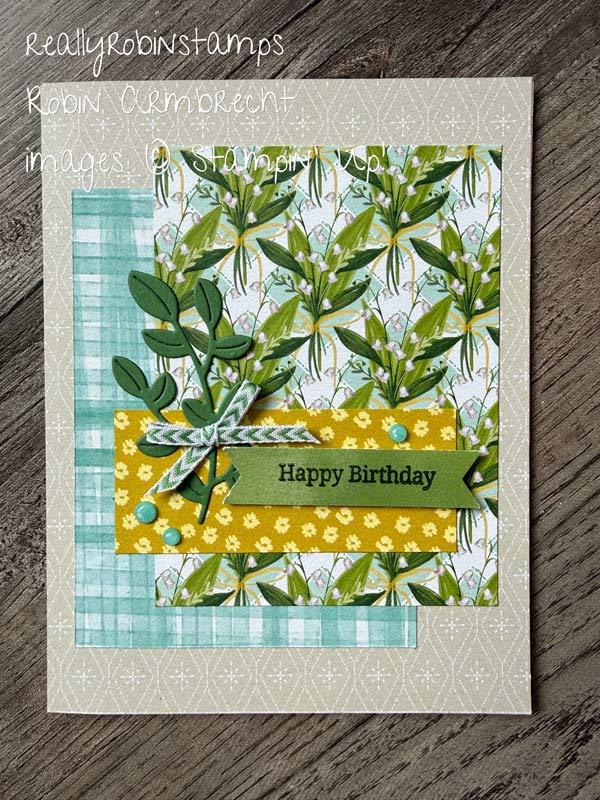
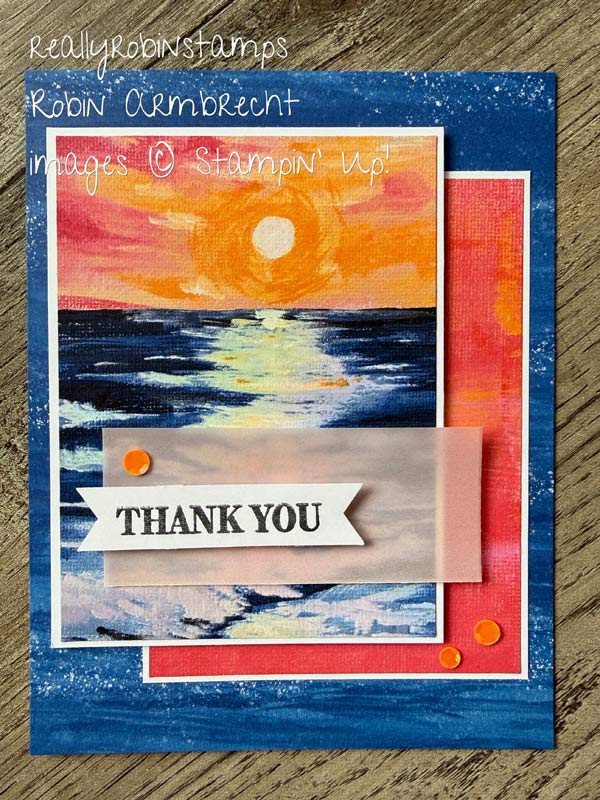
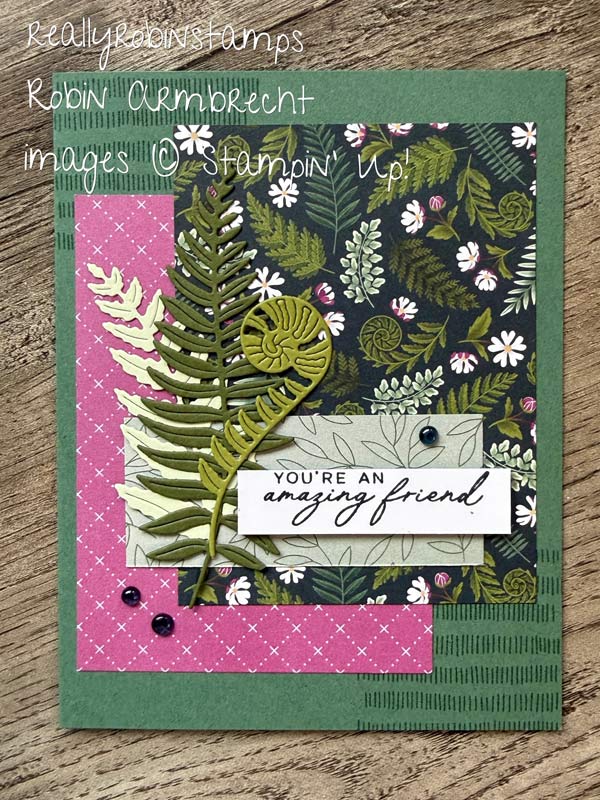
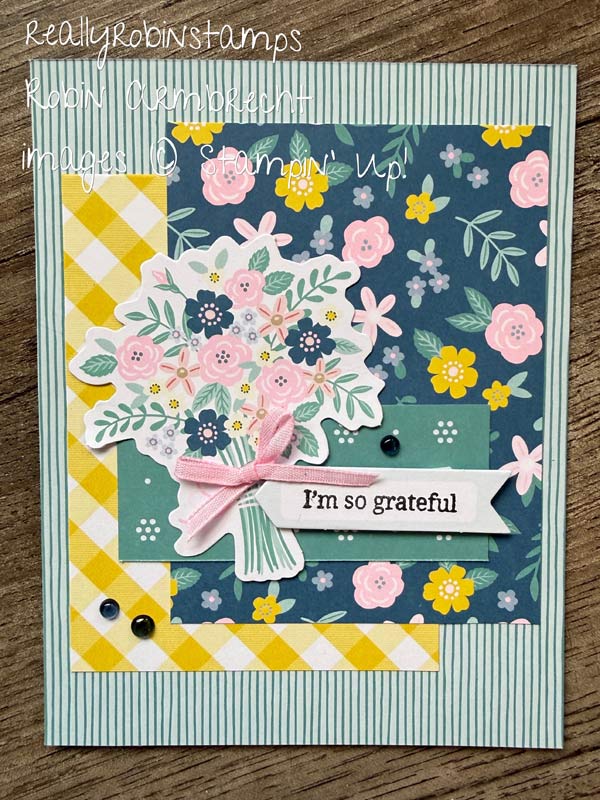
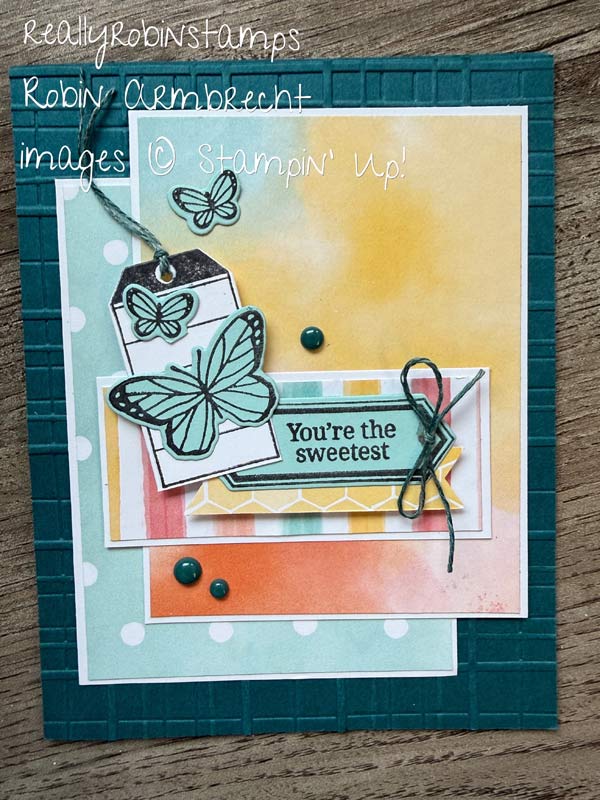
This month’s card template is so simple and stunning. Using three coordinating Designer Series Paper patterns that overlap each other in a symmetrical way, Card Template 36, Overlapped Symmetry, comes together so easily. My inspiration for Card Template 36 comes from a card swap I received at the Onstage demonstrator event I attended. Janet Baker and her daughter, Jessica Wilstead (https://www.facebook.com/snippetsandpretties) shared their swap with me and I was immediately in love with the layout. Once I started using Card Template 36 with my new packs of Designer Series Papers I couldn’t stop designing with this layout! I hope you love it too.

Here’s Your Homework 😉
- Watch the video tutorial, Papercrafting Playdate 177, to learn how to get the most out of Card Template 36.
- Download the free pdf to use as a resource while you are creating!
- Grab your favorite package of coordinated pattern paper and start creating.
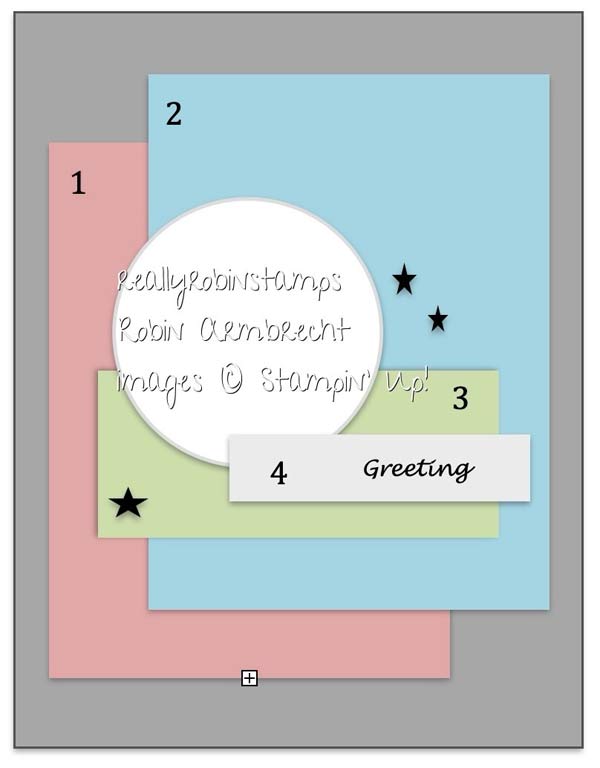
Measurements & Directions
- 5 1/2” x 8 1/2” card base
- 3” x 4” (1 & 2) DSP
- 1-1/4” x 3” (3) DSP or cardstock
- 1/2” x 2-1/4” (4) cardstock
- 3 embellishments
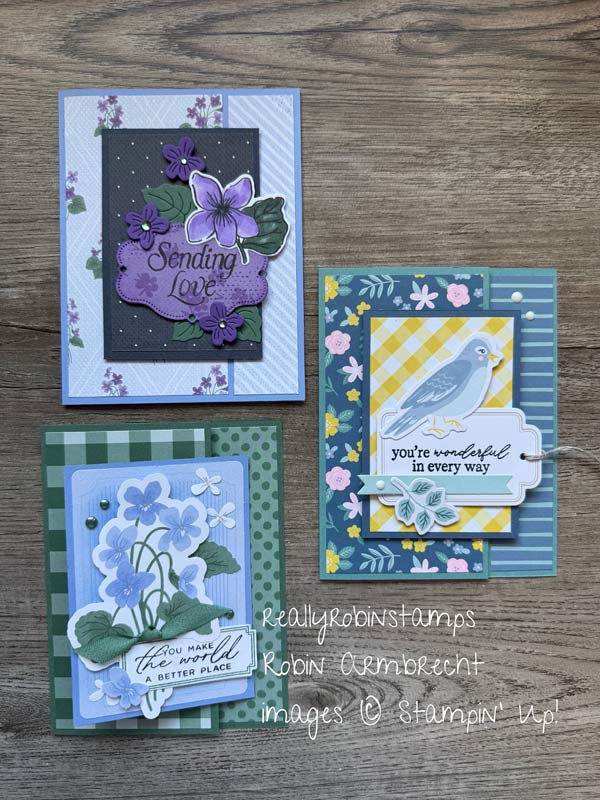
Tips and Options for Card Template 36
- Choose 2 coordinating DSP patterns that compliment each other for the 3” x 4” pieces.
- The focal point represented by the white circle can be anything like die cuts, decorative tag, or flowers.
- Optional: Cover the card front with a 4-1/4 x 5-1/2” piece of subtle coordinating DSP or an embossed piece of cardstock.
- Optional: Stamp a coordinating background image in the top left and bottom right corners of the card front.
- (Optional Step) Attach the 4-1/4” x 5-1/2” piece of cardstock or DSP to the card front. This piece can be a subtle coordinating piece of pattern paper or an embossed piece of cardstock.
- Adhere DSP #1 1/4” from the left (fold) edge and 1/2” from the bottom edge of the card front.
- Adhere DSP #2 1/4” from the right edge and 1/2” from the top edge of the card front, overlapping DSP #1. (Ahh, happy symmetry)
- Adhere DSP #3 (or cardstock) approximately 1-1/2 to 1-3/4” from the bottom edge of the card front and centered over the two 3” x 4” pieces of DSP. There will be 3/8” from the edges of DSP #3 to the edges of DSPs 1&2.
- Pop-up the focal point image or shape and layer over the overlapping rectangles pieces where they meet at the top left corner of DSP #3.
- Stamp a greeting on the 1/2” x 2-1/4” piece of cardstock. (Optional) Snip the ends of this piece to create a banner shape. Pop up the middle and right side of this piece and adhere over DSP #3 and overlapping your focal point. Use regular adhesive on the left side where it attaches to the focal point.
- Add three embellishments in the empty spaces creating a long skinny triangle.
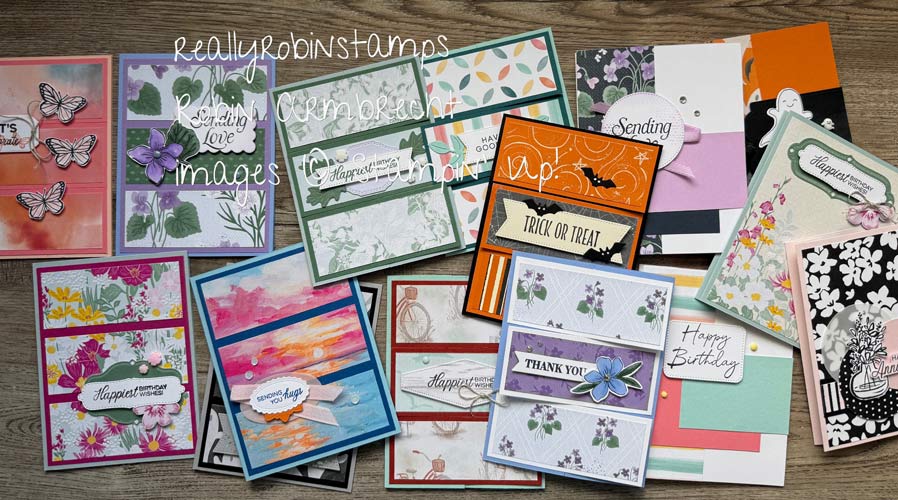
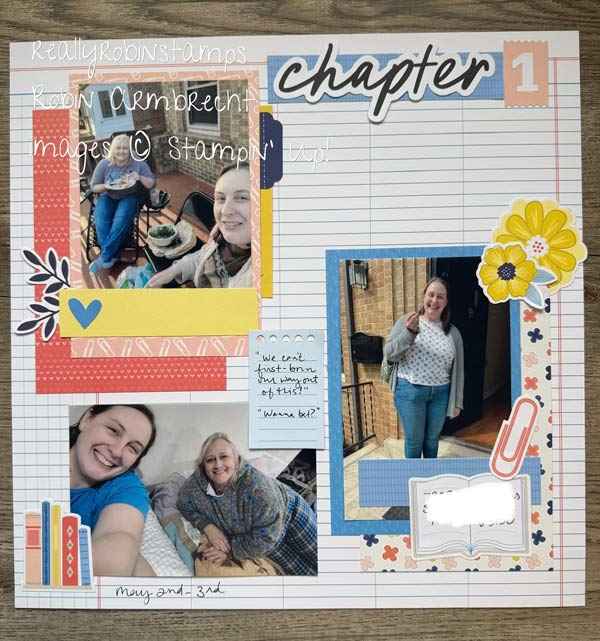
When you have a good template don’t forget you can apply it to a scrapbook page too! I used the Sunniest Days Scrapbook Kit and applied the formula of Card Template 35 to my page.
What do you think of Card Template 36, Overlapped Symmetry? Are you loving this simple design as much as me? I sure hope so! 😊 Now it is your turn to make one or a bunch of cards with this new layout! I can’t wait to see what you make.

![Fern & Flora Bundle (English) [ 167745 ]](https://assets1.tamsnetwork.com/images/EC042017NF/167745s.jpg "Fern & Flora Bundle (English) [ 167745 ]") | |||
![Bordered In Beauty Bundle [ 167557 ]](https://assets1.tamsnetwork.com/images/EC042017NF/167557s.jpg "Bordered In Beauty Bundle [ 167557 ]") |
![Paper Medley 12" X 12" (30.5 X 30.5 Cm) Mix In Designer Series Paper [ 167759 ]](https://assets1.tamsnetwork.com/images/EC042017NF/167759s.jpg "Paper Medley 12\" X 12\" (30.5 X 30.5 Cm) Mix In Designer Series Paper [ 167759 ]")
![Artisan Sketched Garden 12" X 12" (30.5 X 30.5 Cm) Designer Series Paper [ 167752 ]](https://assets1.tamsnetwork.com/images/EC042017NF/167752s.jpg "Artisan Sketched Garden 12\" X 12\" (30.5 X 30.5 Cm) Designer Series Paper [ 167752 ]")
![Waterside Retreat 12" X 12" (30.5 X 30.5 Cm) Designer Series Paper [ 167920 ]](https://assets1.tamsnetwork.com/images/EC042017NF/167920s.jpg "Waterside Retreat 12\" X 12\" (30.5 X 30.5 Cm) Designer Series Paper [ 167920 ]")
![Beautiful Ordinary Life 12" X 12" (30.5 X 30.5 Cm) Designer Series Paper [ 167553 ]](https://assets1.tamsnetwork.com/images/EC042017NF/167553s.jpg "Beautiful Ordinary Life 12\" X 12\" (30.5 X 30.5 Cm) Designer Series Paper [ 167553 ]")
![Valley In Bloom 12" X 12" (30.5 X 30.5 Cm) Designer Series Paper [ 167935 ]](https://assets1.tamsnetwork.com/images/EC042017NF/167935s.jpg "Valley In Bloom 12\" X 12\" (30.5 X 30.5 Cm) Designer Series Paper [ 167935 ]")
![Bloom Boutique 12" X 12" (30.5 X 30.5 Cm) Specialty Designer Series Paper [ 167637 ]](https://assets1.tamsnetwork.com/images/EC042017NF/167637s.jpg "Bloom Boutique 12\" X 12\" (30.5 X 30.5 Cm) Specialty Designer Series Paper [ 167637 ]")
![Velvet Meadow 12" X 12" (30.5 X 30.5 Cm) Specialty Designer Series Paper [ 167904 ]](https://assets1.tamsnetwork.com/images/EC042017NF/167904s.jpg "Velvet Meadow 12\" X 12\" (30.5 X 30.5 Cm) Specialty Designer Series Paper [ 167904 ]")
![Scenic Coast 6" X 6" (15.2 X 15.2 Cm) Specialty Designer Series Paper [ 167773 ]](https://assets1.tamsnetwork.com/images/EC042017NF/167773s.jpg "Scenic Coast 6\" X 6\" (15.2 X 15.2 Cm) Specialty Designer Series Paper [ 167773 ]")
![Moonlit Flora 12" X 12" (30.5 X 30.5 Cm) Designer Series Paper [ 167737 ]](https://assets1.tamsnetwork.com/images/EC042017NF/167737s.jpg "Moonlit Flora 12\" X 12\" (30.5 X 30.5 Cm) Designer Series Paper [ 167737 ]")
![Everyday Essentials Mix & Match 12" X 12" (30.5 X 30.5 Cm) Designer Series Paper [ 167702 ]](https://assets1.tamsnetwork.com/images/EC042017NF/167702s.jpg "Everyday Essentials Mix & Match 12\" X 12\" (30.5 X 30.5 Cm) Designer Series Paper [ 167702 ]")
![Silly Old Bear 12" X 12" (30.5 X 30.5 Cm) Designer Series Paper [ 167616 ]](https://assets1.tamsnetwork.com/images/EC042017NF/167616s.jpg "Silly Old Bear 12\" X 12\" (30.5 X 30.5 Cm) Designer Series Paper [ 167616 ]")
![Extraordinary Life Bundle (English) [ 167719 ]](https://assets1.tamsnetwork.com/images/EC042017NF/167719s.jpg "Extraordinary Life Bundle (English) [ 167719 ]")
![Meant For You Mix & Match Ephemera Pack [ 167700 ]](https://assets1.tamsnetwork.com/images/EC042017NF/167700s.jpg "Meant For You Mix & Match Ephemera Pack [ 167700 ]")