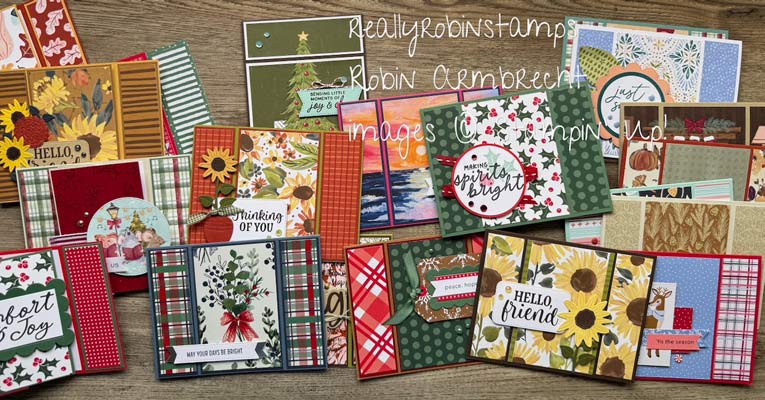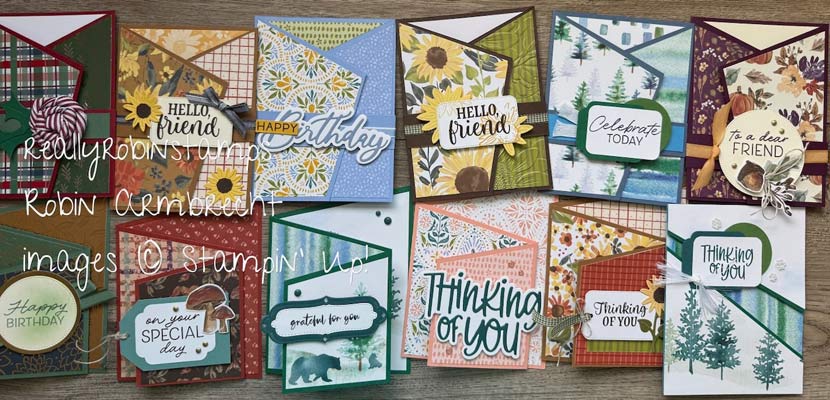
I hope you agree with me saying that we LOVE focal point clusters around here! While a focal point cluster (FPC) can be added to any basic card, a Center Step card is a terrific fun fold design to feature a FPC. There are two ways to create a Center Step card – Let me show you how!


Here’s Your Homework 😉
- Watch the video tutorial for Fall Focal Point Clusters on Center Step cards to see how they are created.
- Download the PDF to use while you are creating.
- Find some fall images and put together some stand-up cards!
Center Step Card
- 5-1/2” x 8-1/2” card base
- 3-1/4” x 3-1/4” coordinating cardstock (or 3-1/4” x 3-1/8”)
- 3” x 3” DSP (optional)
- 3/4” x 5-1/4” DSP
- 3/4” x 3” cardstock
- 3” x 5-1/4” Basic White cardstock for the inside

- Measure 1” from each edge (along the 8-1/2” side) and make a slit between 1” and 5-1/4”. Flip the cardstock over to the other side and make same slit on the other side. Turn the cardstock 90° and make 1” score lines at 1” , 2” and 5-1/4” between the edge of the cardstock and the cut line on both sides.
- 2. Score between the cut lines (slits) at 4-1/4”.
- 3. Fold the 1”, 4-1/4”, and 5-1/4” score lines into mountain folds. Fold the 2” score line into valley folds.
- 4. Layer and attach the squares to the center of the card.
- 5. Attach the piece of 3/4” x 5-1/4” DSP along the bottom front edge of the card from.
- 6. Attach the pieces of 3/4” x 3” cardstock to the shortened edges.


Faux Center Step Card
- 5-1/2” x 8-1/2” card base
- 8-1/2” x 3” mini card base – cardstock same as card base
- 5-1/4” x 2-3/4” DSP
- 5-1/4” x 3/4” DSP
- 2-3/4” x 4” DSP
- 3” x 5-1/4” Basic White cardstock for the inside

- Score the card base at 1”, 2” and 5-1/4”.
- Fold the 1” and 5-1/4” score lines into mountains and the 2” into a valley.
- Score the 8-1/2” x 3” mini card base at 4-1/4” and fold in half.
- Attach the 5-1/4” x 2-3/4” piece of DSP on the card base in the section between the 2” and 5-1/4” score lines.
- Attach the 5-1/4” x 3/4” piece of DSP on the section between the 1” and 2” score lines.
- Attach the 3” x 8-1/2” mini card base to the 1” section, meeting the bottom edge in the front, and attach again on the back side of the card base along the bottom edge.
- Attach the 2-3/4” x 4” piece of DSP to the front of the mini card base.
- Add focal point to the card front and the piece of Basic White on the inside.


Now it’s your turn to find search for fall themed images, dies or punches in your stash to help you create focal points to add to this new sweet fun fold card!

Product List
![Fun For Fall Bundle (English) [ 168139 ]](https://assets1.tamsnetwork.com/images/EC042017NF/168139s.jpg "Fun For Fall Bundle (English) [ 168139 ]")
|
![Lustrous Leaves Bundle [ 170559 ]](https://assets1.tamsnetwork.com/images/EC042017NF/170559s.jpg "Lustrous Leaves Bundle [ 170559 ]")
|
![Tile Garden Dies [ 168573 ]](https://assets1.tamsnetwork.com/images/EC042017NF/168573s.jpg "Tile Garden Dies [ 168573 ]")
|
|
![Simply Leaves Bundle (English) [ 168165 ]](https://assets1.tamsnetwork.com/images/EC042017NF/168165s.jpg "Simply Leaves Bundle (English) [ 168165 ]")
|
|||
![Three Banner Punch [ 167050 ]](https://assets1.tamsnetwork.com/images/EC042017NF/167050s.jpg "Three Banner Punch [ 167050 ]")
|
![Banner Sayings Bundle (English) [ 167051 ]](https://assets1.tamsnetwork.com/images/EC042017NF/167051s.jpg "Banner Sayings Bundle (English) [ 167051 ]")
|
||
![Painted Pumpkins Bundle (English) [ 168439 ]](https://assets1.tamsnetwork.com/images/EC042017NF/168439s.jpg "Painted Pumpkins Bundle (English) [ 168439 ]")
|
![Adhesive Backed Metallic Gems [ 163780 ]](https://assets1.tamsnetwork.com/images/EC042017NF/163780s.jpg "Adhesive Backed Metallic Gems [ 163780 ]")
|
![Learn & Grow Photopolymer Stamp Set (English) [ 168249 ]](https://assets1.tamsnetwork.com/images/EC042017NF/168249s.jpg "Learn & Grow Photopolymer Stamp Set (English) [ 168249 ]")
![Autumn Opulence 12" X 12" (30.5 X 30.5 Cm) Specialty Designer Series Paper [ 168336 ]](https://assets1.tamsnetwork.com/images/EC042017NF/168336s.jpg "Autumn Opulence 12\" X 12\" (30.5 X 30.5 Cm) Specialty Designer Series Paper [ 168336 ]")
![Sunflower Fields 12" X 12" (30.5 X 30.5 Cm) Designer Series Paper [ 168351 ]](https://assets1.tamsnetwork.com/images/EC042017NF/168351s.jpg "Sunflower Fields 12\" X 12\" (30.5 X 30.5 Cm) Designer Series Paper [ 168351 ]")
![Radiant Sunflowers Bundle (English) [ 168359 ]](https://assets1.tamsnetwork.com/images/EC042017NF/168359s.jpg "Radiant Sunflowers Bundle (English) [ 168359 ]")
![Soiree Salutations Photopolymer Stamp Set (English) [ 168337 ]](https://assets1.tamsnetwork.com/images/EC042017NF/168337s.jpg "Soiree Salutations Photopolymer Stamp Set (English) [ 168337 ]")
![Texture & Tone 12" X 12" (30.5 X 30.5 Cm) Mix In Designer Series Paper [ 168532 ]](https://assets1.tamsnetwork.com/images/EC042017NF/168532s.jpg "Texture & Tone 12\" X 12\" (30.5 X 30.5 Cm) Mix In Designer Series Paper [ 168532 ]")
![Painted Patch 12" X 12" (30.5 X 30.5 Cm) Designer Series Paper [ 168430 ]](https://assets1.tamsnetwork.com/images/EC042017NF/168430s.jpg "Painted Patch 12\" X 12\" (30.5 X 30.5 Cm) Designer Series Paper [ 168430 ]")