
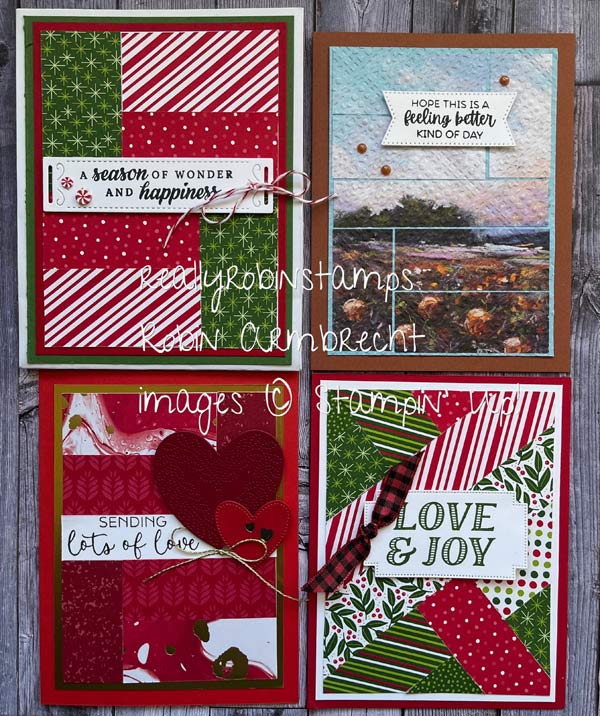
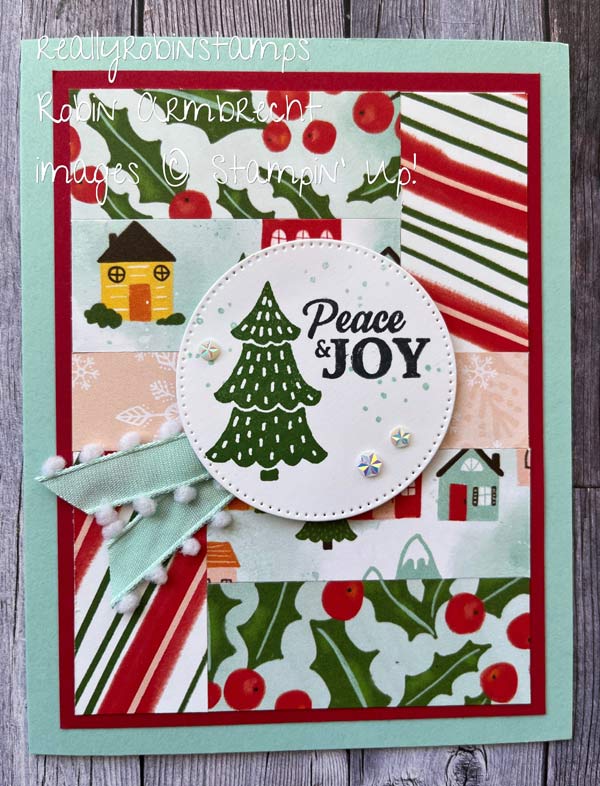
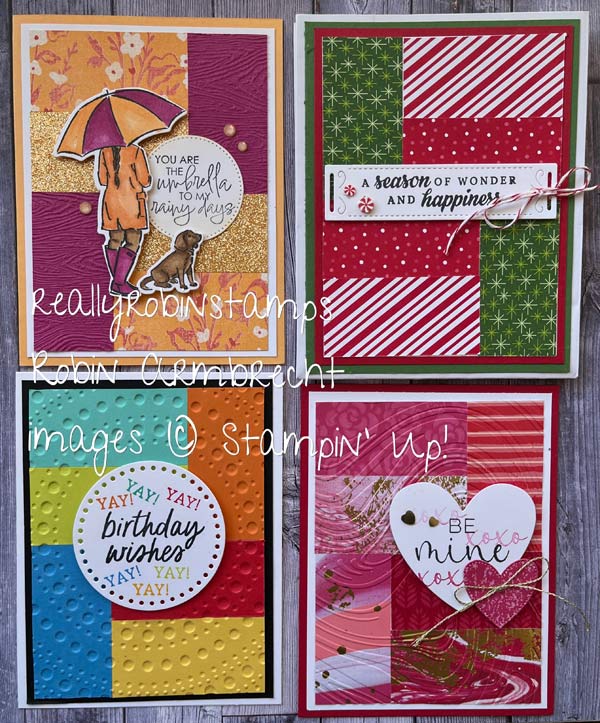
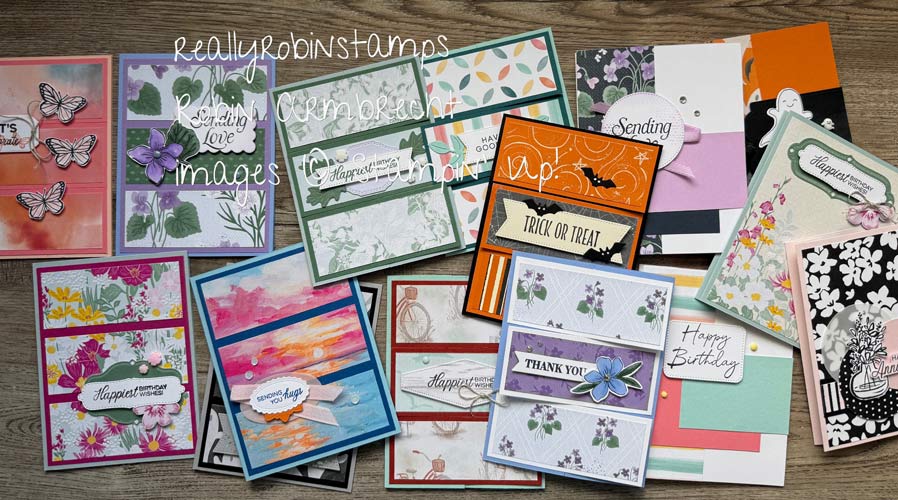
We love to have card templates on hand to help us when we are designing card fronts. The Mirrored Blocks Card Template 27 is a great layout to turn to when you are looking for ways to use up scraps of pattern paper, especially 1″ strips. This template uses repeating blocks of rectangles to create a nice symmetrical layout.
Here’s Your Homework 😉
- Watch the video tutorial for Card Template 27 to learn the ins and out of how to use this flexible layout.
- Download the pdf to use as your reference while you are creating with Card Template 27.
- Grab some paper scraps from your favorite packs of Designer Series Paper are start creating with Mirrored Blocks Card Template 27
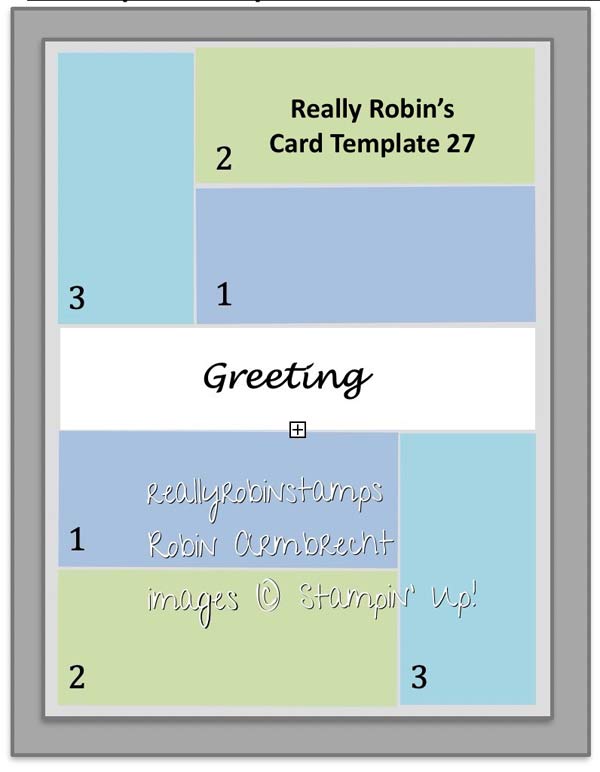
Measurements & Directions for Mirrored Blocks Card Template
- 5 1/2” x 8 1/2” card base
- 3-3/4” x 5” coordinating cardstock
- 2-1/2” x 1” DSP #1 (2)
- 2-1/2” x 1” DSP #2 (2)
- 2” x 1” DSP #3 (2)
- 3-1/2” x 3/4” Basic White
- 3-1/2” x 4-3/4” copy paper
- If using Basic White (as opposed to another DSP pattern) for the 3-1/2” x 3/4” strip, stamp the desired greeting first.
- Attach the DSP blocks and Basic White cardstock strip onto the 3-1/2” x 4-3/4” piece of copy paper. This will help to align the pieces and allow you to trim any edges that are uneven. Start by adhering one of the vertical corner rectangles (DSP 3) first, then the rectangles next to it (DSP 1 & 2). Then repeat on the same process on the other half leaving the Basic White strip to adhere last.
- Optional Step – use an embossing folder to “quilt” the arranged blocks before adhering to the card in the next step.
- Attach the copy paper to the 3-3/4” x 5” piece of coordinating cardstock. There will be an 1/8” margin around the edges of the blocks
- Adhere the card front to the card base.
- Embellish as desired.

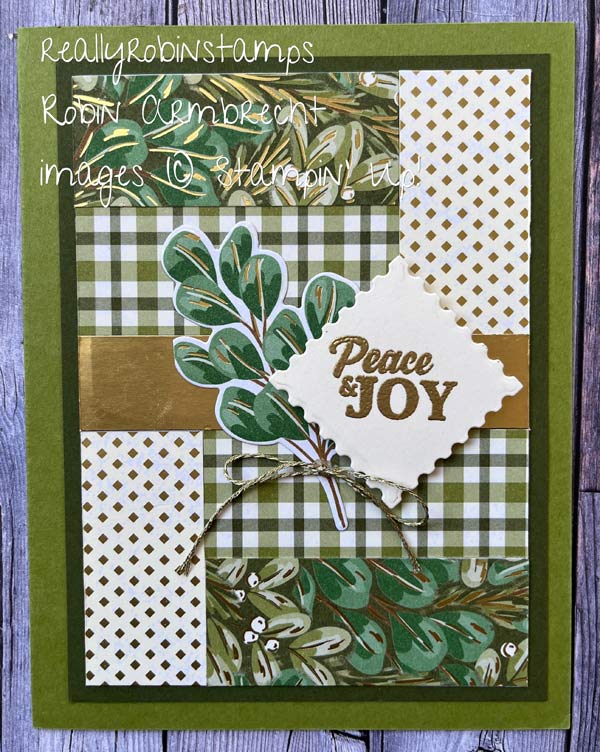
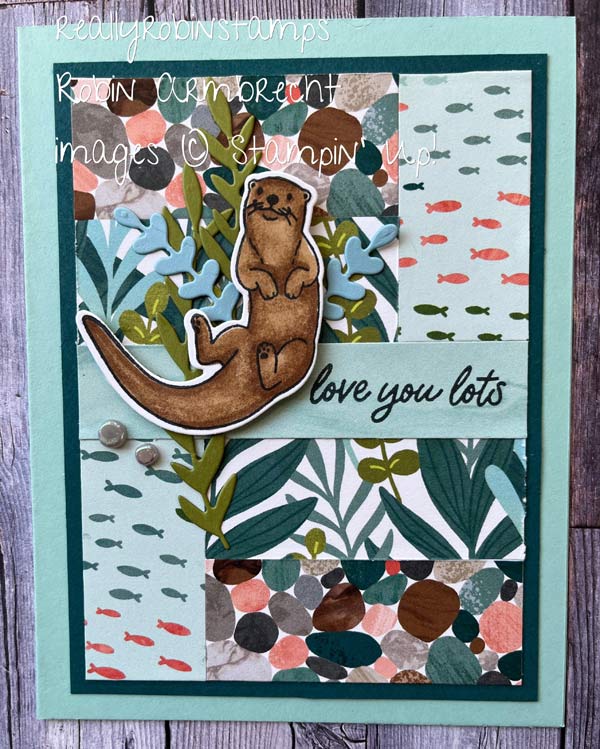


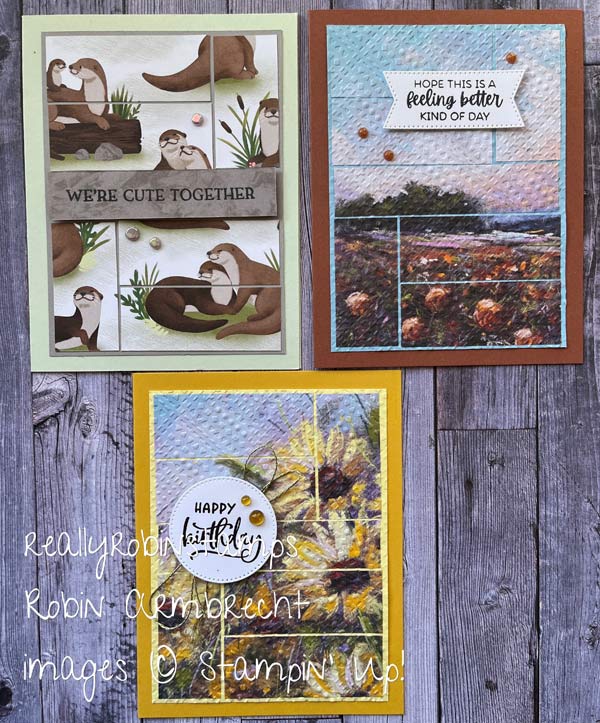
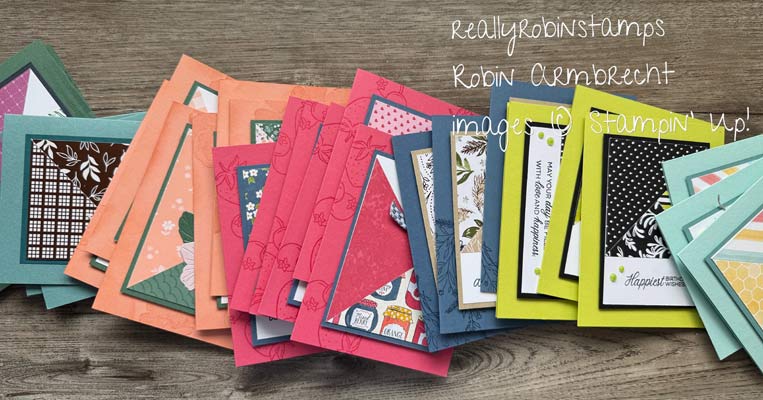
Of course there lots of ways to make this template work with the supplies you have. With some minor adjustments you can use the Mirrored Blocks Card Template 27 with your scenery papers for an easy twist in the design.
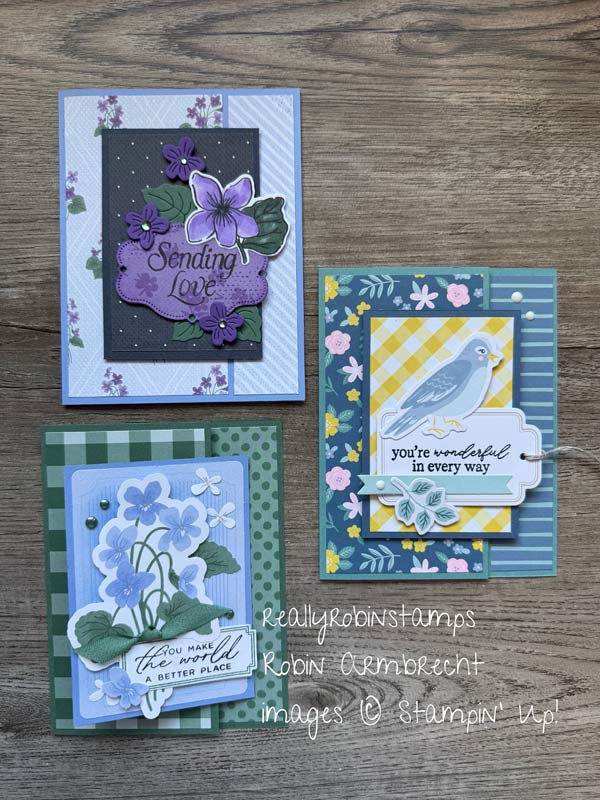
But Wait – Mirrored Blocks Card Template 27.1 version!
By changing up a few measurements I came up with a slightly different version of Mirrored Blocks Card Template 27 (which is called 27.1). This variation will help you see the versatility of this design as well as give you another options for using up paper scraps.
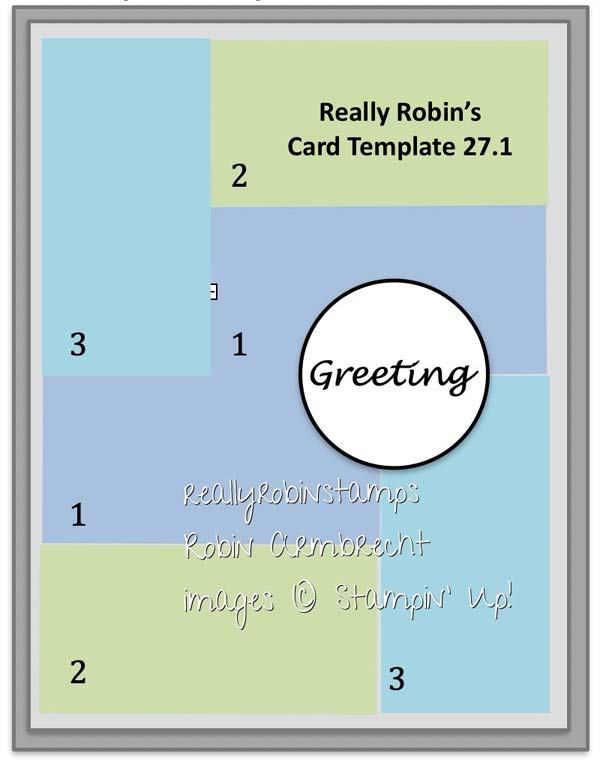
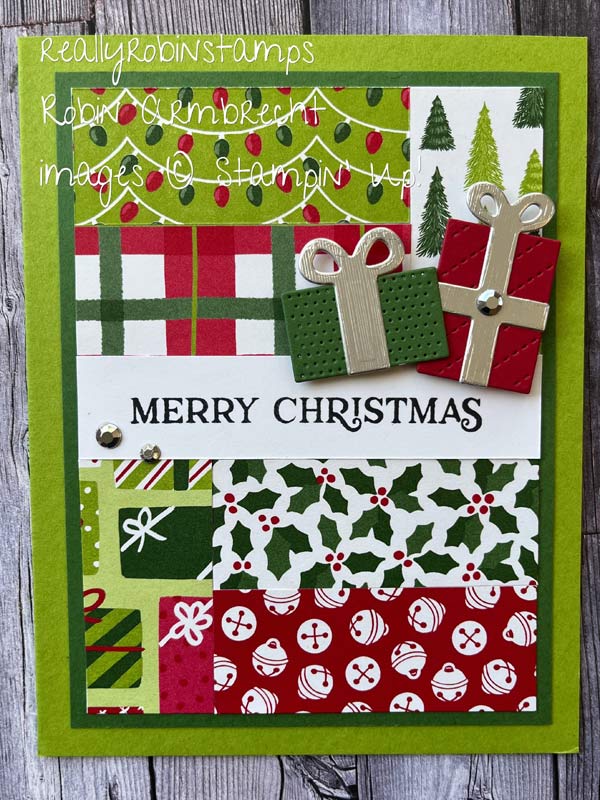
Measurements & Directions for Card Template Version 27.1
- 5-1/2” x 8-1/2” card base
- 4” x 5-1/4” coordinating cardstock
- 2-1/2” x 1-1/4” DSP #1 (2)
- 2-1/2” x 1-1/4” DSP #2 (2)
- 2-1/2” x 1-1/4” DSP #3 (2)
- 3-3/4” x 5” copy paper
- Die cut or punched shape
- Attach the DSP blocks onto the 3-3/4” x 5 ” piece of copy paper. This will help to align the pieces and allow you to trim any edges that are uneven. Start by adhering one of the vertical corner rectangles (DSP 3) first, then the rectangles next to it (DSP 1 & 2). Optional Step – use an embossing folder to “quilt” the arranged blocks before adhering to the card in the next step.
- Attach the copy paper to the 4” x 5-1/4” piece of coordinating cardstock. There will be an 1/8” margin around the edges of the blocks
- Adhere the card front to the card base.
- Embellish as desired.
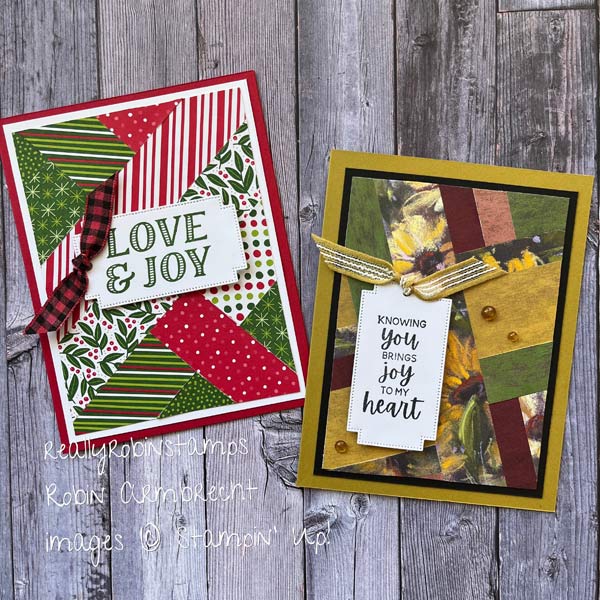
AND…as long as you have your paper strips out don’t forget about this fun technique for using up scraps. There is a video tutorial all about this technique called Using Paper Strips for Faux Quilting, Papercrafting Playdate 15. This technique is also know as the Herringbone technique and is so much fun.
Whew! That should keep us busy for awhile! I hope you take and use one or all of these ideas on cards you need to make for those people who are special to you! Happy creating!

Product List
")
|
|||
")
|
|||
|
|
")
|

|
 Designer Series Paper")
 Designer Series Paper")
 Designer Series Paper")
 Designer Series Paper")


This lesson is so timely. I’m starting on my Christmas cards and these will be perfect because of all my scraps!
Thank you
Yay! I hope to make some more for Christmas too!
Wonderful cards and, as usual, full of alternate ways to stretch our imagination! Your playdates always start with such a simple idea or template…and then you color waaay outside of the lines. I especially liked that you reached back to the faux quilting to expand our thinking even further. Thank you so much for sharing your time and talent – your playdates are always an inspiration.
I really appreciate your sweet words, April. I’m really glad you “get” me and my method. I just want card makers to see how they can use whatever they have on hand. Hugs!
Very pretty cards. You have such great ideas. Like the heart card and the otter card.
Thank you very much, Diane!
Thanks for sharing your templates. I love all your cards and I’m excited to make some.
Thank you very much, Vicki!
why can’t I download recent playdates? When I search the archives, the lastest I am able to access are Playdate # 122 and later ones .
Hi Gertrude. All you have to do is use the search feature and enter the playdate number to take you to the post where the information is located. I haven’t updated the resource library just yet but all the information you need can be found whithin the posts.
I am trying to do patchwork cards on a 5 x 7 card, but I do not know what size the pieces should be. Math was never my best subject
Hi Barbara! Math isn’t mine either. I don’t have any other sizes prepared than the ones I presented.