
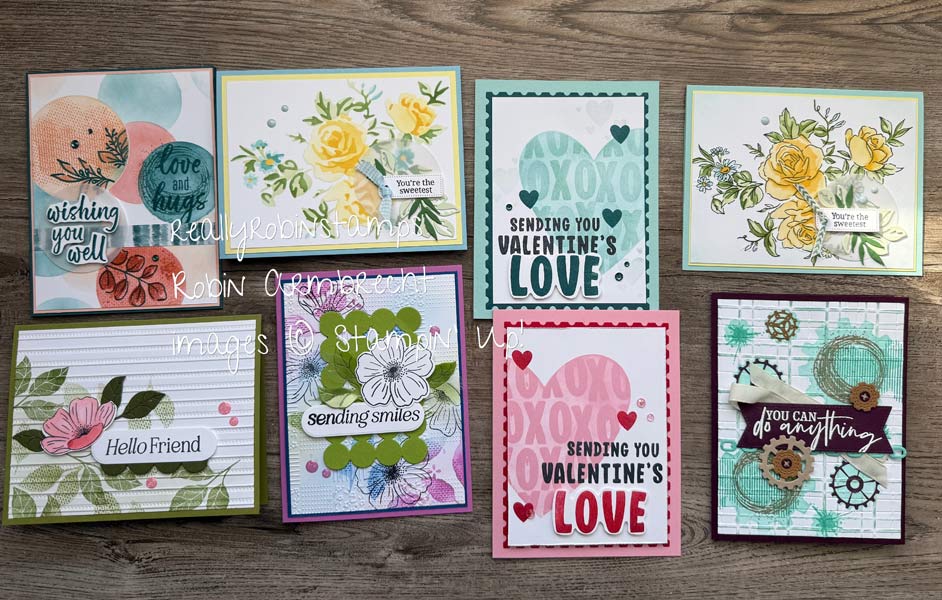
I’m ready for a super easy technique this week, how about you? The Split Shape Negative technique is stunning because of its symmetrical design. All you need to create this technique is some pattern paper and a punch or die that can be halved symmetrically. Boom! That’s it!

Here’s Your Homework 😉
- Watch the video tutorial to see the process step-by-step, and all the variations.
- Download the pdf to help you while you are creating.
- Shop your stash of supplies and look for symmetrical shape dies (or punches), and your favorite pattern papers.
Supplies & Directions for Split Shape Negative Technique
- 5-1/2” x 8-1/2” card base (2)
- 4” x 5-1/4” Basic White cardstock (or other color) (2)
- 4” x 5-1/4” piece of pattern paper (1)
- Symmetrical shape die or punch
- Die-cut sentiments (optional)
- 4-1/8” x 5-3/8” coordinating cardstock (optional)
- Determine the orientation of your card: vertical (portrait) or horizontal (landscape).
- Lightly score the 4” x 5-1/4” piece of pattern paper in half based on the orientation of your card. If it is vertical score at 2”. If it is horizontal score at 2-5/8”. You will eventually cut on this score line.
- Center your shape die or punch along the score line so that there are equal halves on both sides of the line and cut out.
- Cut on the score line to create halves. If your shape rests securely inside the larger piece you can do this with one cut, or take the shape out and cut separately. This will give you 4 pieces: 2 halves of the shape and 2 halves of the rest of the pattern paper. Separate the pieces so that the left side of the shape goes with the right side of the paper, and the right side of the shape goes with the left side of the paper. This will create the negative spaces when you attach to card front.
- Attach the pieces to the 4” x 5-1/4” Basic White card fronts. Line up the shape half with the negative space on the other piece.
- Add a simple greeting across the shape or stamp inside the negative space. Embellish as desired.


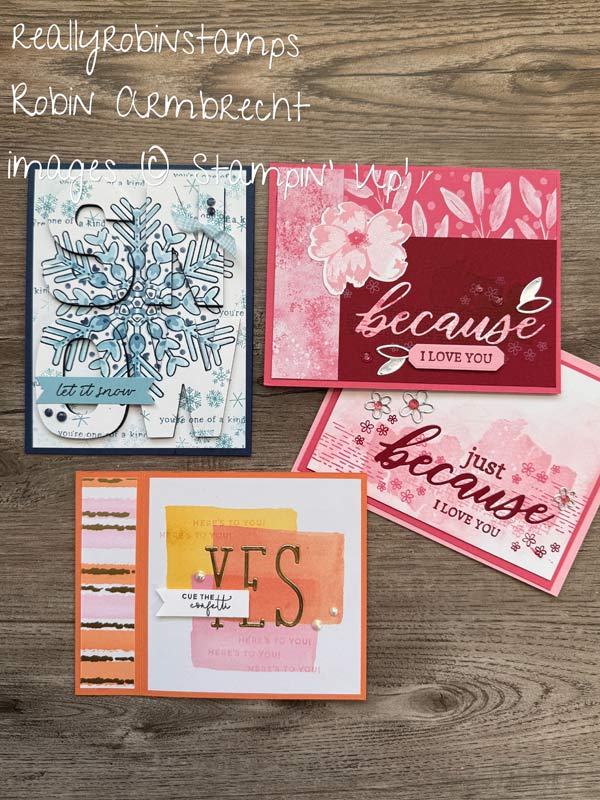
By using this simple technique and applying it to all kinds of symmetrical shapes and using different pattern papers you can come up with so many different designs!


Now it’s your turn to play with the Split Shape Negative Technique! Come share your designs in our Facebook page, Robin’s Really Super Stampers, so we can celebrate your creativity!

 |  |  | |
") | |||
") | ") |  |
")
 Specialty Paper")
 Designer Series Paper & Sticker Sheet (English)")
 Specialty Designer Series Paper")
 Specialty Designer Series Paper")

Love this technique. Will be using it for my card class….probably the tree.
Thanks for the inspiration…I really need it right now.
Hello Cheryl! I’m so glad you can sue this technique for a class – they will love it!