It’s time to play with March’s Paper Pumpkin Kit, “Fluttering Garden”. Join me as we put together the cards and use this stunning kit!
Here is Our Monthly Paper Pumpkin Challenge
- Open the kit when it arrives (I’m a bit late with this kit 😝 but that’s OK!)
- Use the contents to create beautiful things.
- Store the leftovers in an organized way.
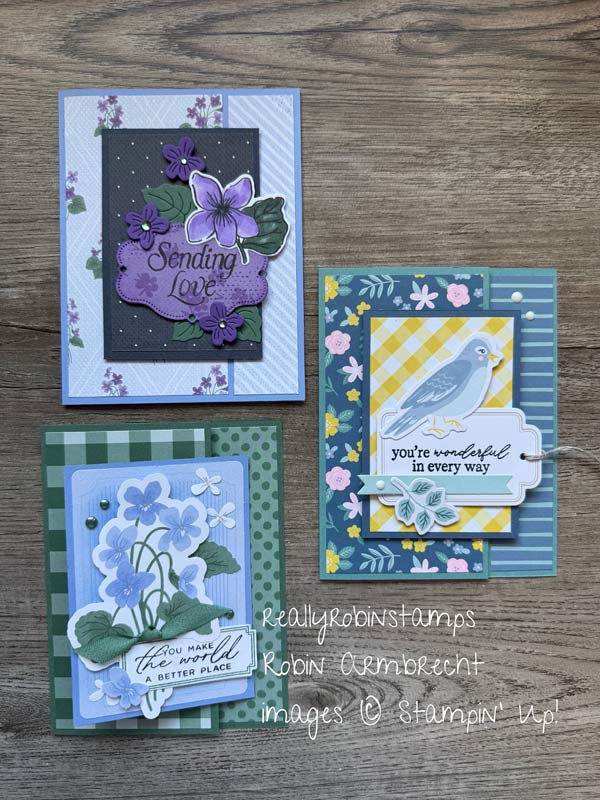
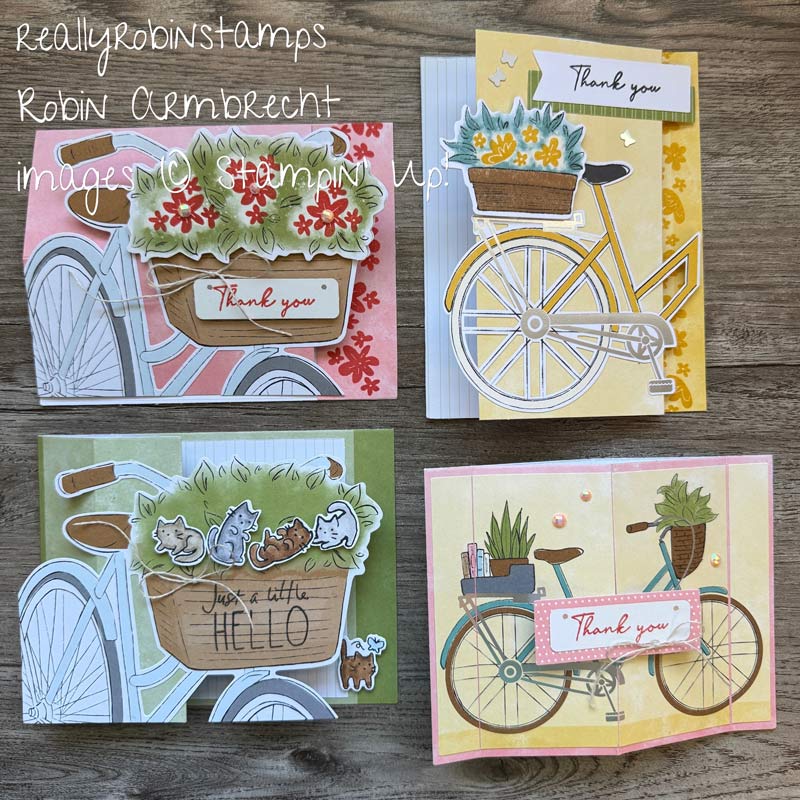
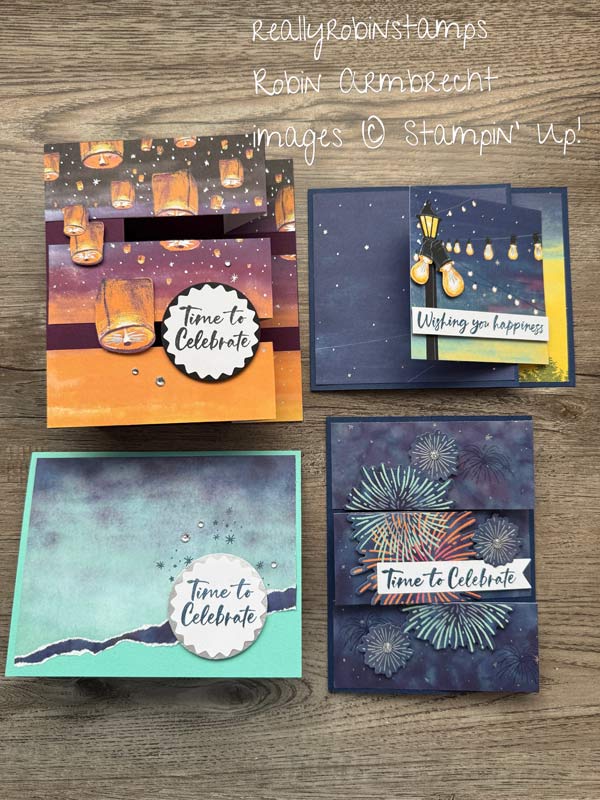
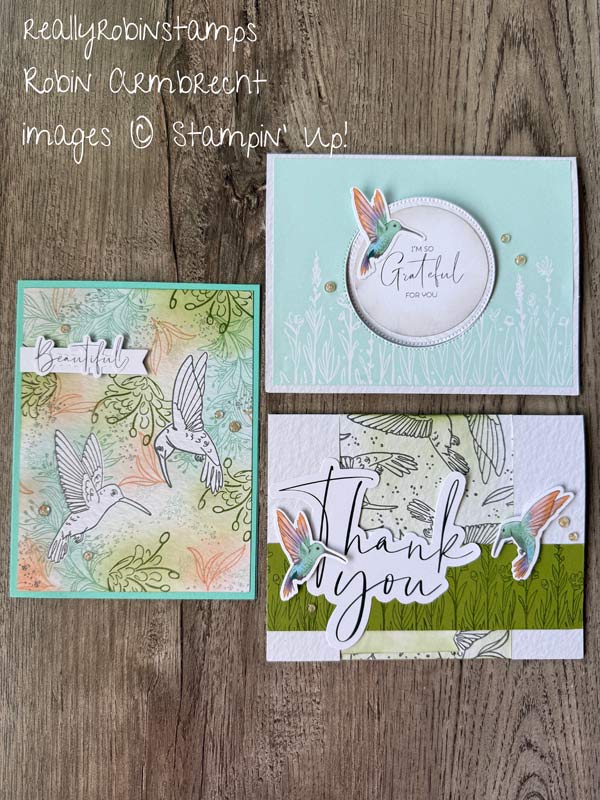
Grab your kit and join me for some creative playtime. March’s “Fluttering Garden” Kit makes nine cards. I will make three cards as designed by Stampin’ Up! and then make three alternative versions using the supplies in the kit. The photos of the alternative cards are below. Watch the video for the specific measurements used to create the alternative designs on cards #1-#3.
Interested in Paper Pumpkin Kits? Become a monthly subscriber or choose the months you want to receive the kits. You can also give Paper Pumpkin subscriptions as a gift!
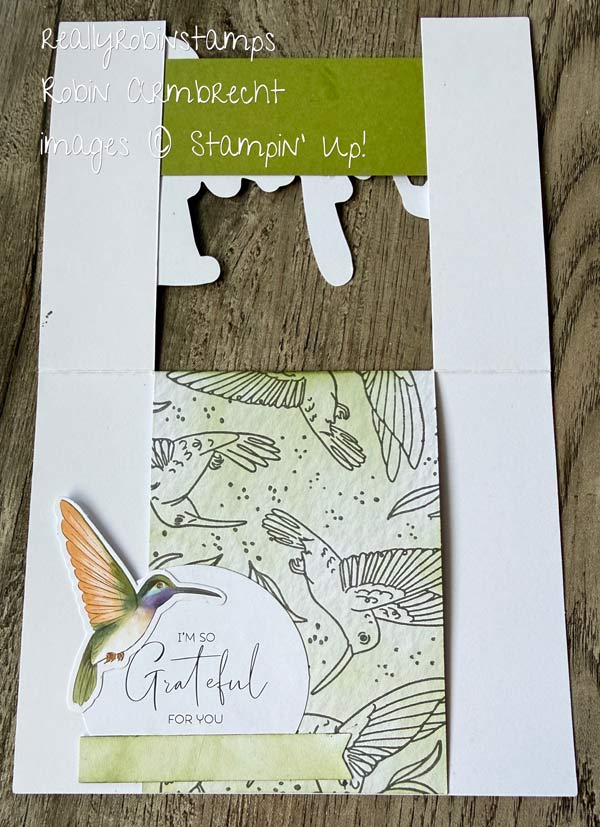
Alternative Card 1 – Spanner Card
Cut 1-1/4″ from the left and right edge of the card front stopping at the score line creating three front panels Attach a piece of cardstock (mine is 1-1/2″ x 5-1/2″) to connect (“span the gap”) the side panels. Layer the die cuts strategically to hide the second layer under the first.

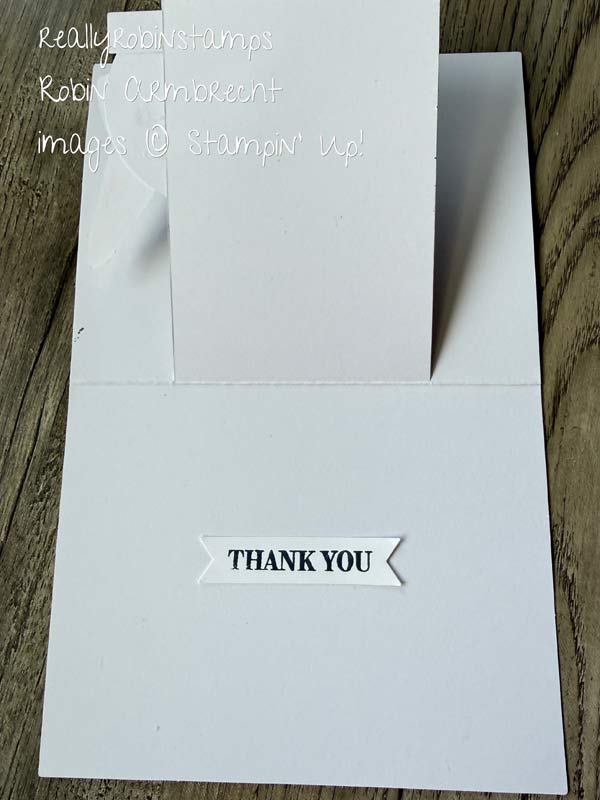
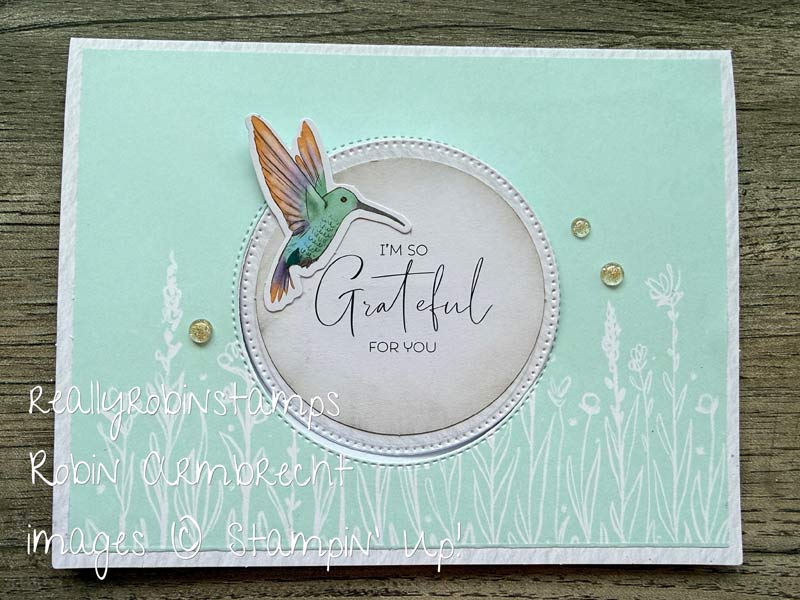
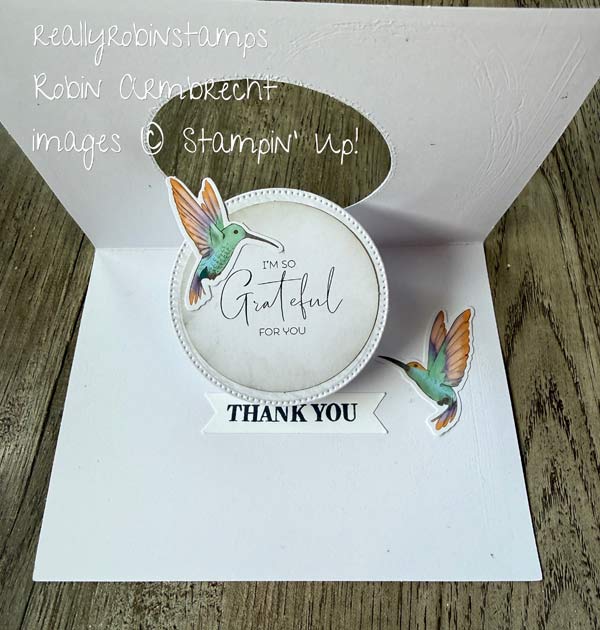
Alternative Card 2 – Pop-Up Window Card
Cut a circle in the center of the card front with a die creating a window and save the cut out to use as the pop-up. Make a pop-up mechanism (1″ x 4″ scored at 1″, 2″ and 3″). Attach the pop-up mechanism on the inside of the card centered with the window and up against the fold. Make an additional pop-up piece ( 1″ x 1-1/2″ scored at 3/4″). Attach half of this folded piece on top of the pop-up mechanism and the other half to the pop-up.
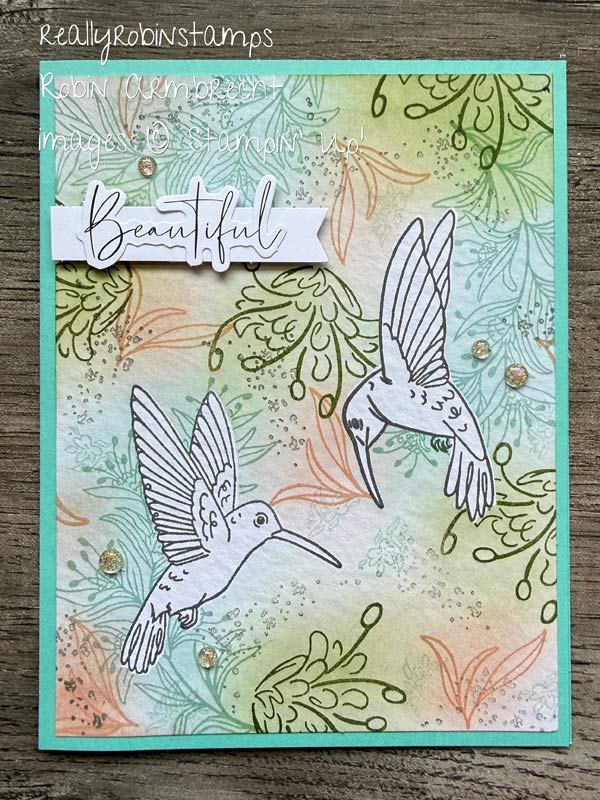
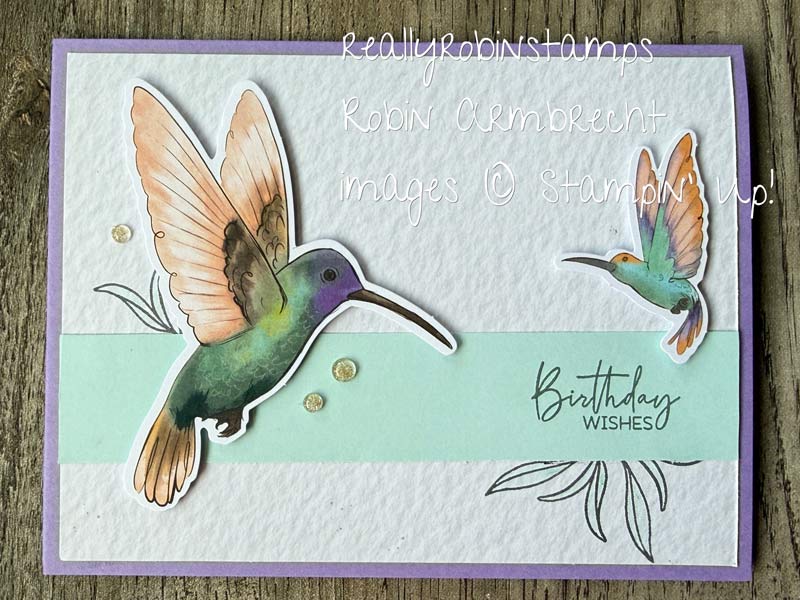
Alternative Card 3 – Stamped Collage Card
To make a one layer collage with the stamped images, start by stamping the two hummingbirds then covering them with masking paper. Starting with the largest background image and working to the smallest, stamp randomly and strategically over and around the masked birds to create a background. Use a blending blush to add soft color over the stamped background images. Remove masking paper when finished!
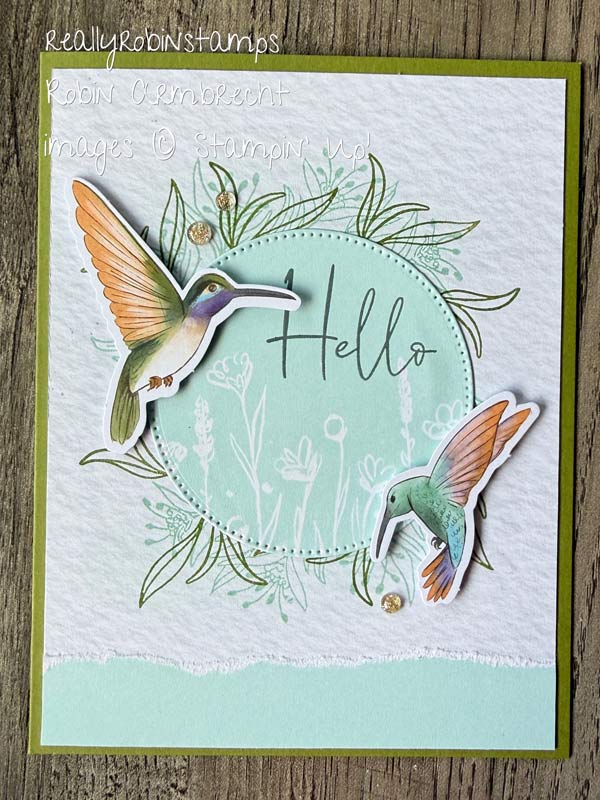
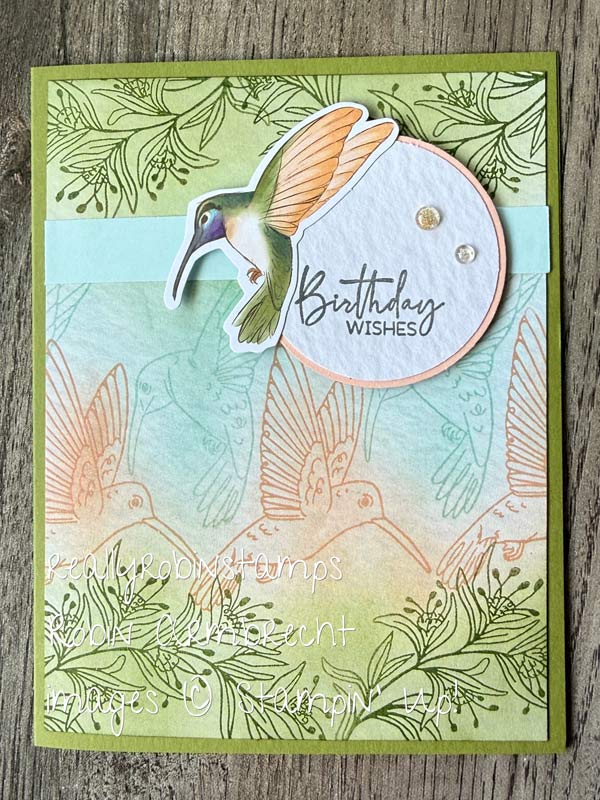
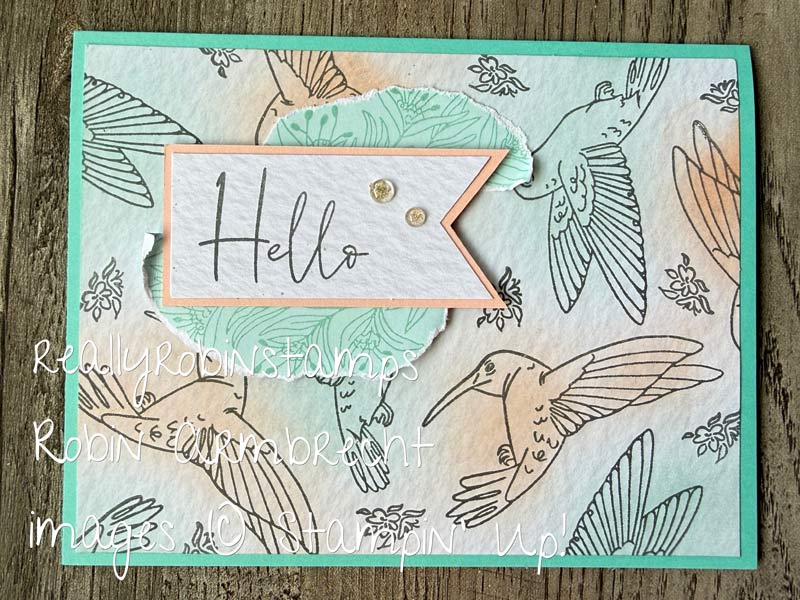
It was so easy to use this simple kit! I created several more alternative ideas with just a bit of extra cardstock and additional ink pads
How I used the Remainder of My Kit – 6 More Cards


I hope you are feeling inspired to be creative, whether it is with this month’s Paper Pumpkin Kit, “Fluttering Garden”, or any other kit! Happy Paper Pumpkin-ing!

Product List
![Paper Pumpkin Subscription [ 166815 ]](https://assets1.tamsnetwork.com/images/EC042017NF/166815s.jpg "Paper Pumpkin Subscription [ 166815 ]")
|
![Paper Pumpkin 3 Month Subscription [ 166816 ]](https://assets1.tamsnetwork.com/images/EC042017NF/166816s.jpg "Paper Pumpkin 3 Month Subscription [ 166816 ]")
|
![Paper Pumpkin 6 Month Subscription [ 166817 ]](https://assets1.tamsnetwork.com/images/EC042017NF/166817s.jpg "Paper Pumpkin 6 Month Subscription [ 166817 ]")
|
![Paper Pumpkin 12 Month Subscription [ 166818 ]](https://assets1.tamsnetwork.com/images/EC042017NF/166818s.jpg "Paper Pumpkin 12 Month Subscription [ 166818 ]")
|
![Fluttering Garden Paper Pumpkin Refill (English) [ 168629 ]](https://assets1.tamsnetwork.com/images/EC042017NF/168629s.jpg "Fluttering Garden Paper Pumpkin Refill (English) [ 168629 ]")