Stampin’ Up!’s White Craft Ink Pad is one of the products in my collection of inks that always makes cardmaking more fun. It not only has multiple uses for many different techniques, but because it’s pigment ink (versus dye-based ink) it reminds me of using white craft paint. Today’s tutorial is second part in a series on techniques to try with White Craft Ink. I will be sharing three additional techniques for creating magic with the White Craft ink pad.
I suggest you look back at Part 1 of White Craft Ink Techniques to start with the basics of using this versatile ink pad. You can download the PDF for Part 1 as well.
Here’s Your Homework 😉
- Watch the video tutorial for White Craft Ink Techniques Part 2 (or start with Part 1.
- Download the PDF for reference.
- Grab some basic supplies and your white ink pad to begin having fun.
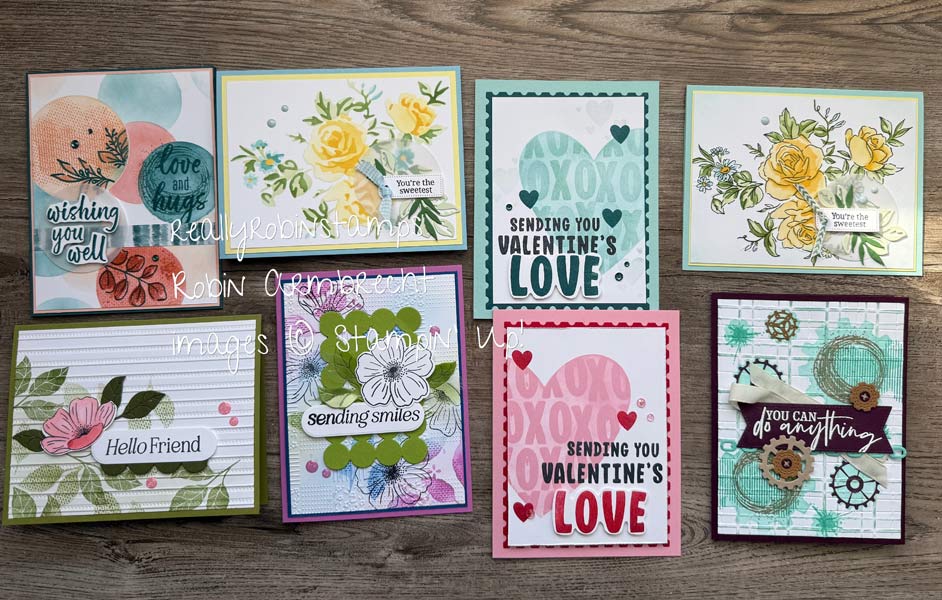
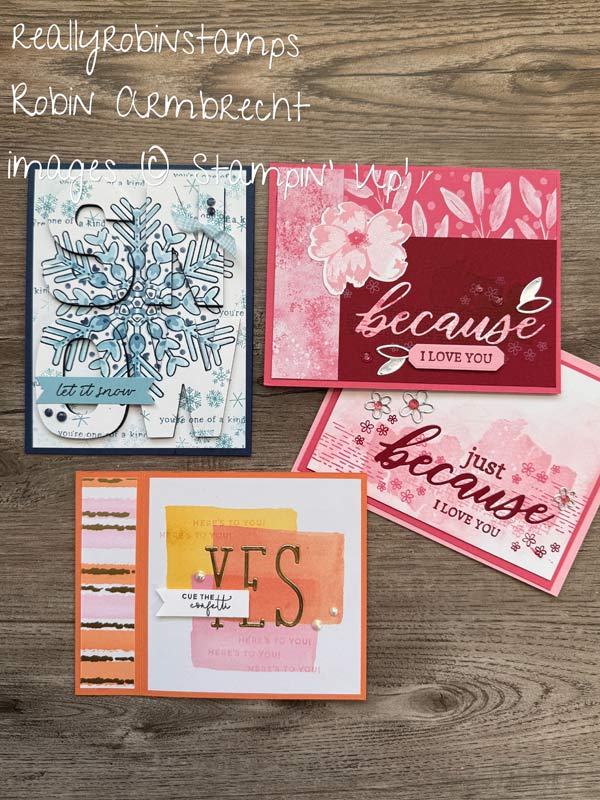
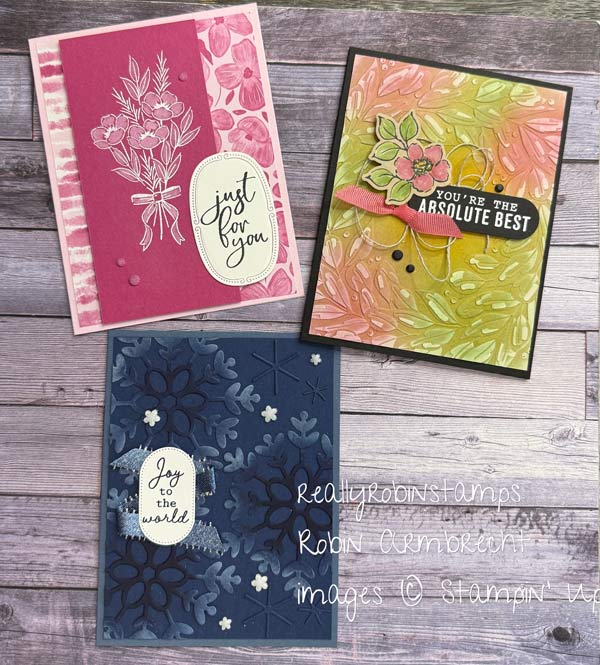
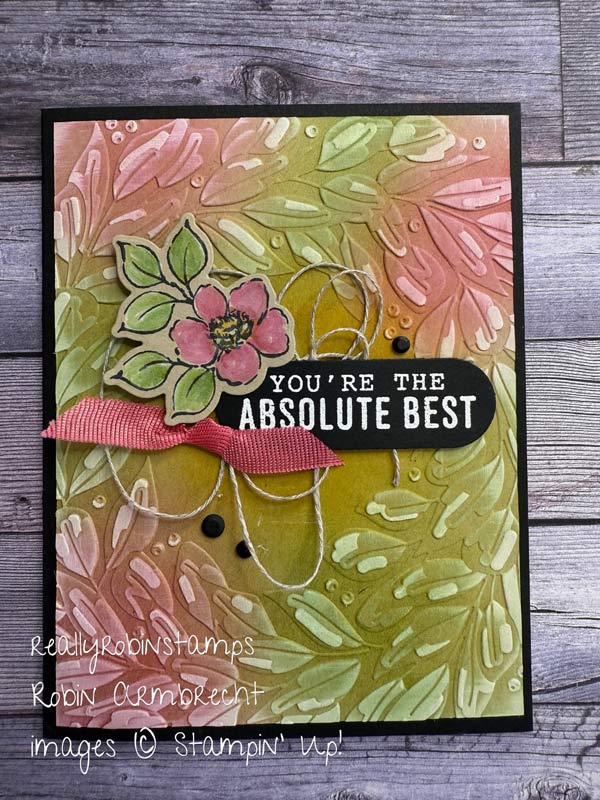
Three More Techniques Using White Craft Ink = MAGIC 😁
- Stepped-Up Embossing Folder technique with Inked Background
- White Wash Technique
- Blended Ink on Die Cuts
Supplies Used – (Use the links below to find these supplies in the online store!)
- White Craft Ink Pad & Refill
- Sponge Dauber
- Heat Tool
- White Embossing Powder
- Classic Inks
- Dark & Medium Cardstock Tones
- Embossing Folders
- Acrylic Block
- Water Painter & Blender Pen
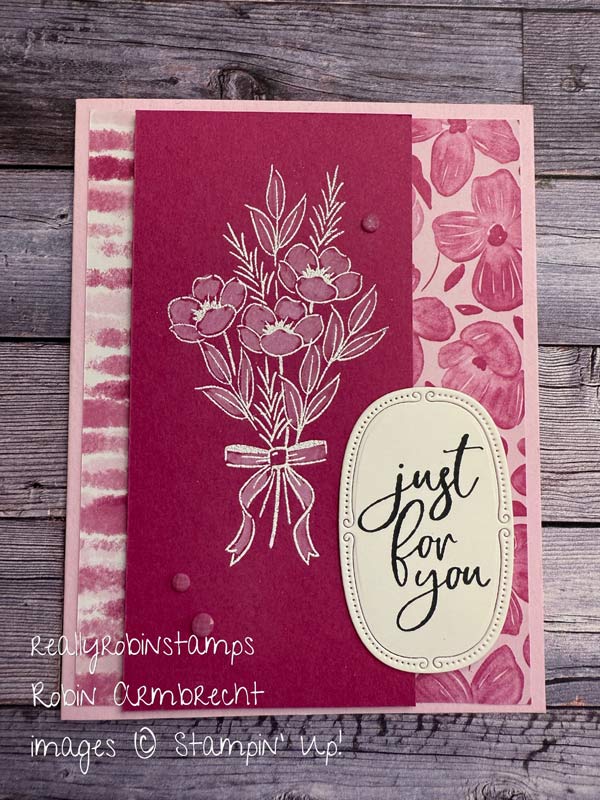
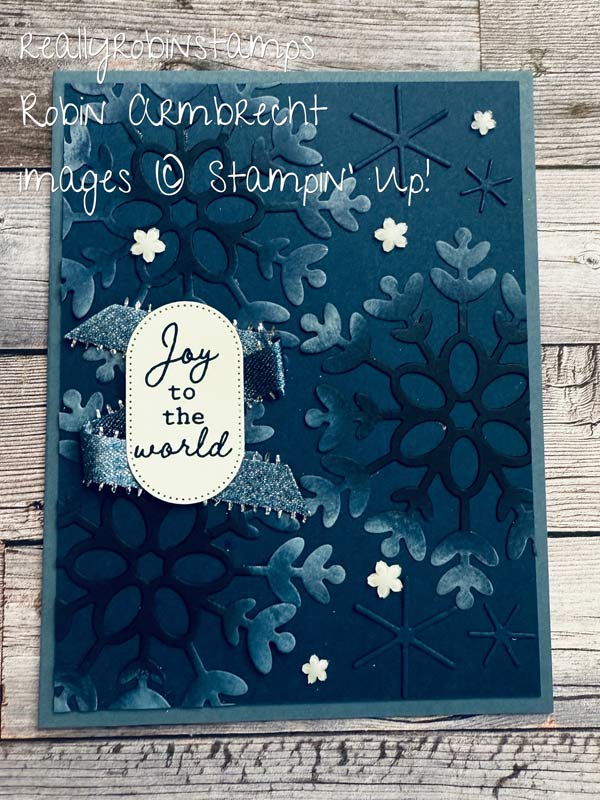
Technique 1: Stepped-Up Embossing Folder Direct-to-Paper with Inked Background

Technique 2: White Wash Coloring
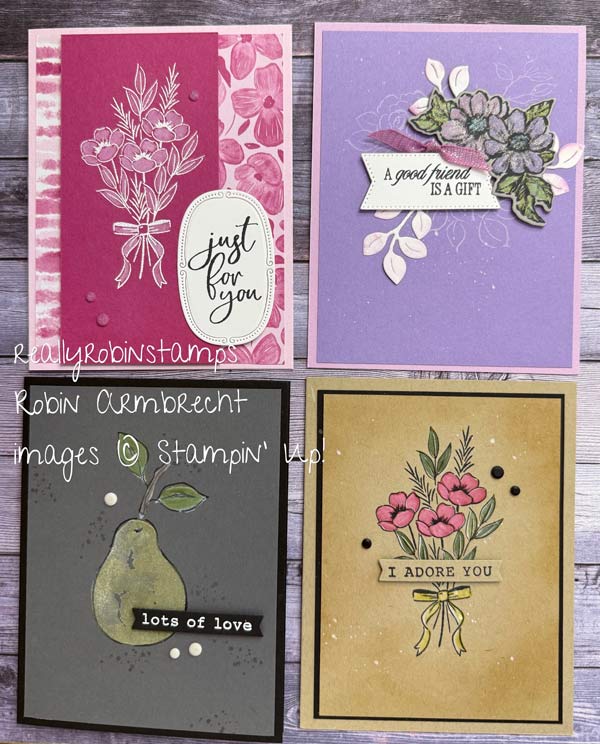
Technique 3: Blended Ink on Die Cuts
If you haven’t used your White Craft ink pad lately it’s time to get it out and show it some love! I hope you have so much fun trying one or all of these techniques with White Craft ink! – Robin

Product List
![Spooky Halloween Bundle (English) [ 166199 ]](https://assets1.tamsnetwork.com/images/EC042017NF/166199s.jpg "Spooky Halloween Bundle (English) [ 166199 ]")
|
![Charming Day Bundle (English) [ 166136 ]](https://assets1.tamsnetwork.com/images/EC042017NF/166136s.jpg "Charming Day Bundle (English) [ 166136 ]")
|
![More Messages Bundle (English) [ 165473 ]](https://assets1.tamsnetwork.com/images/EC042017NF/165473s.jpg "More Messages Bundle (English) [ 165473 ]")
|
|
![Perfectly Pears Bundle (English) [ 166154 ]](https://assets1.tamsnetwork.com/images/EC042017NF/166154s.jpg "Perfectly Pears Bundle (English) [ 166154 ]")
|
![Sunflower 3 D Embossing Folder [ 166145 ]](https://assets1.tamsnetwork.com/images/EC042017NF/166145s.jpg "Sunflower 3 D Embossing Folder [ 166145 ]")
|
||
![Party Alphabet Dies [ 165263 ]](https://assets1.tamsnetwork.com/images/EC042017NF/165263s.jpg "Party Alphabet Dies [ 165263 ]")
|
![Blender Pens [ 102845 ]](https://assets1.tamsnetwork.com/images/EC042017NF/102845s.jpg "Blender Pens [ 102845 ]")
|
||
![Sponge Daubers [ 133773 ]](https://assets1.tamsnetwork.com/images/EC042017NF/133773s.jpg "Sponge Daubers [ 133773 ]")
|
![Basics Wow! Embossing Powder [ 165679 ]](https://assets1.tamsnetwork.com/images/EC042017NF/165679s.jpg "Basics Wow! Embossing Powder [ 165679 ]")
|
![Small Blending Brushes [ 160518 ]](https://assets1.tamsnetwork.com/images/EC042017NF/160518s.jpg "Small Blending Brushes [ 160518 ]")
|
![Spooky Sweet 12" X 12" (30.5 X 30.5 Cm) Specialty Designer Series Paper [ 166191 ]](https://assets1.tamsnetwork.com/images/EC042017NF/166191s.jpg "Spooky Sweet 12\" X 12\" (30.5 X 30.5 Cm) Specialty Designer Series Paper [ 166191 ]")
![Dotted Circles 3 D Embossing Folder [ 163789 ]](https://assets1.tamsnetwork.com/images/EC042017NF/163789s.jpg "Dotted Circles 3 D Embossing Folder [ 163789 ]")
![Impressions Abloom Bundle (English) [ 165611 ]](https://assets1.tamsnetwork.com/images/EC042017NF/165611s.jpg "Impressions Abloom Bundle (English) [ 165611 ]")
![Regals 6" X 6" (15.2 X 15.2 Cm) Designer Series Paper [ 165304 ]](https://assets1.tamsnetwork.com/images/EC042017NF/165304s.jpg "Regals 6\" X 6\" (15.2 X 15.2 Cm) Designer Series Paper [ 165304 ]")
![Uninked Stampin’ Craft Pad & Whisper White Refill [ 147277 ]](https://assets1.tamsnetwork.com/images/EC042017NF/147277s.jpg "Uninked Stampin’ Craft Pad & Whisper White Refill [ 147277 ]")