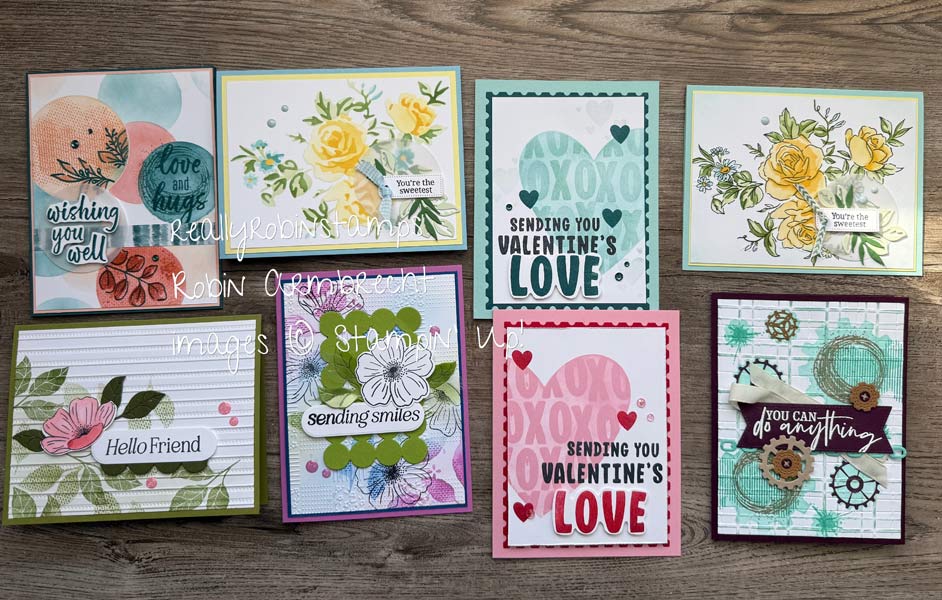
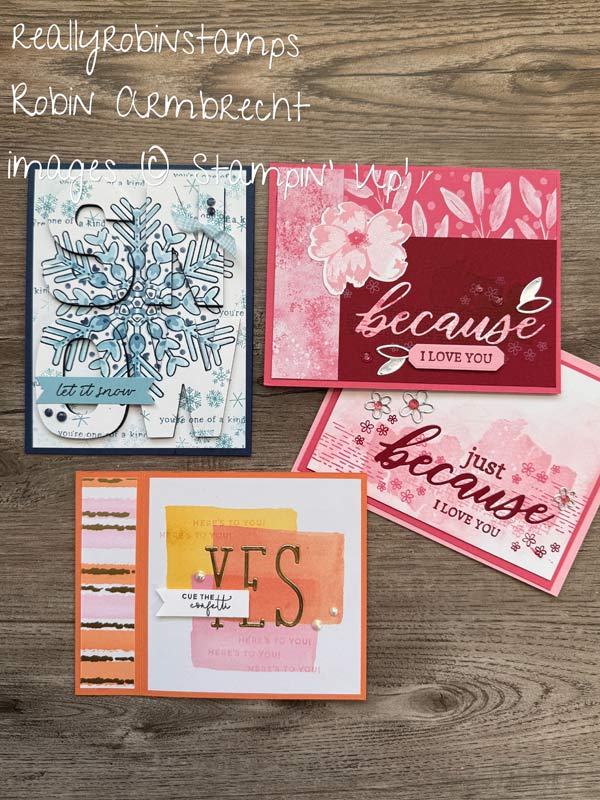
Sometimes the simplest techniques can make the biggest impact in the art of cardmaking. Shadow stamping is one of these simple techniques that you can use to add “pop” to your focal points. I’m going to share three different ways to use shadows in stamping projects.

Want to see more ideas for Shadow Stamping? Take a look at Papercrafting Playdate 5! See my inspiration for the Shadow Block Quilt Technique, fellow demonstrator Tina Zinck (The Serene Stamper).
Here’s Your Homework 😉
- Watch the video tutorial to see how shadows can be used in stamping.
- Download the pdf to help you while creating your own shadow stamping projects.
- Shop your stash of cardmaking supplies to find some images, paper, and shapes to use with the shadow stamping technique.
Shadow Stamping 3 Ways
Shadow Stamping with Ink and Images Supplies & Directions
- Photopolymer images/sentiments that are large and bold.
- Black ink and another lighter ink color (or two coordinating ink colors).
- Ink image/sentiment with Basic Black ink and stamp onto Basic White cardstock. Clean off then ink again with another lighter color.
- Line up the image above where you first stamped it in Basic Black, then slightly shift the image to the right, left, up, or down and stamp it with the lighter color over the Basic Black. This will create your shadow.
- Other Option: Without re-inking the image/greeting in another color, simply shift the image over and stamp again using the remaining ink. This will create a shadow that is a lighter version of the original color.

Shadow Stamping with Dies or Punches Supplies & Directions
- Punches or Dies
- Black Cardstock (or whatever shadowy color you choose)
- White Cardstock, pattern paper or light cardstock color
- Create a shaped focal point with a die or punch.
- Cut out the shape a second time with Basic Black cardstock
- Attach the two shapes together offsetting them to create a shadow on any corner of the shape.

Shadow Block Quilt Technique Supplies & Directions
- 3” x 4” piece of Basic Black cardstock (or Two-Toned Black Cardstock)
- 3” x 4” piece of Designer Series Paper (scenery paper is very fun!)
- 4” x 5-1/4” piece of coordinating cardstock
- 5-1/2” x 8-1/2” cardstock base
- Cut the 3” x 4” piece of black cardstock, and the 3” x 4” piece of DSP into 1” squares. If the DSP piece depicts a “scene” be sure to keep the pieces in order for reassembling.
- Attach each 1” square of DSP to a 1” square of black cardstock leaving a 1/8” black edge on the left and bottom edges to create a shadow effect (or on any corner you choose).
- Attach these squares to the 4” x 5-1/4” piece of coordinating cardstock leaving equal spaces (about 3/16”) in between the square and around the outside edge.
- Attach to card base and add focal point greeting.

Now it’s your turn to put your images and paper to work and create some shadows on your stamping projects! – Robin