
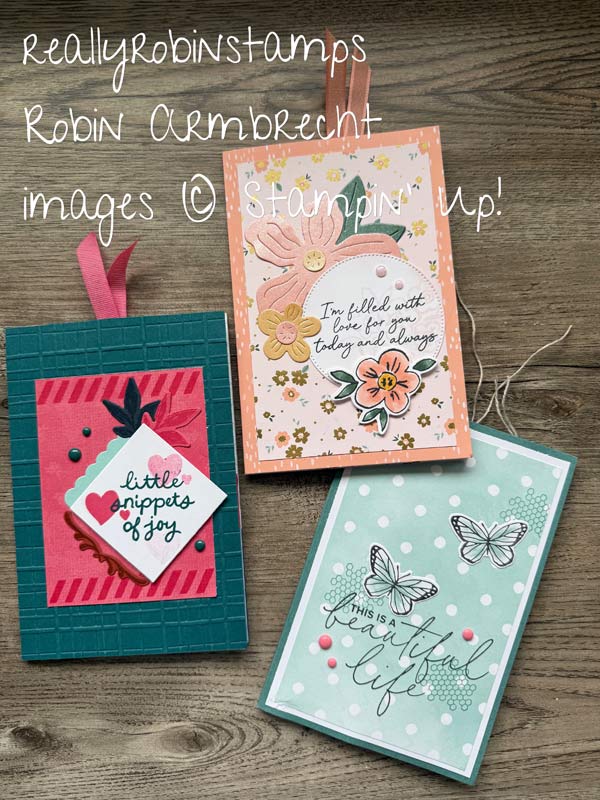
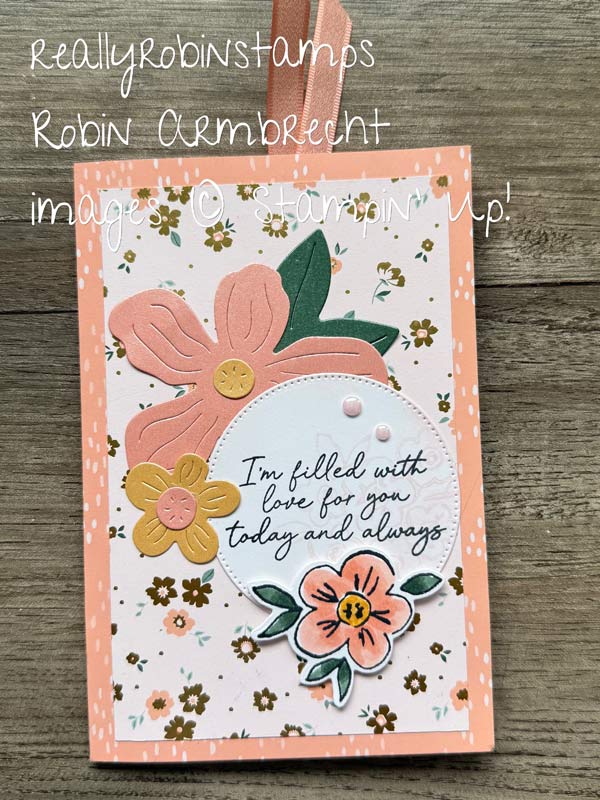
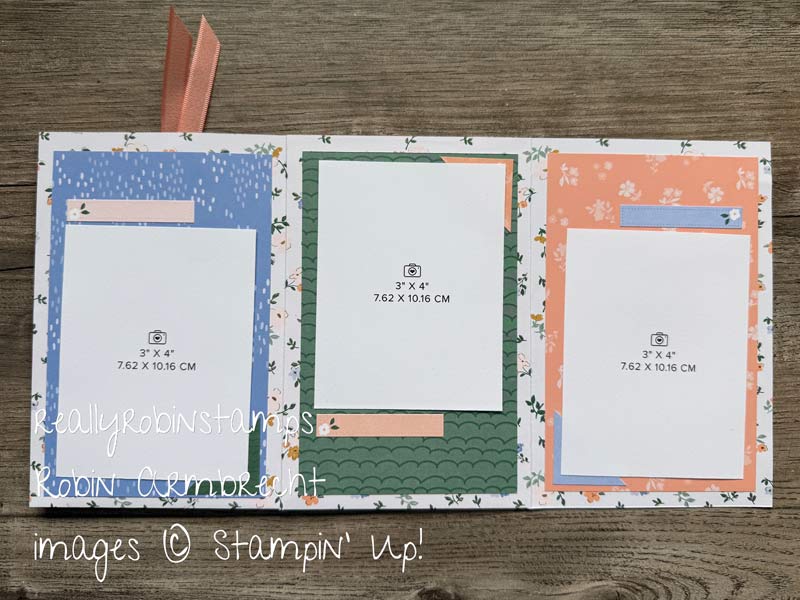
It’s always the perfect time to create a mini album for someone you love! Use one piece of 12 x 12 pattern paper or cardstock to make a three page mini album with a finished size of 4″ x 6″.
If you love making Mini Albums you might want to check out some other designs:
Here’s Your Homework 😉
- Watch the video tutorial for creating the One Sheet Mini Album – Papercrafting Playdate 176
- Download the PDF to use as a reference while making your own album.
- Find a piece of 12 x 12 paper and start making your own album.
Supplies & Measurements for Mini Album
- 12” x 12” DSP or Two Tone cardstock
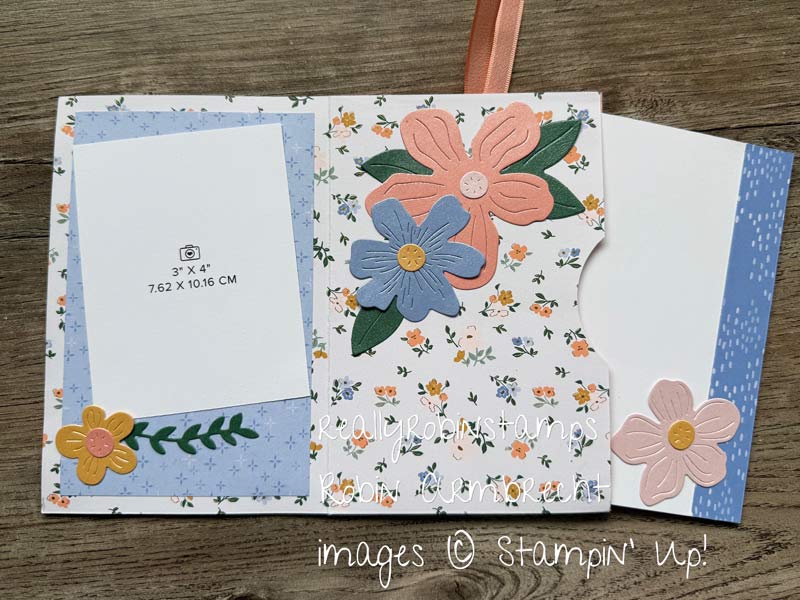
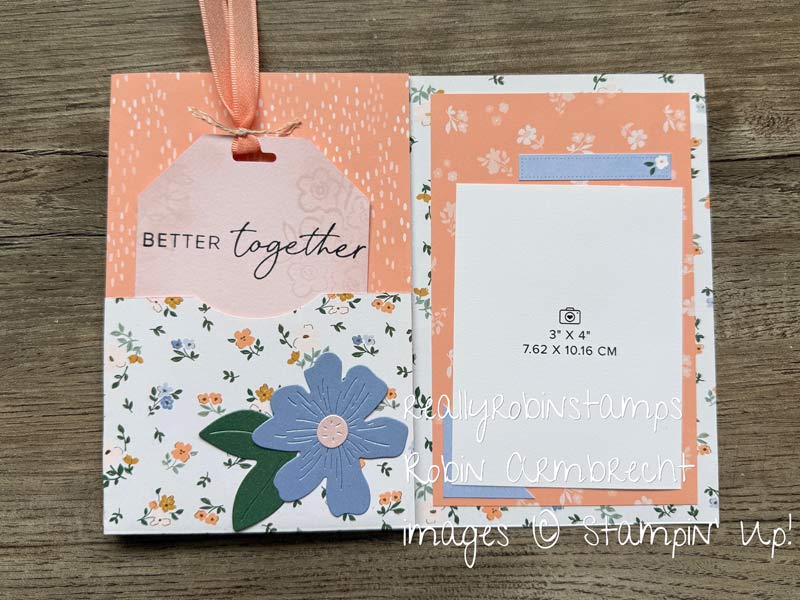
- 3-1/2” x 5-1/2” DSP (4) inside page covers
- 3-1/2” x 5-1/2” Basic White for side pocket insert
- 3/4” x 5-1/2” DSP trim for pocket insert
- 3” x 5” cardstock tag
- 3-1/2” x 5-1/2” DSP for front & back covers
Directions
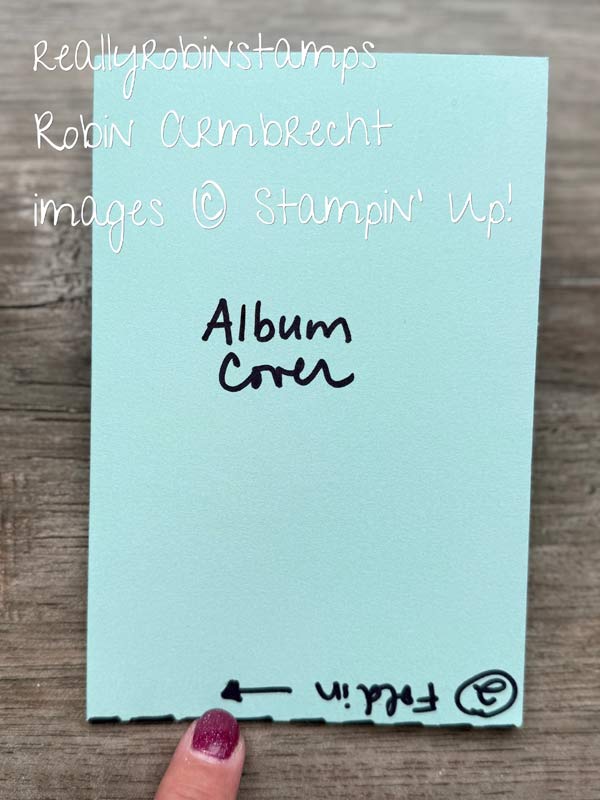
- If using pattern paper, start scoring with the side (pattern) you want on the outside of the album facing you.
- Score the 12 x 12 piece of at 4” and 8”. Turn the paper to the right and score at 6”. You might want to label each section with a sticky note.
- Cut on the score line between sections 1 and 4.
- Cut on the score line between sections 5 and 6
- Cut off 3” of section 6.
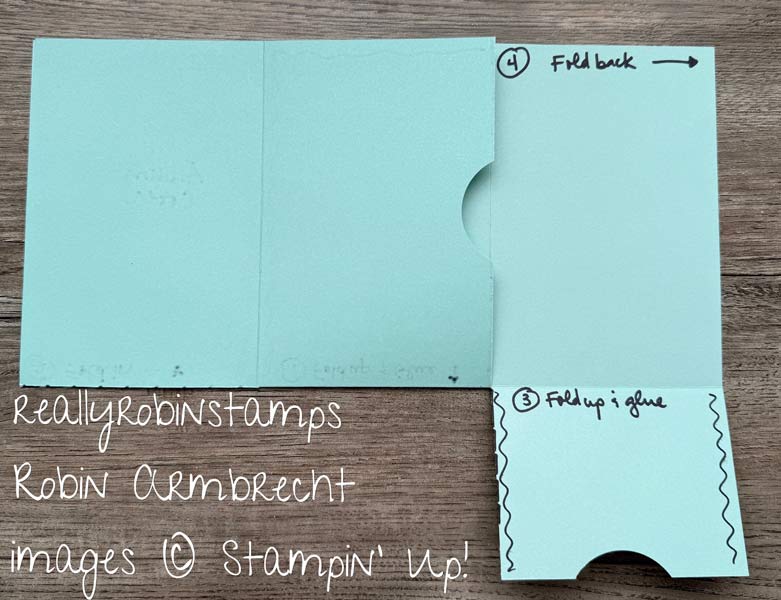
- Use a circle punch to punch a small finger pull hole for the two pockets. (See photo)
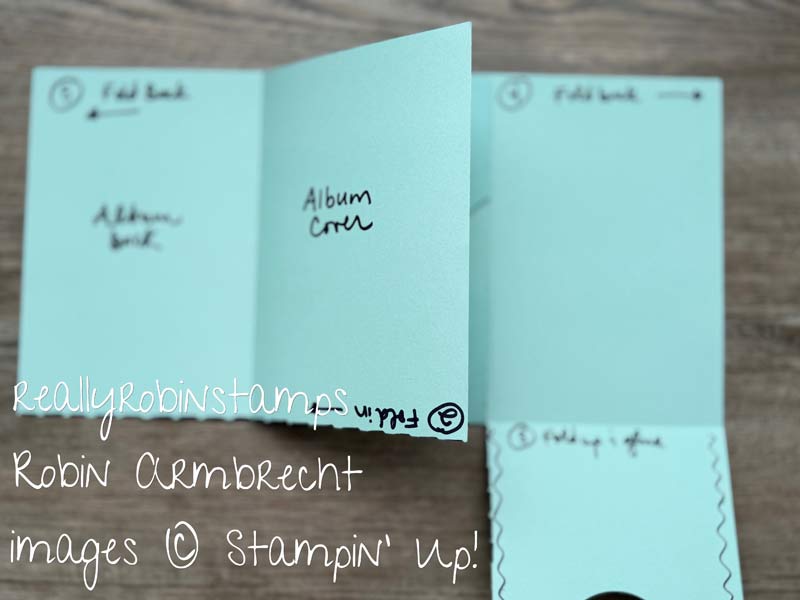
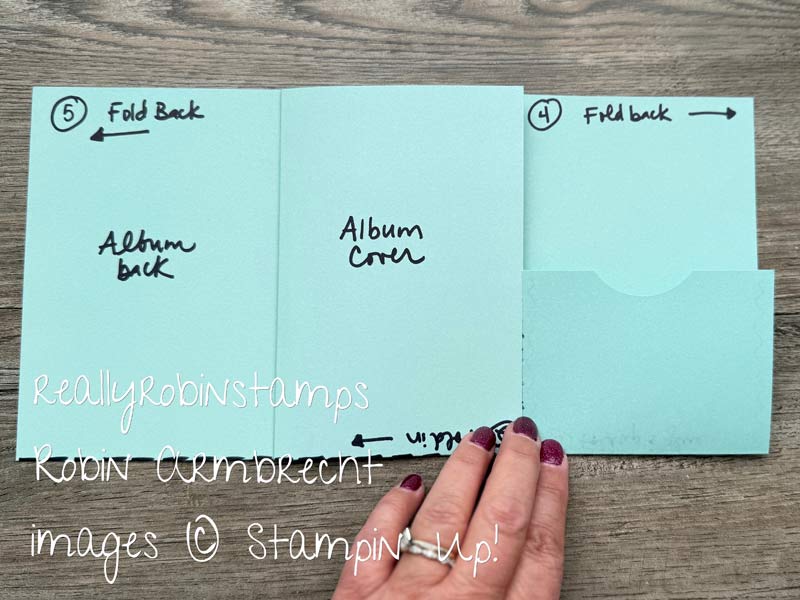
- Follow the numbers and directions on the photos to finish folding and adhering the sections together.

I’ve used a brand new bundle and products from the May- Aug Mini Catalog that use the new In Colors. The Heirloom Boutique bundle and Bloom Boutique DSP are so easy to use.
Now it’s your turn to create a mini album using your favorite piece of 12 x 12 paper. Make one for someone special! – Robin


